

Step 1: Setting up your TrafficManager Platform
This guide covers the essential configurations required to brand your network, set legal parameters, and define your operational workflow before launching.
1. Affiliate & Offer Categories.
Once inside your TrafficManager admin panel, open the Settings menu and access the Categories page.
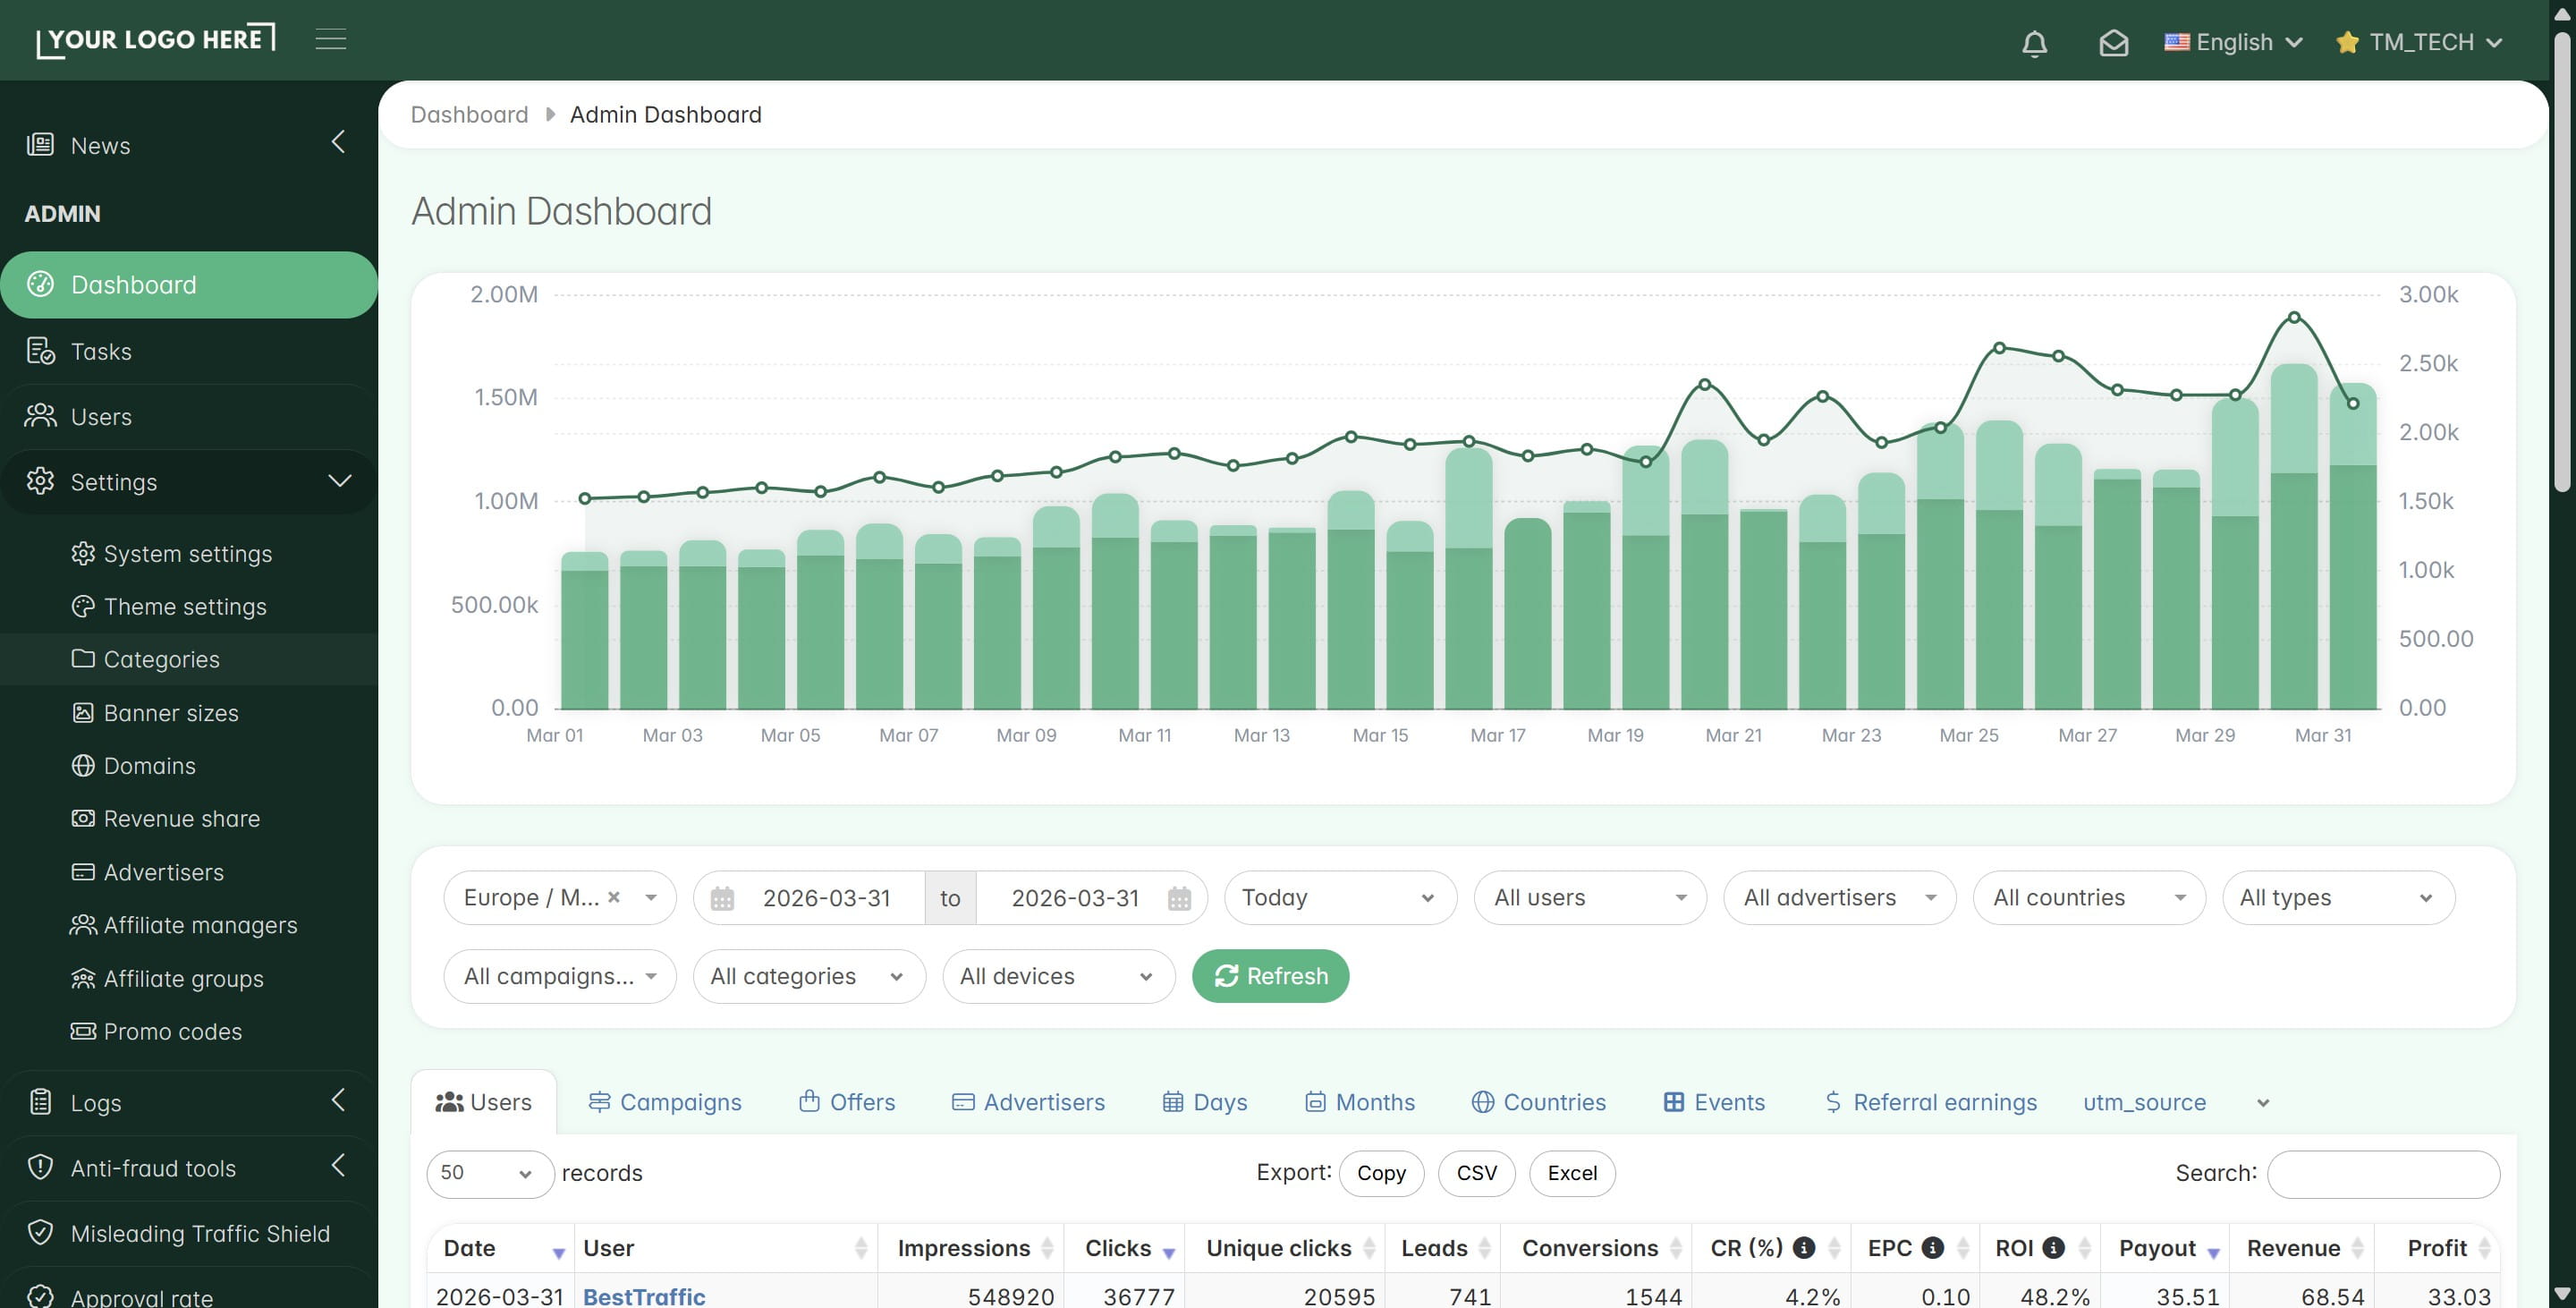
Click "Add New"
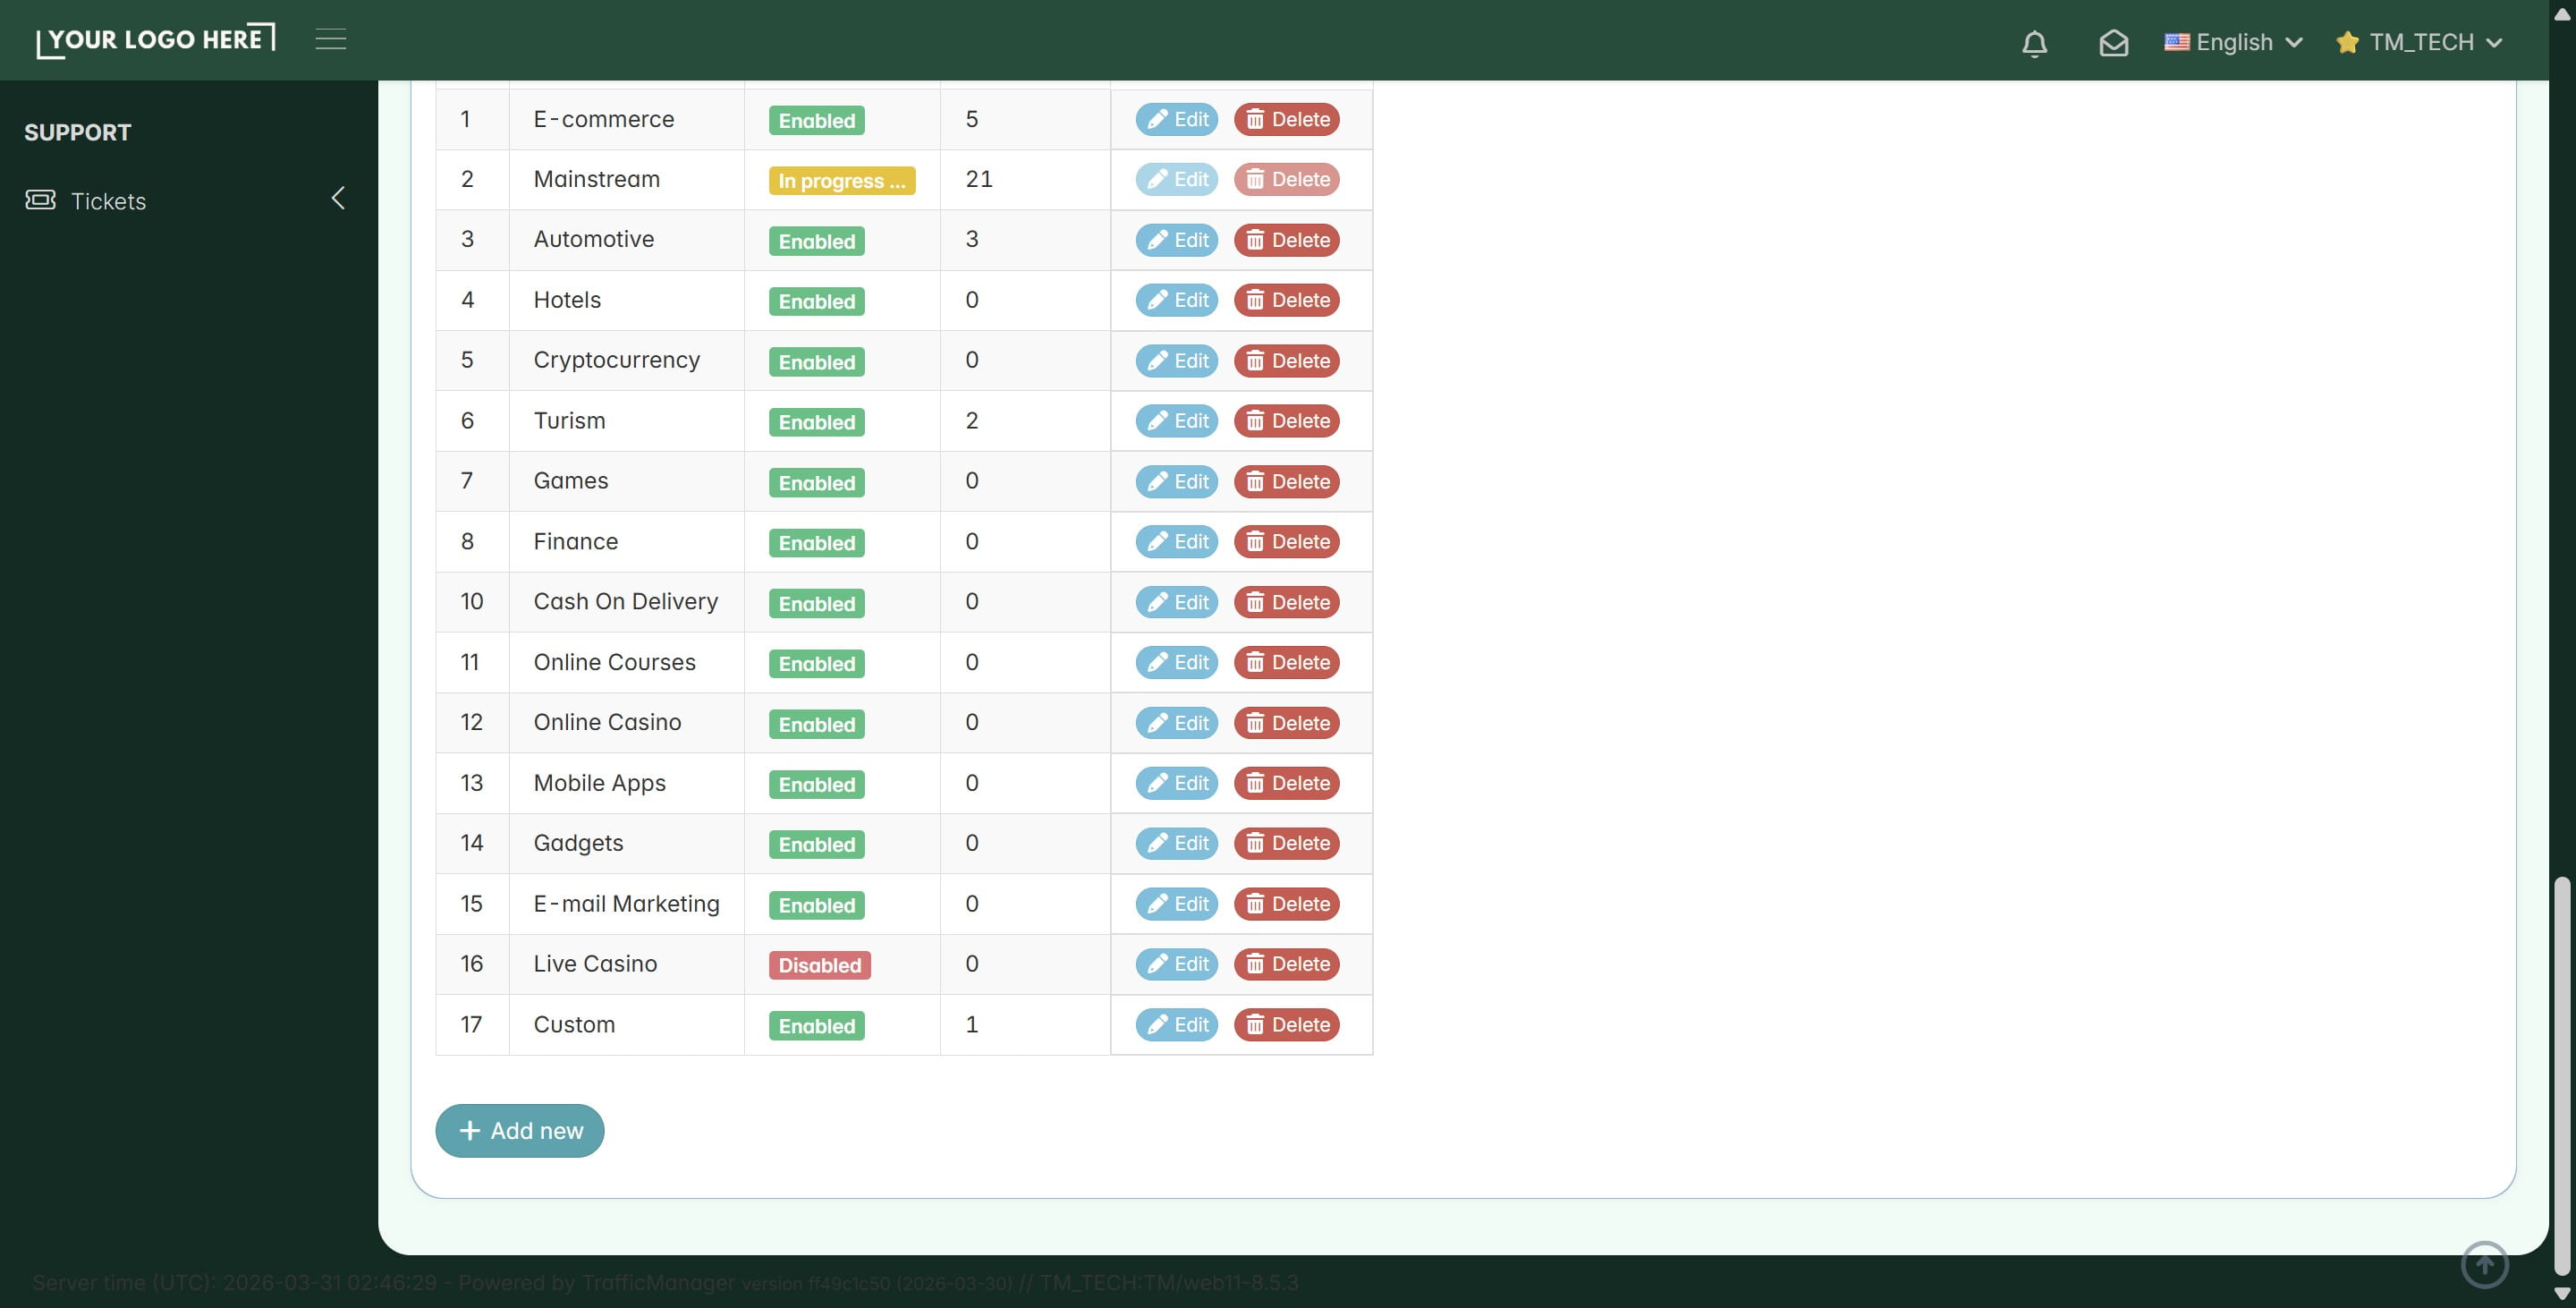
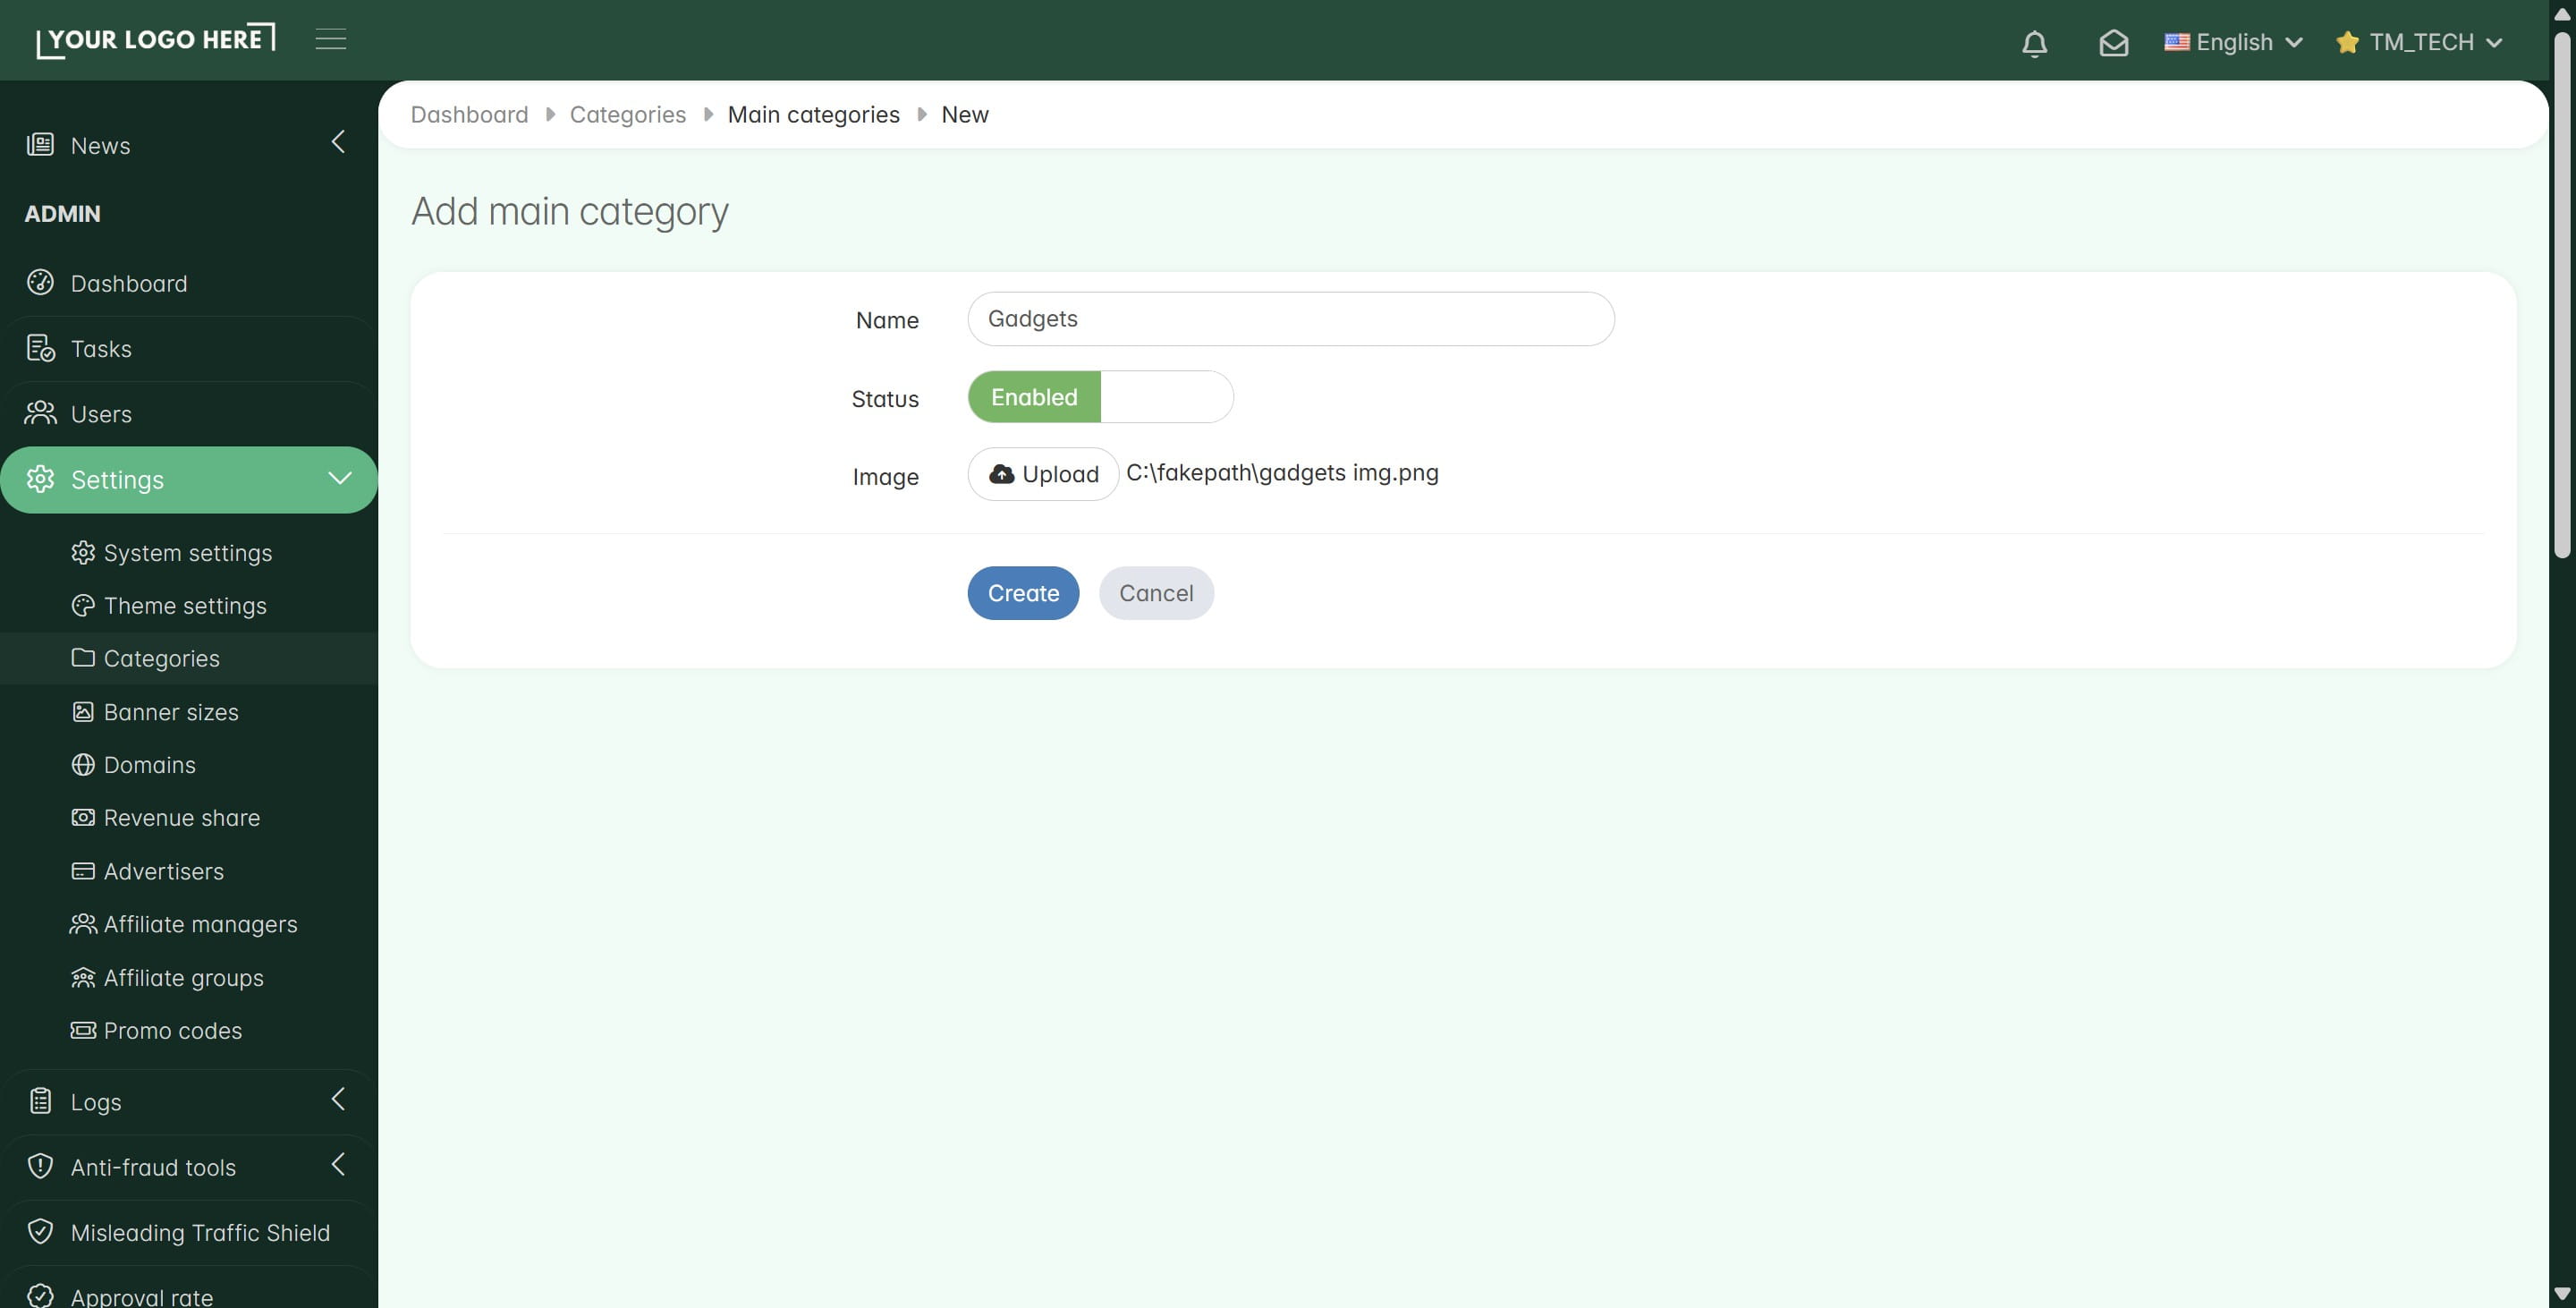
Enter the Category Name (e.g., Nutra, Sweepstakes, Dating, etc.), upload an image (Optional) and click Create
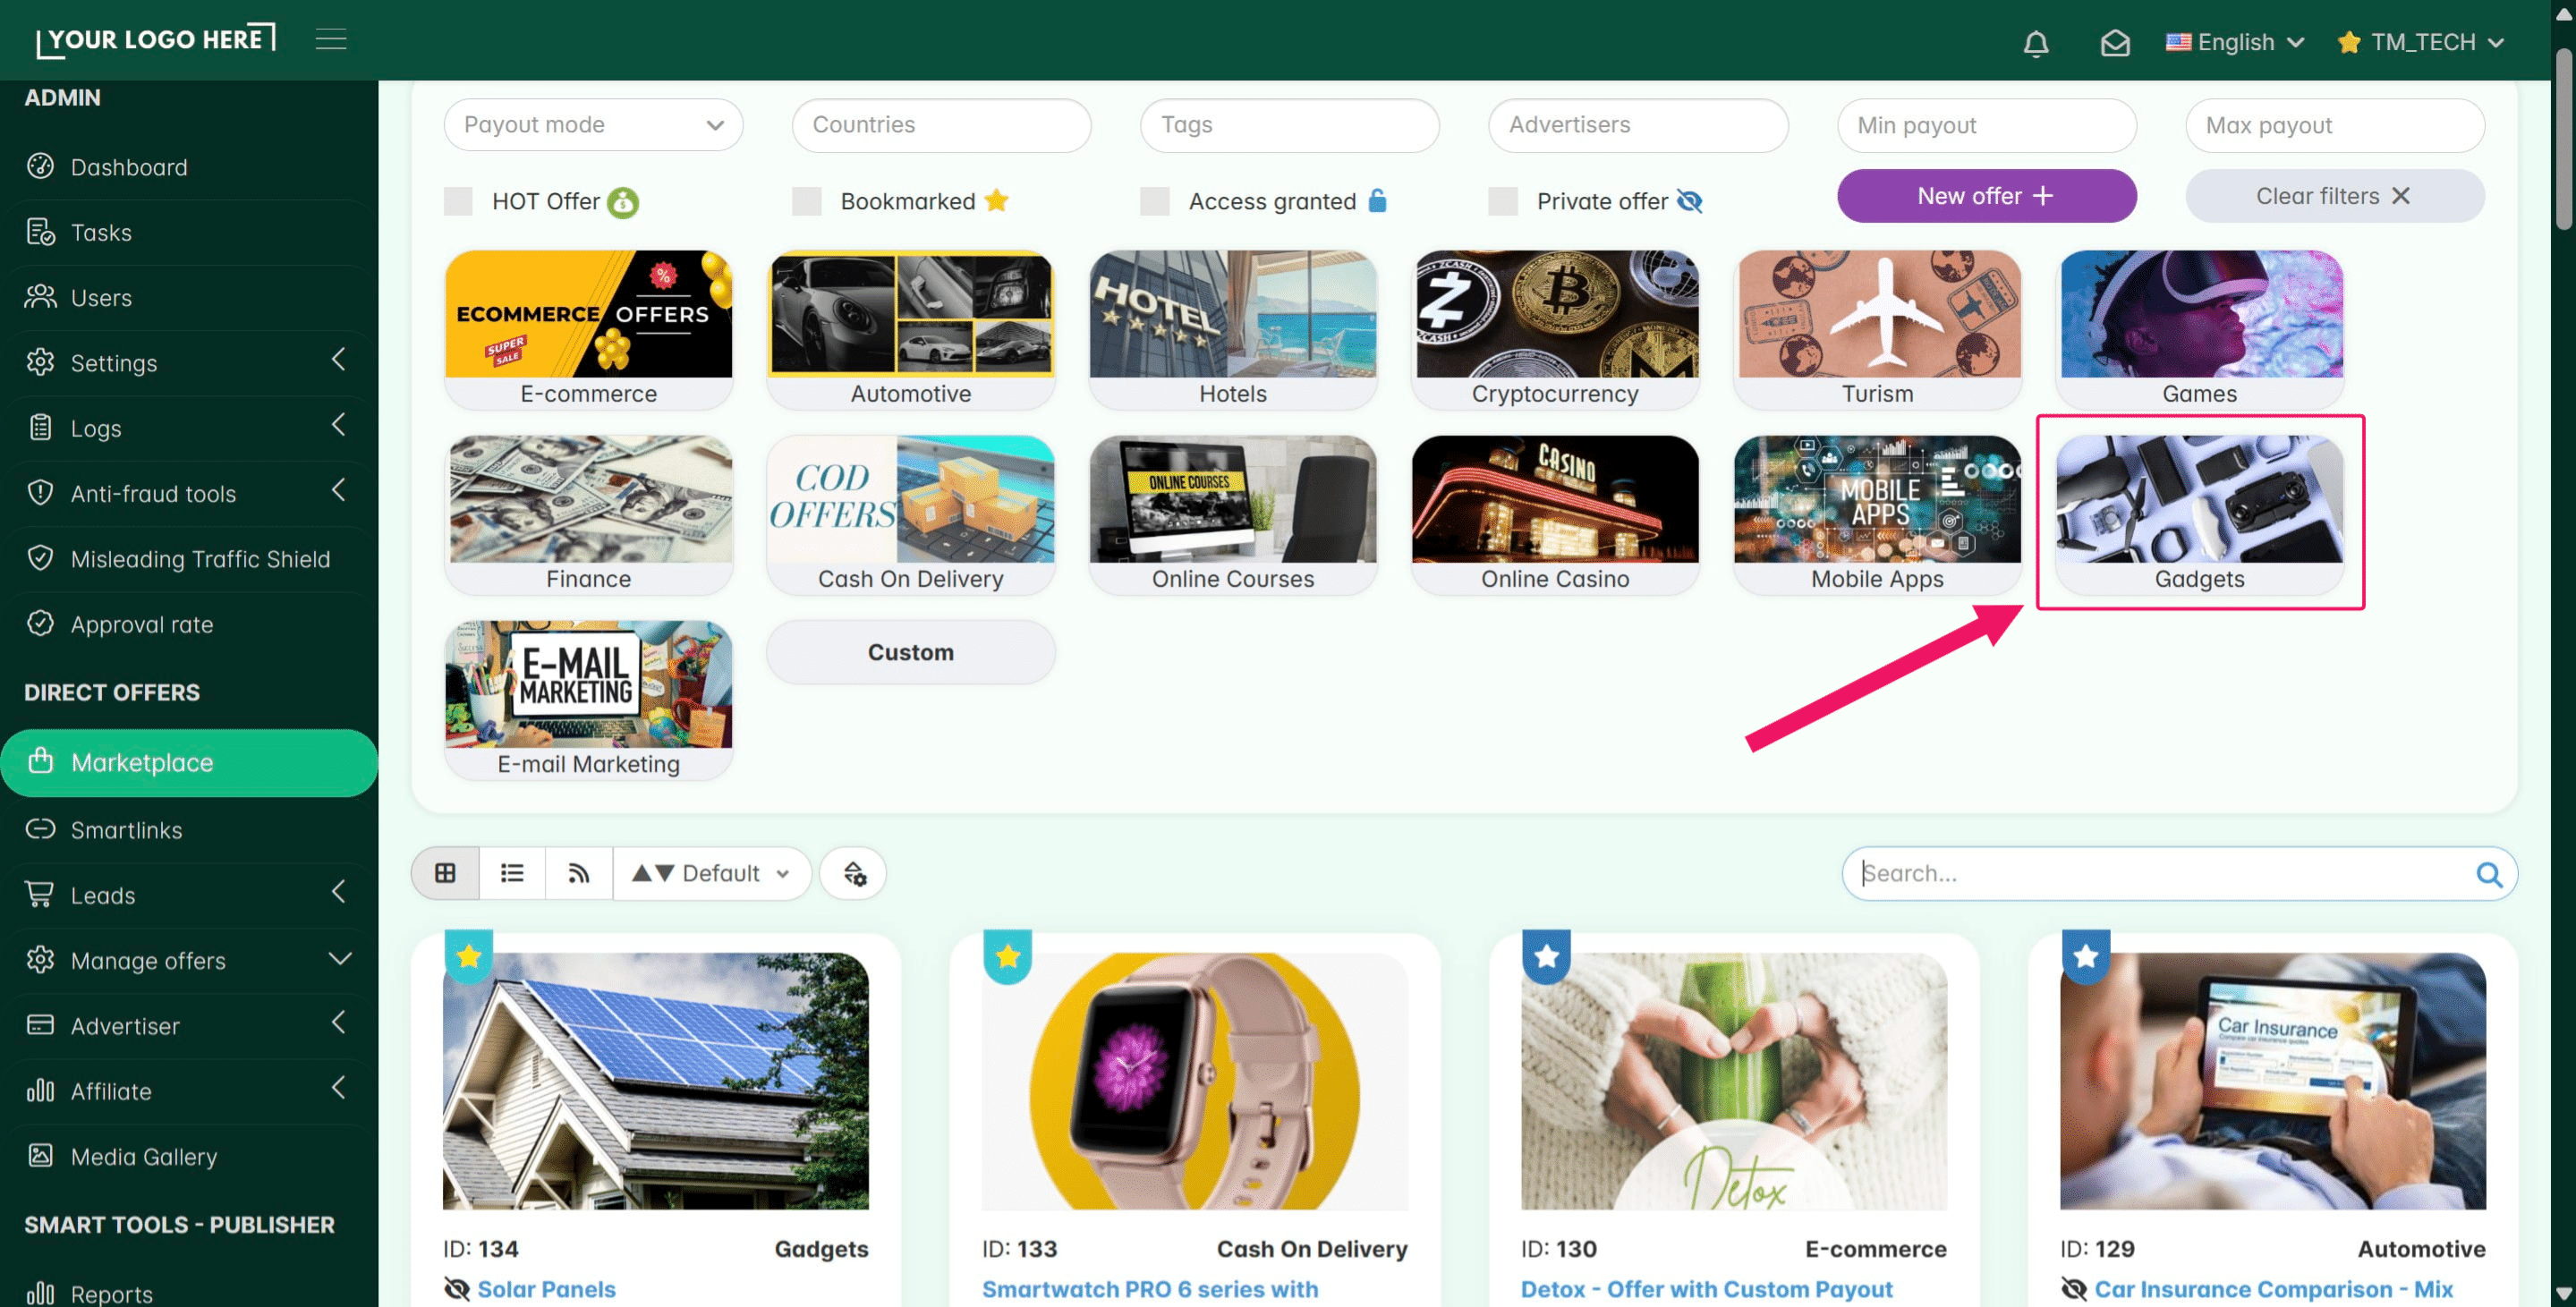
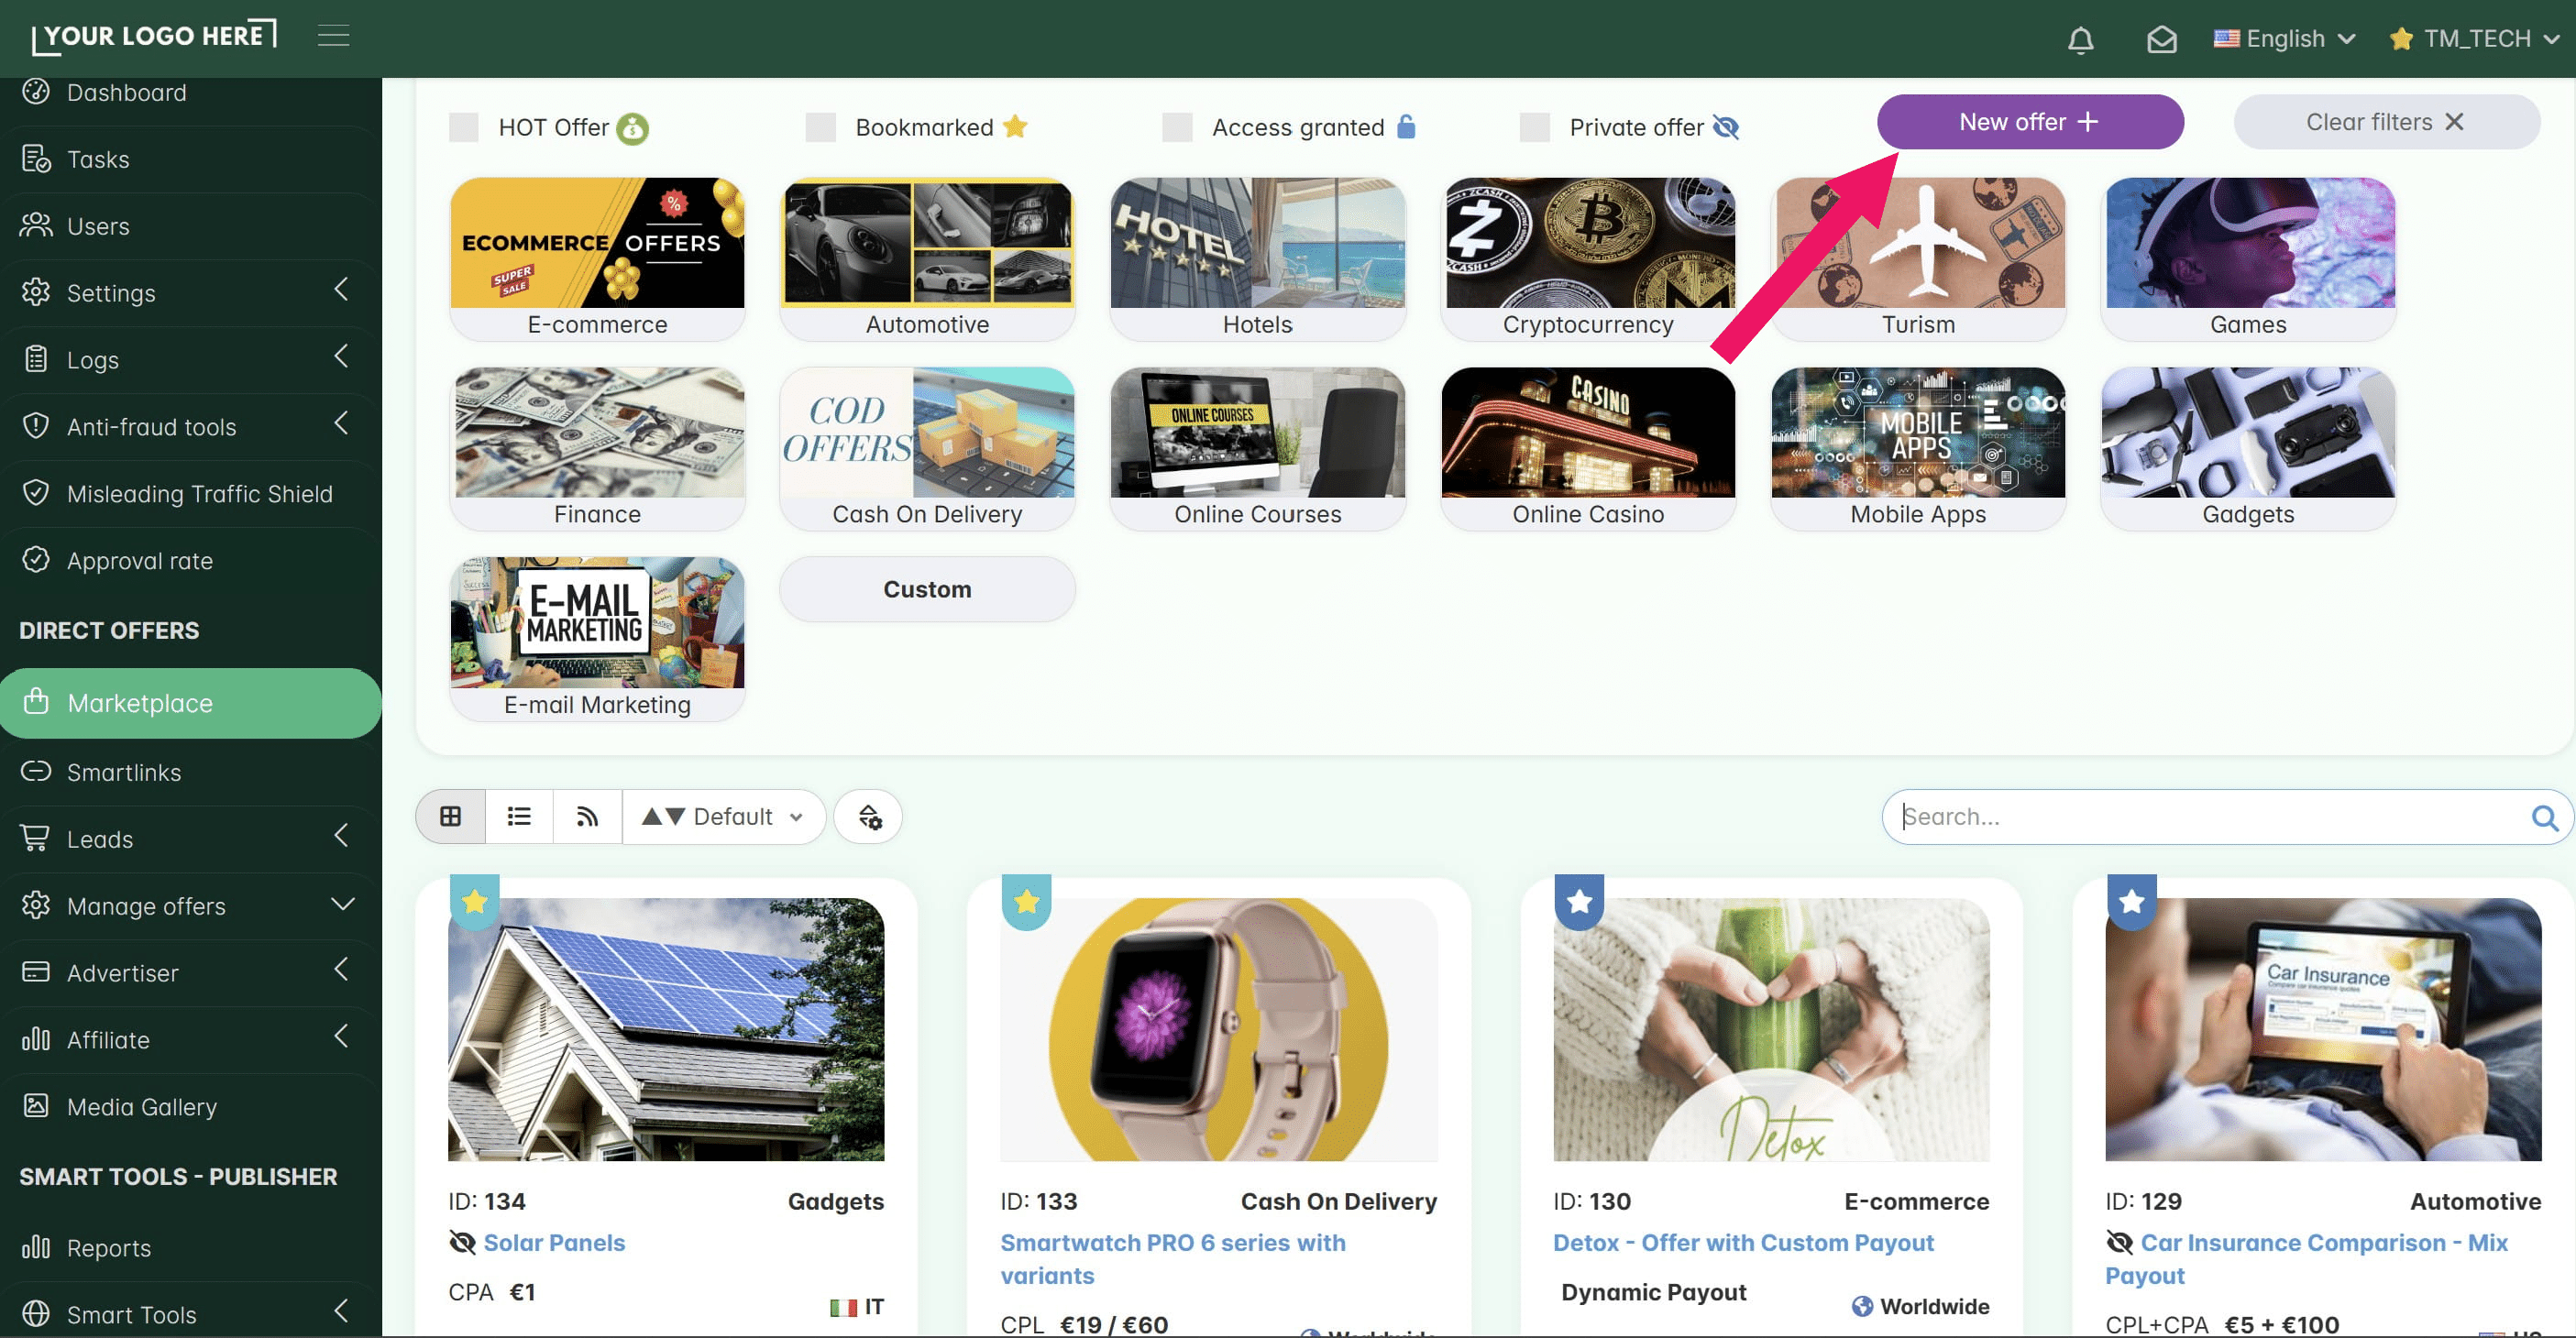
Once the category has been created and an offer has been assigned to it, the category will be visible on the Marketplace page. Info: Categories allow your affiliates to filter offers based on their traffic type or area of interest
2. General System Settings & Branding
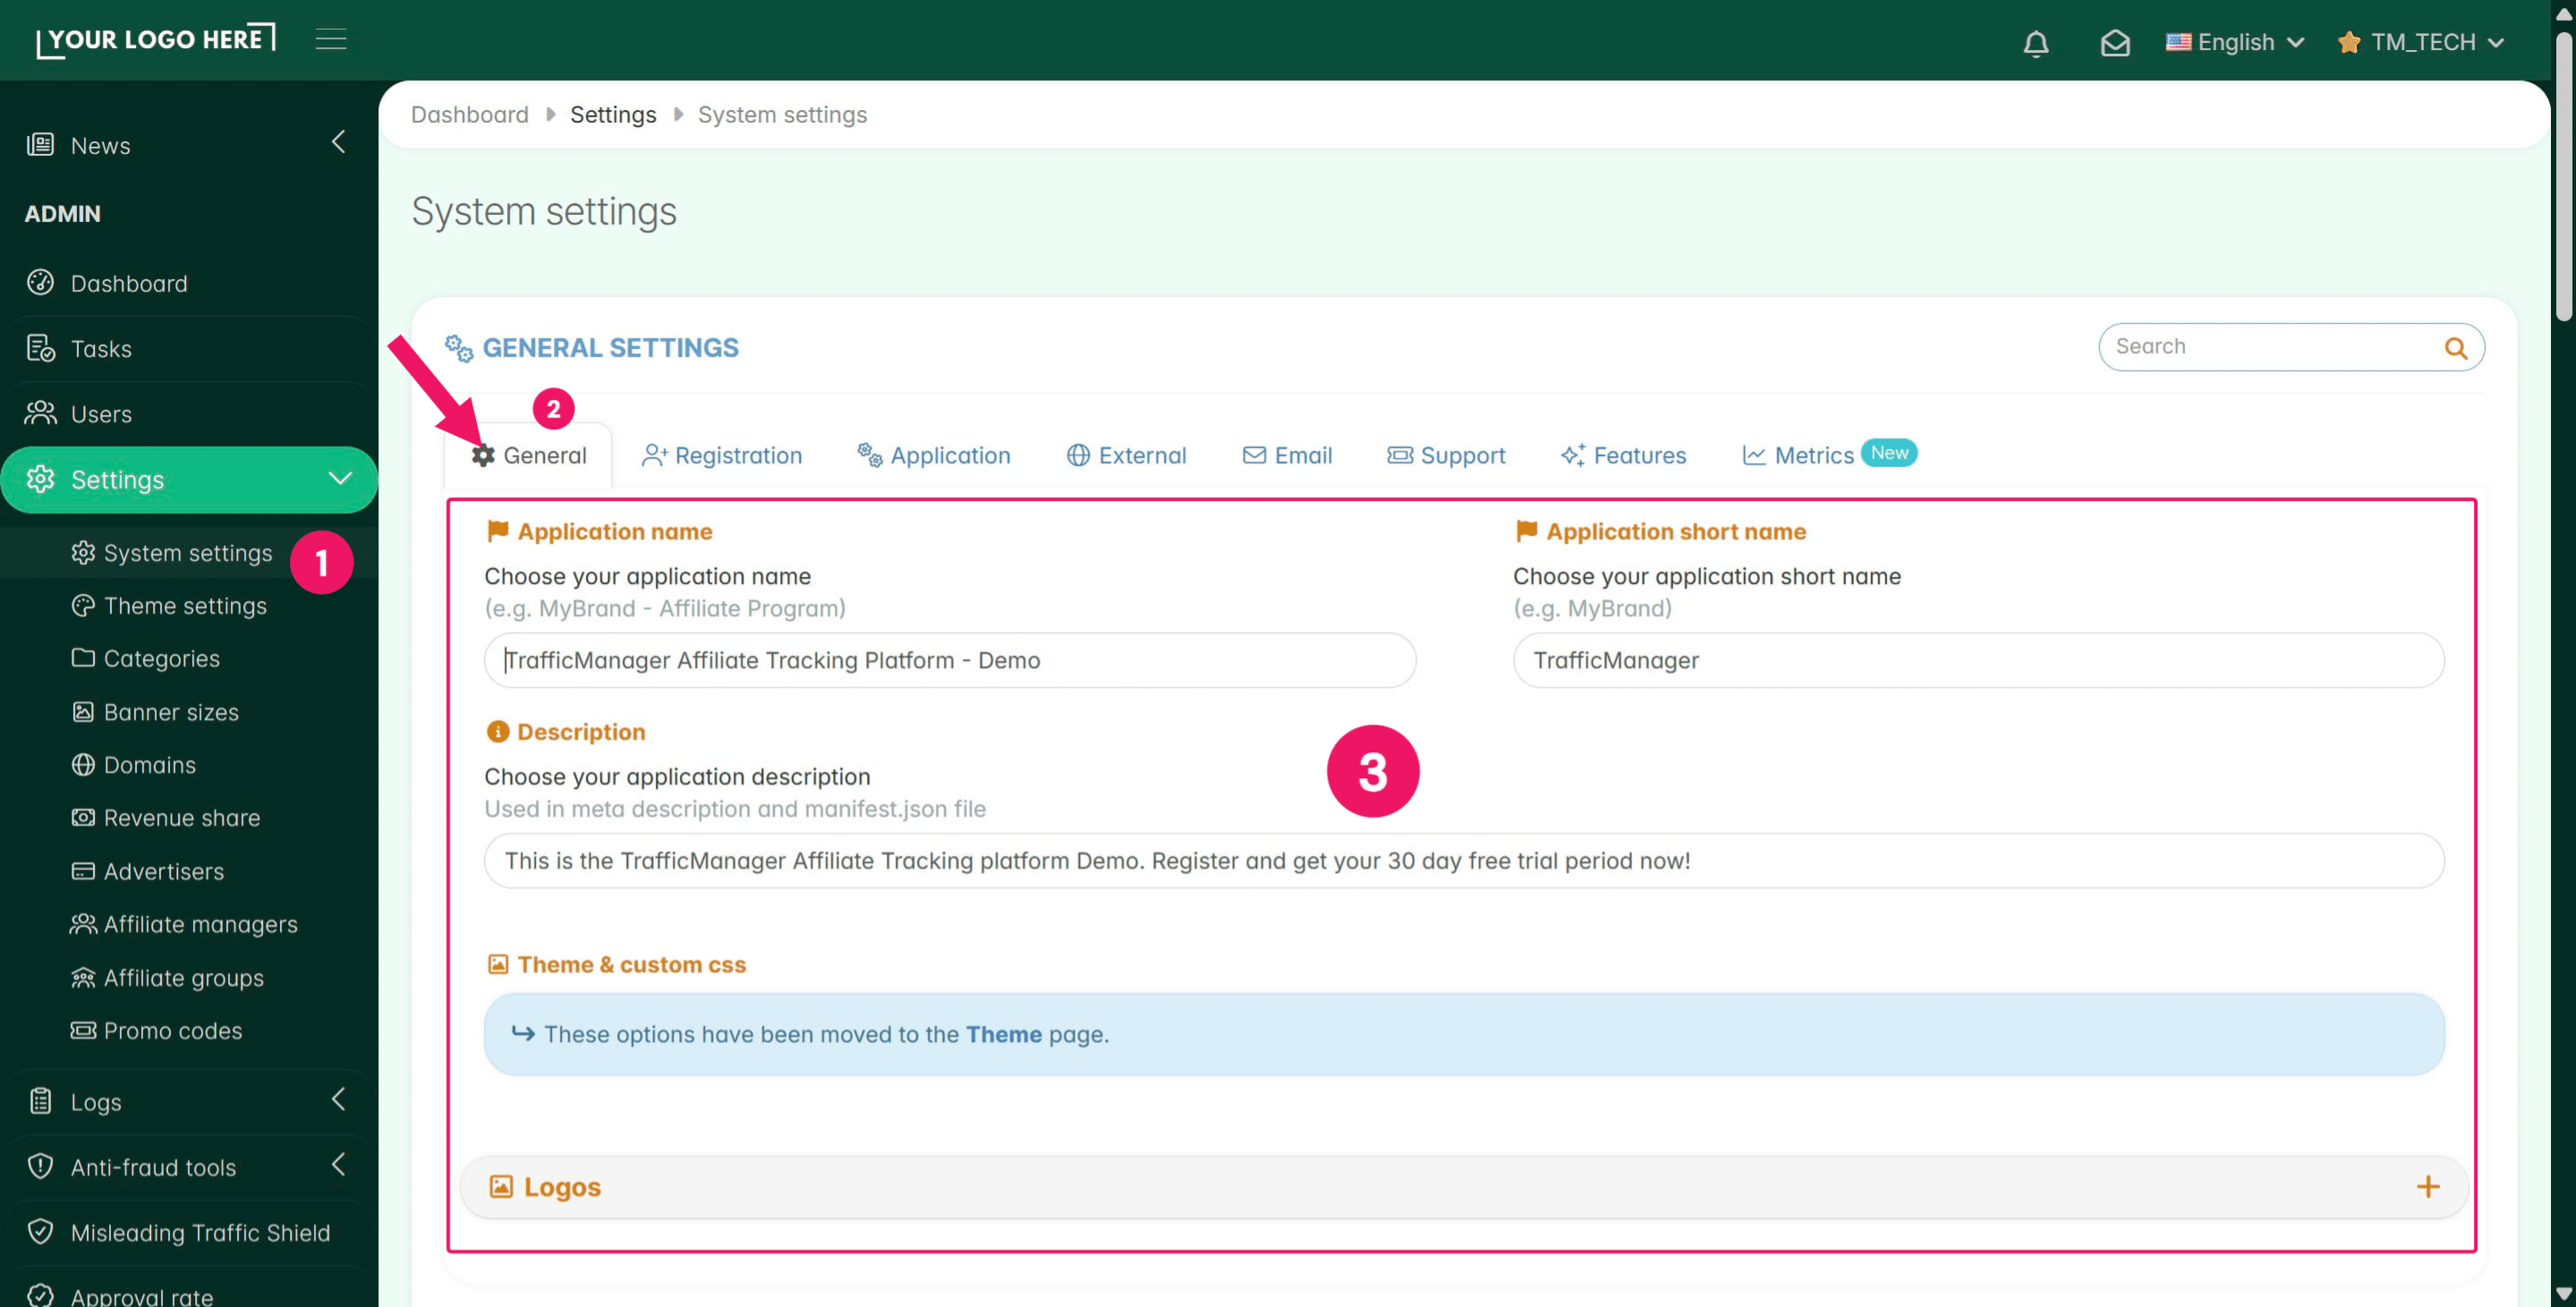
Go to Settings > System Settings > General to add your network’s identity information and upload your logo
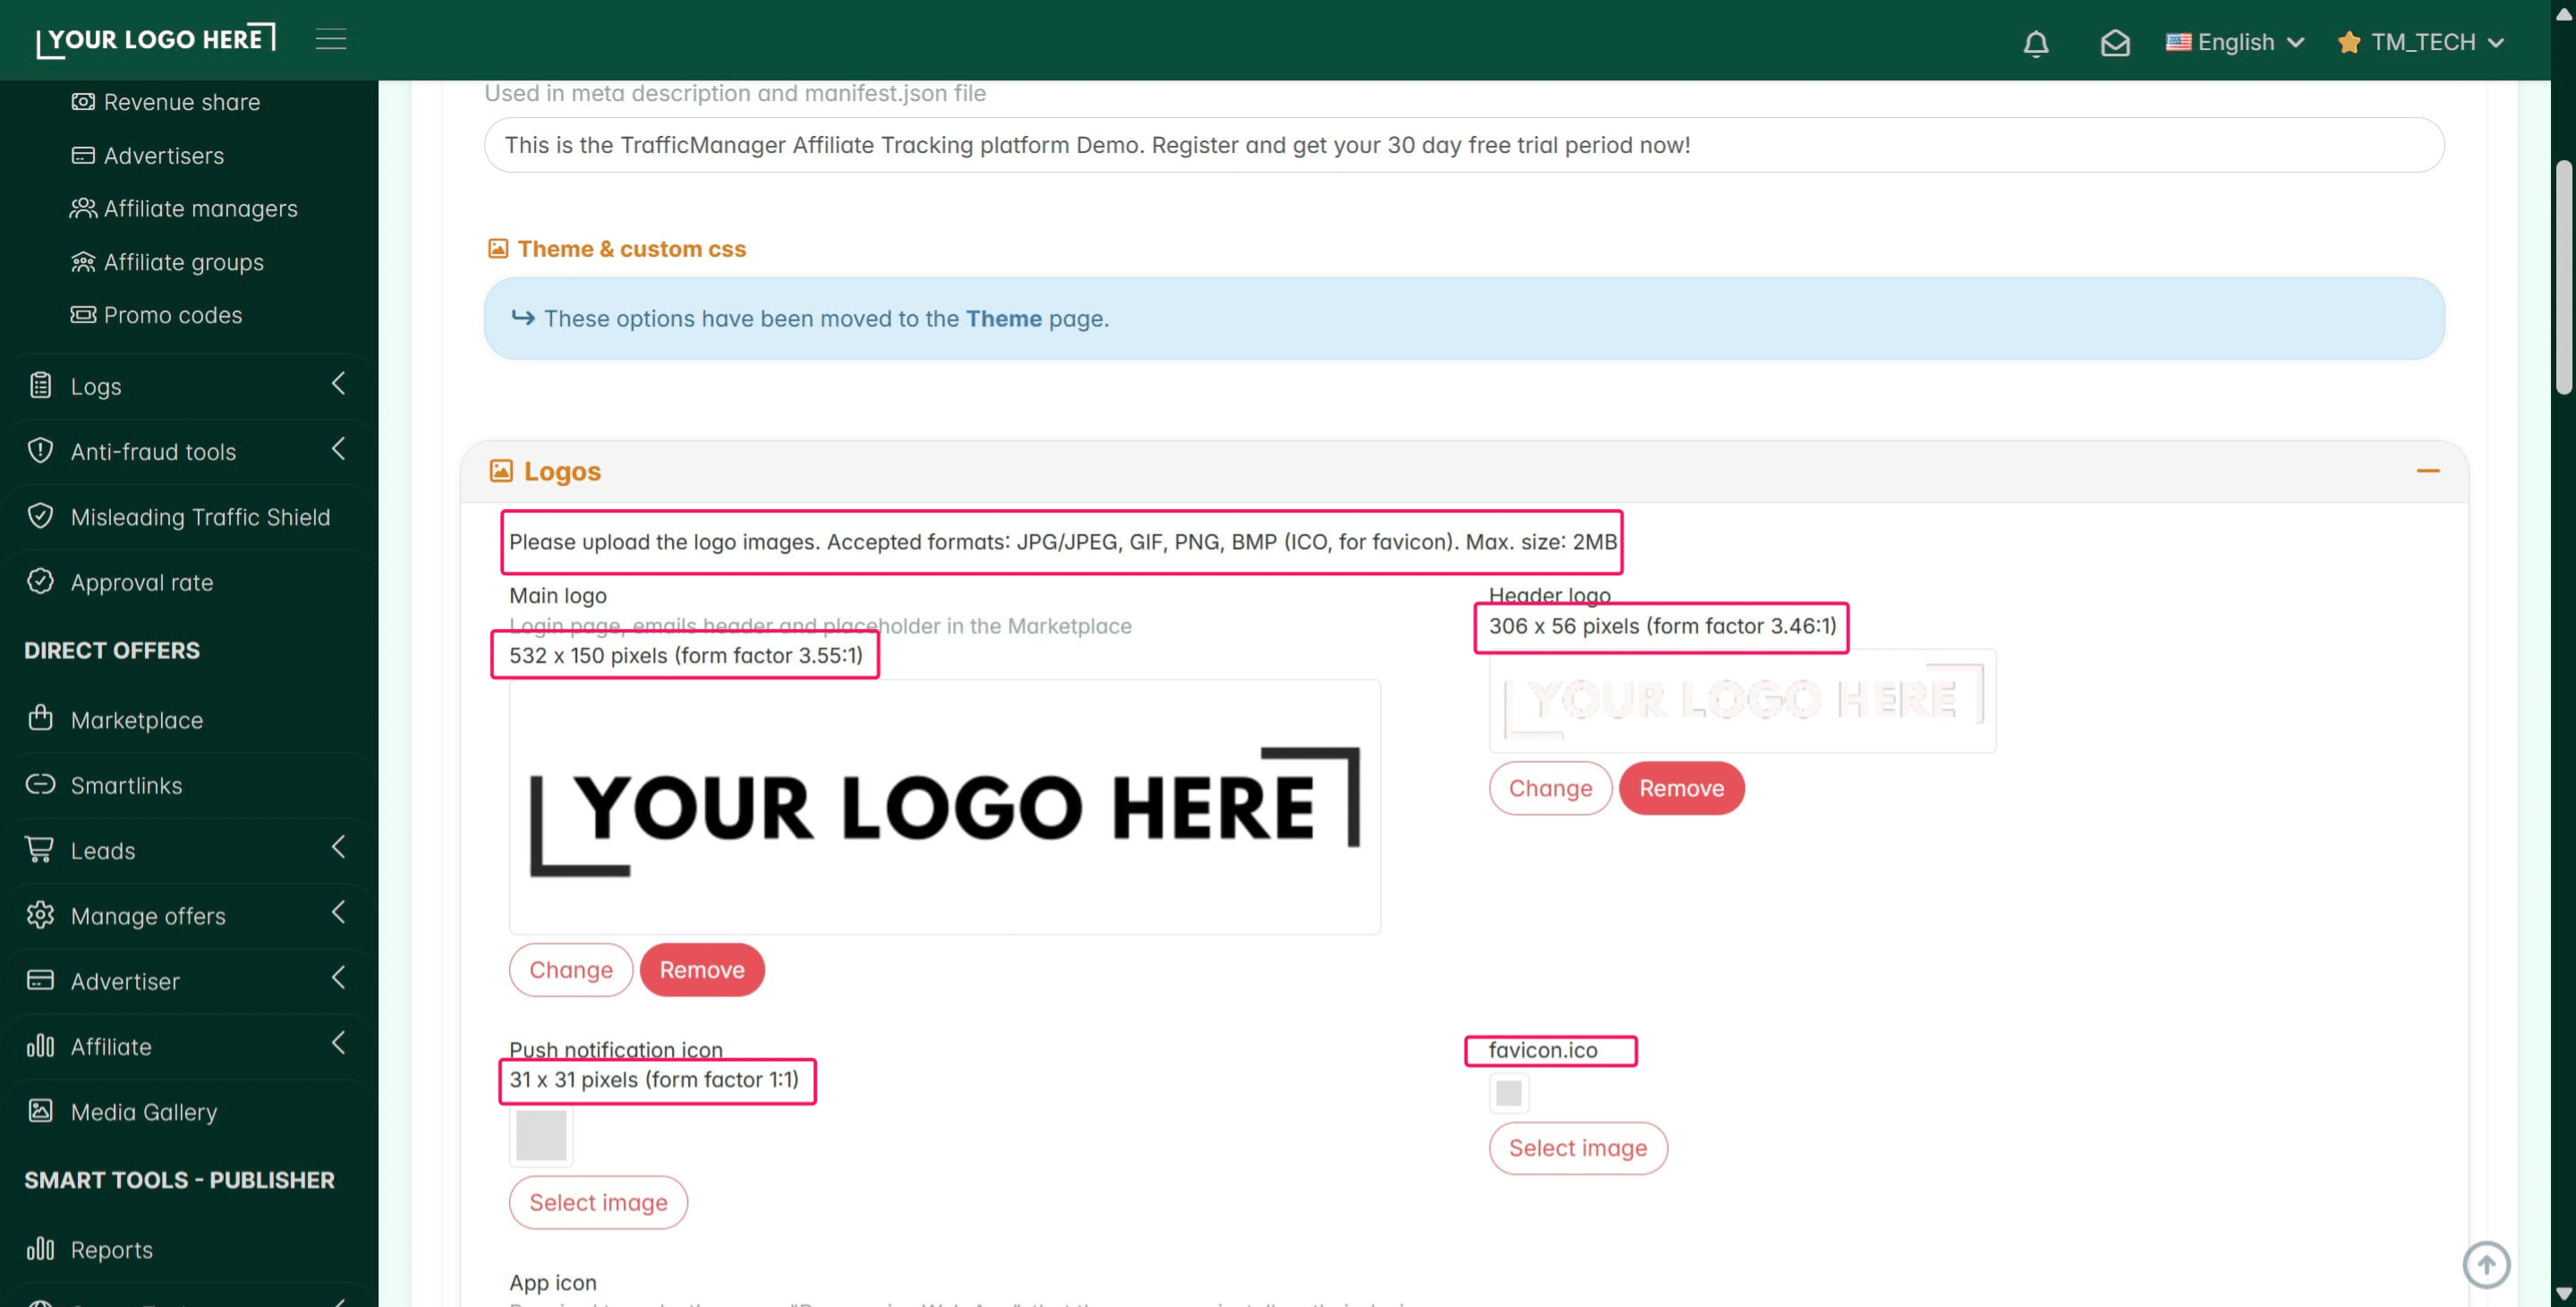
Please make sure to upload the exact logo formats and sizes accepted
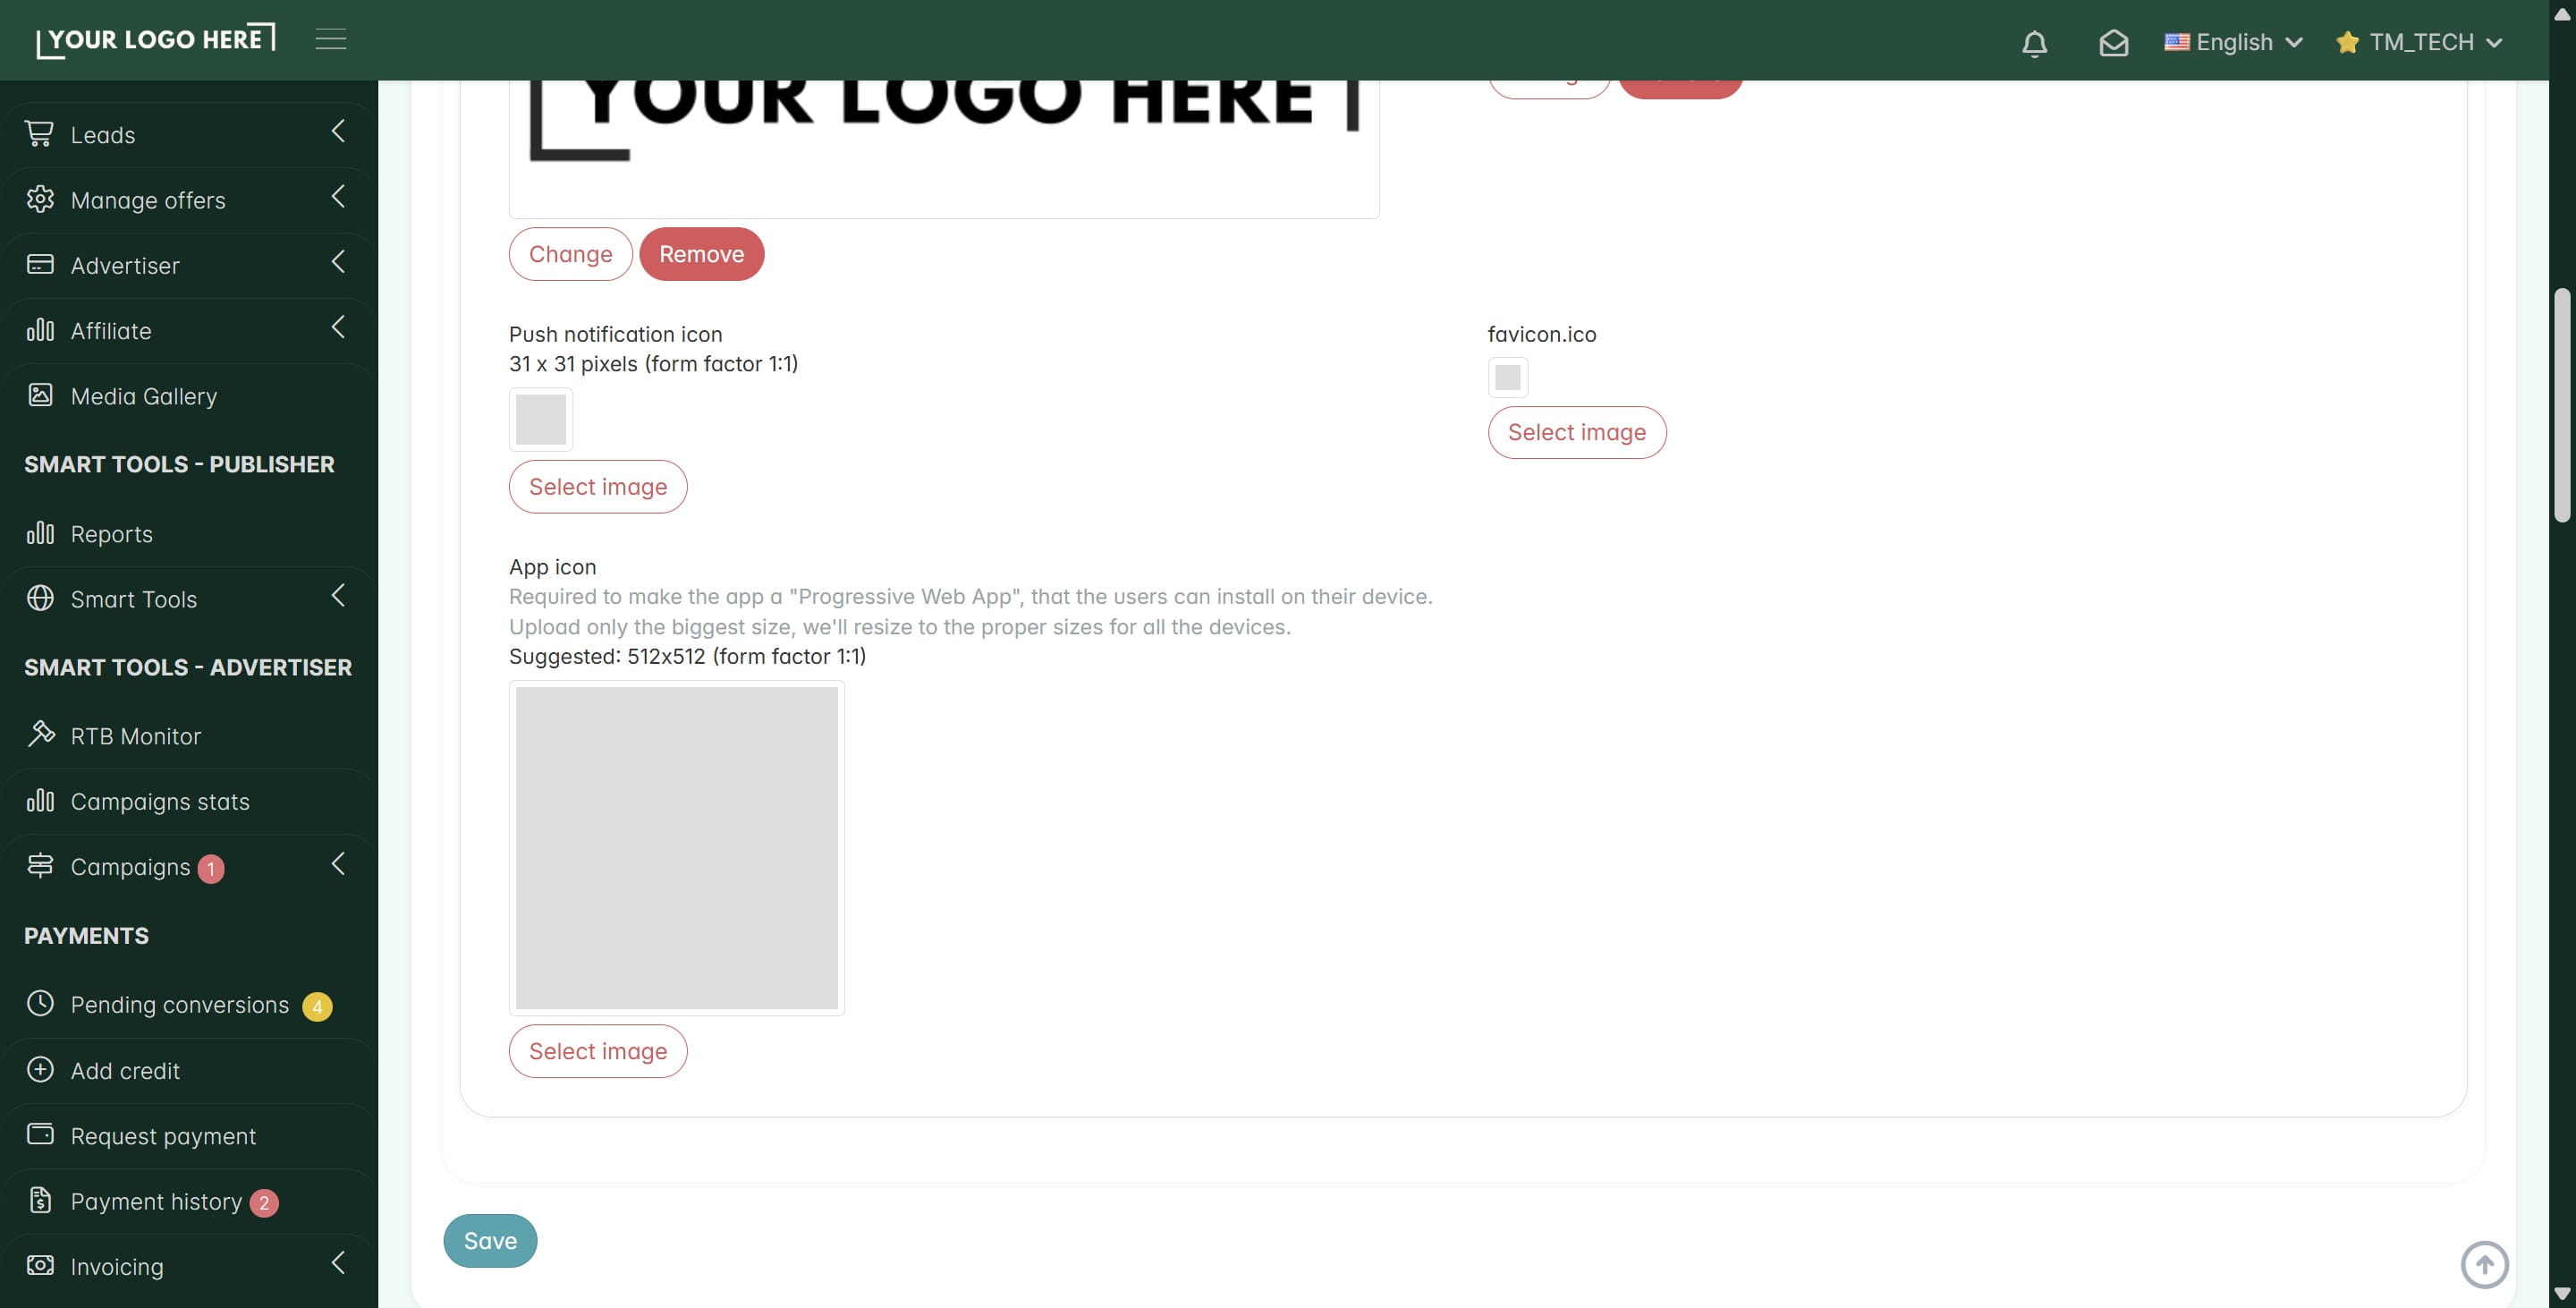
Click on Save. Info: The new logos should appear instantly.
To customize your TrafficManager platform theme color, click on Theme settings.
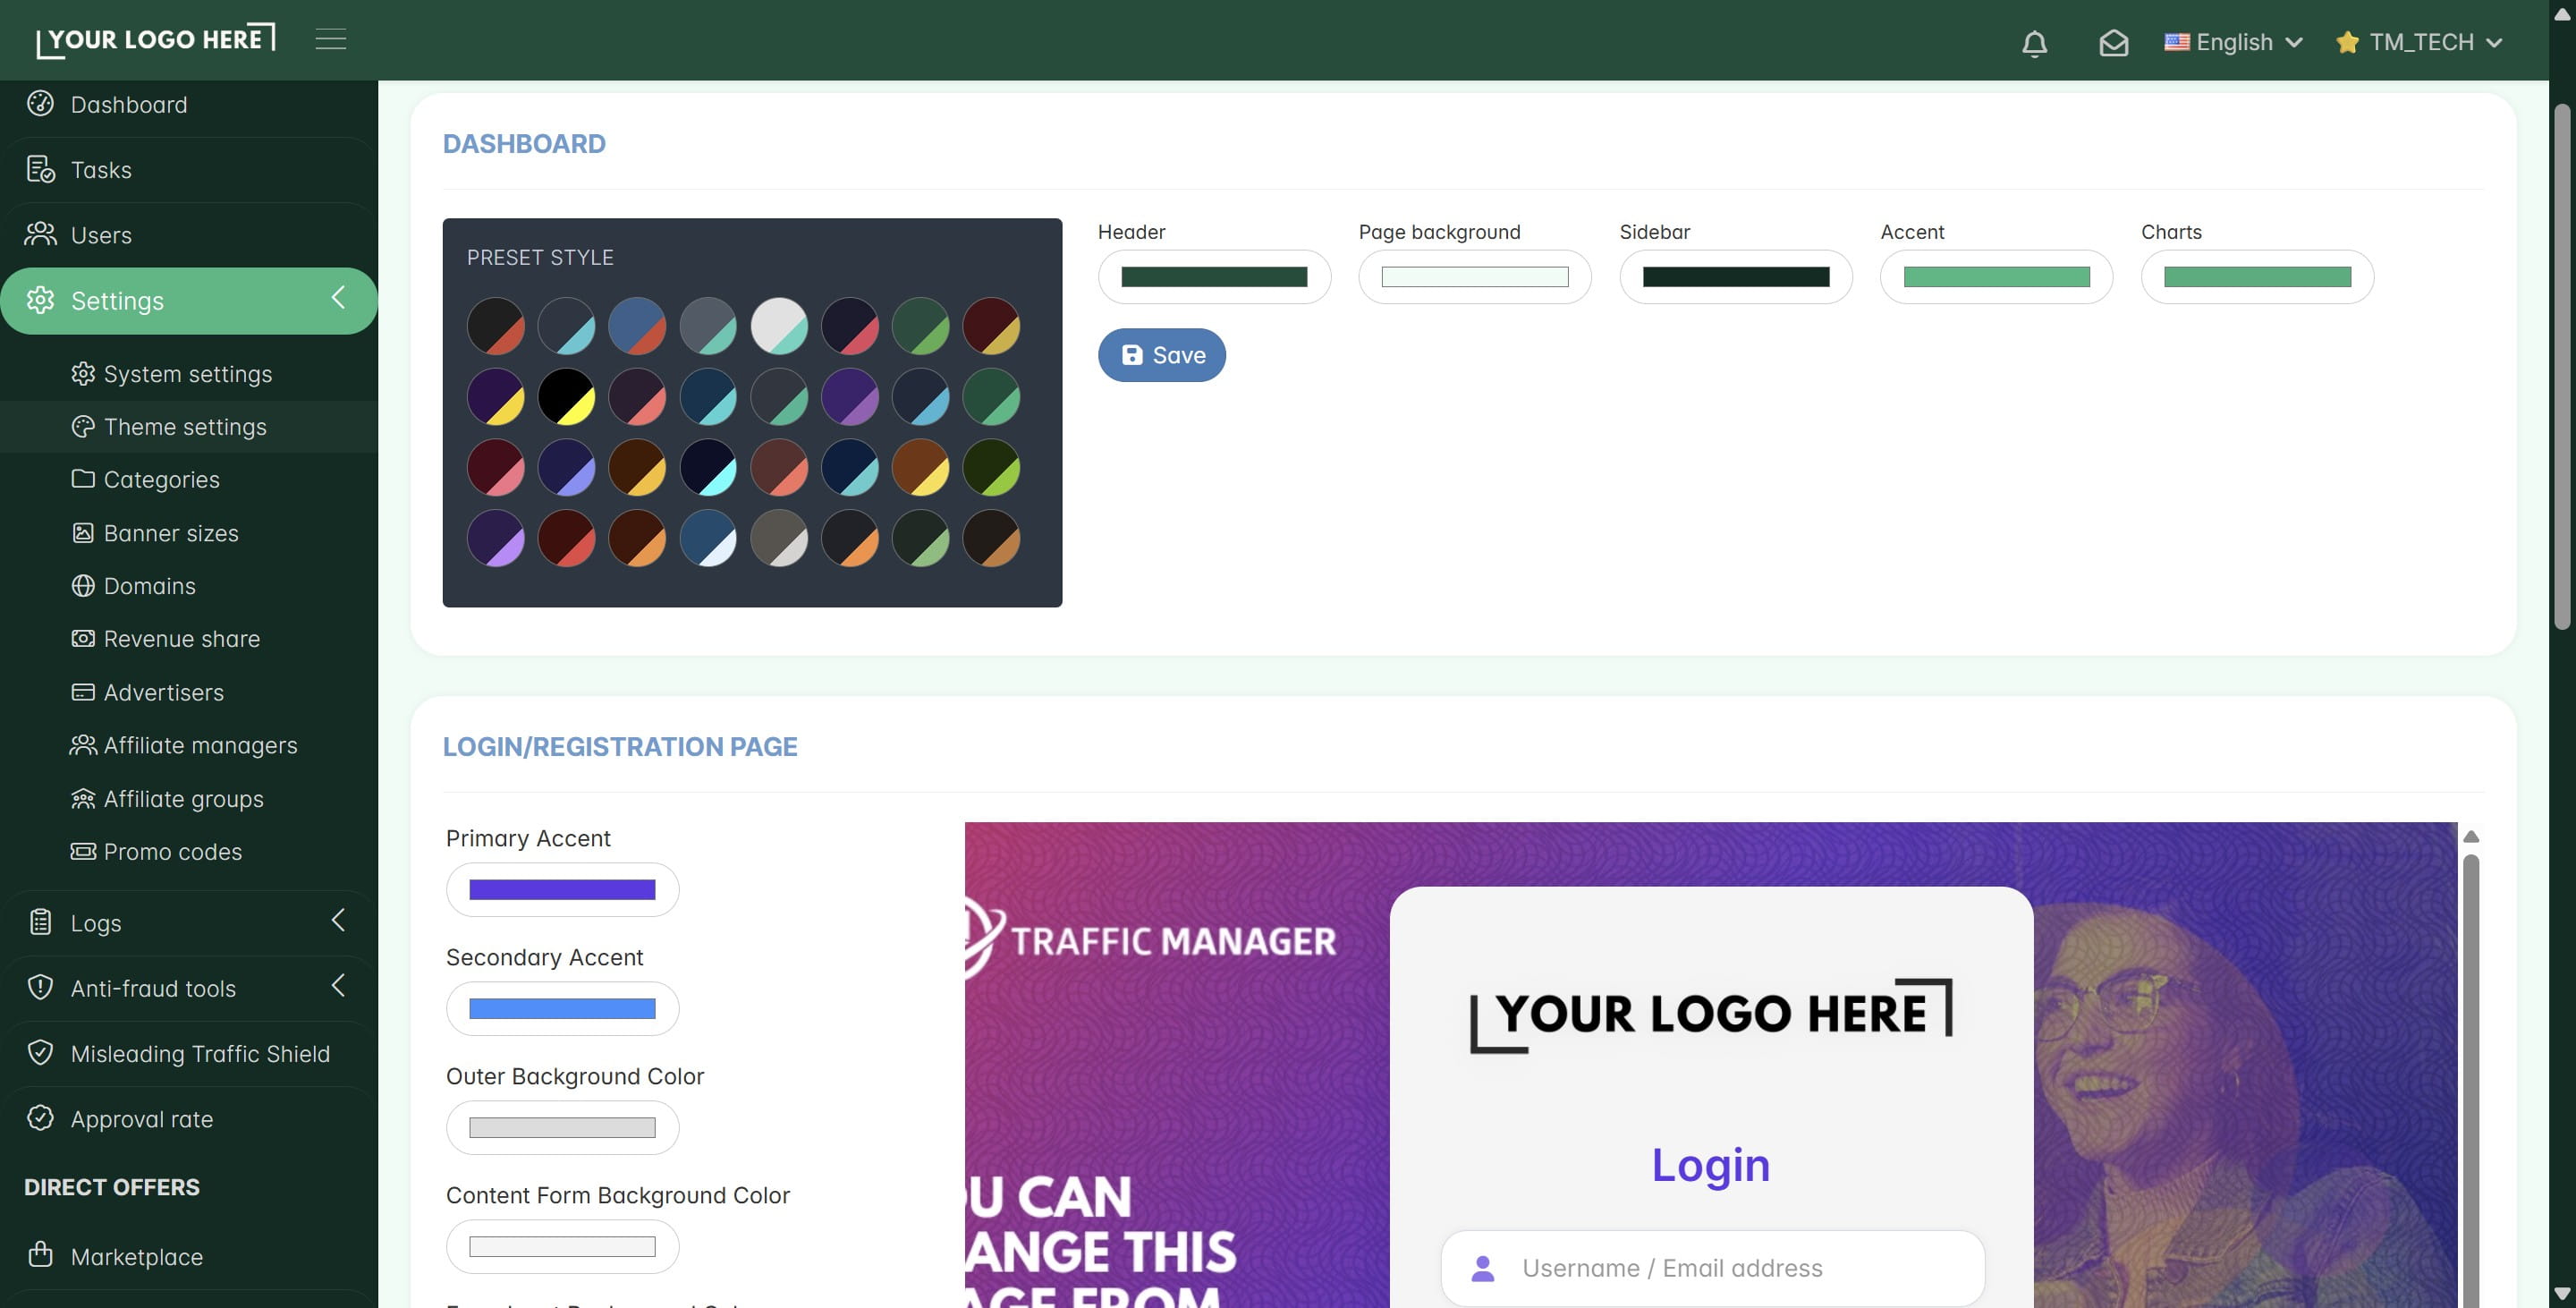
Then select one of the preset styles and hit Save
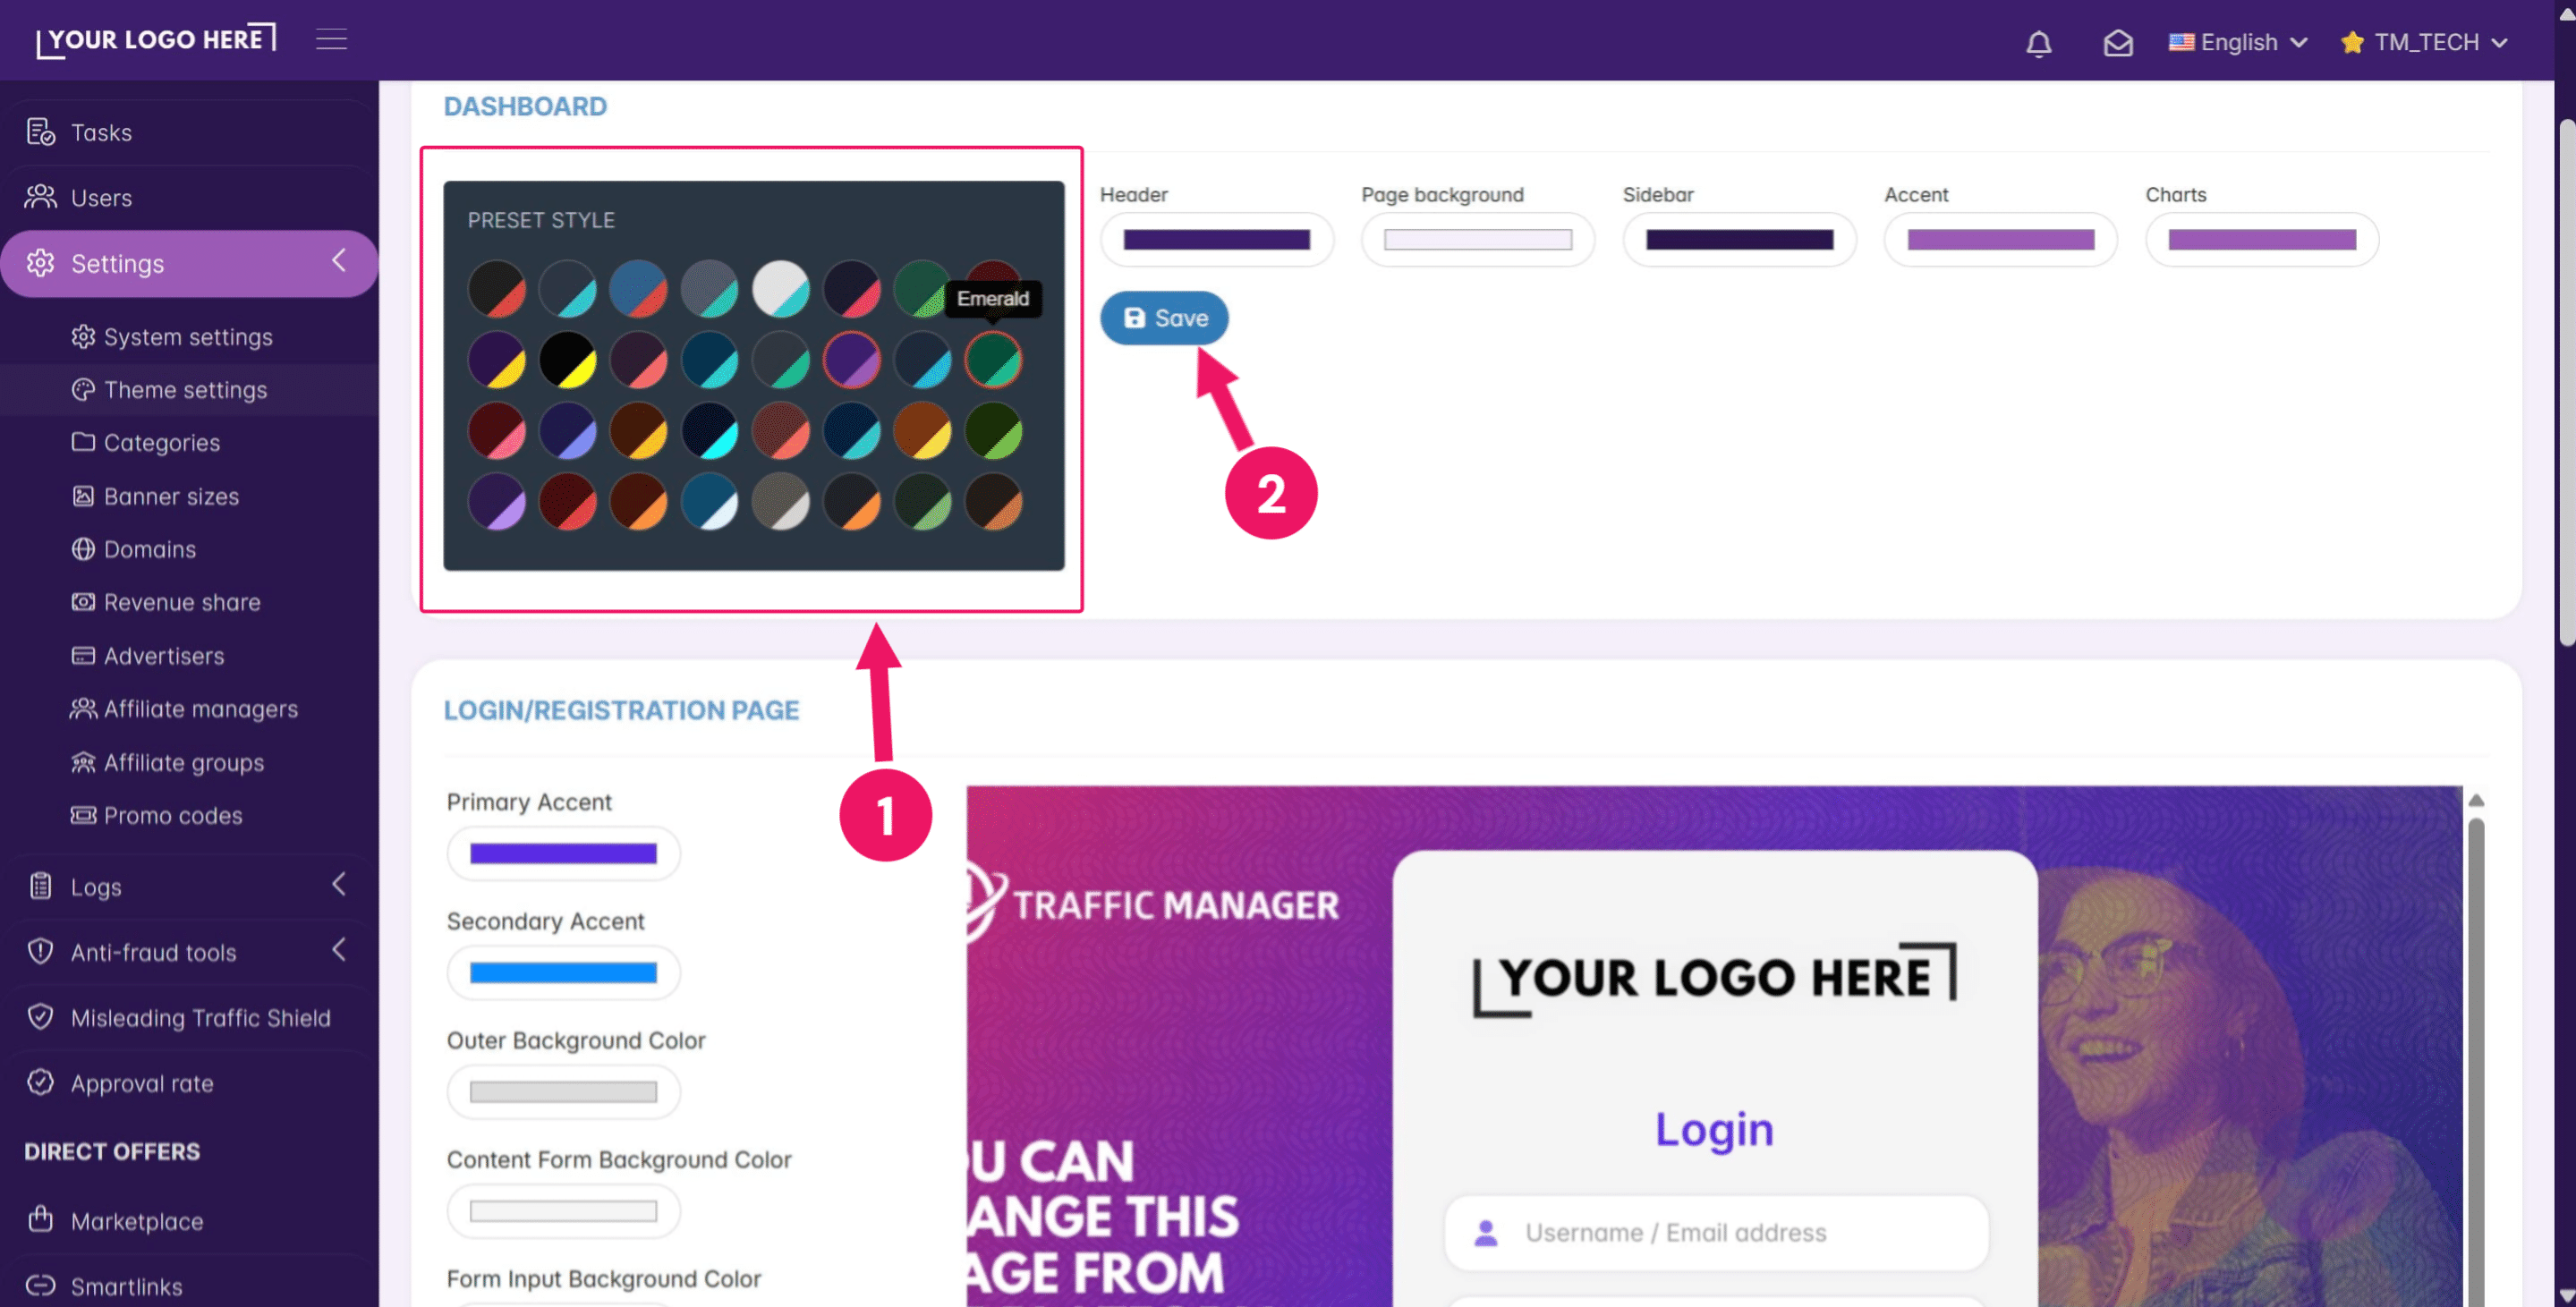
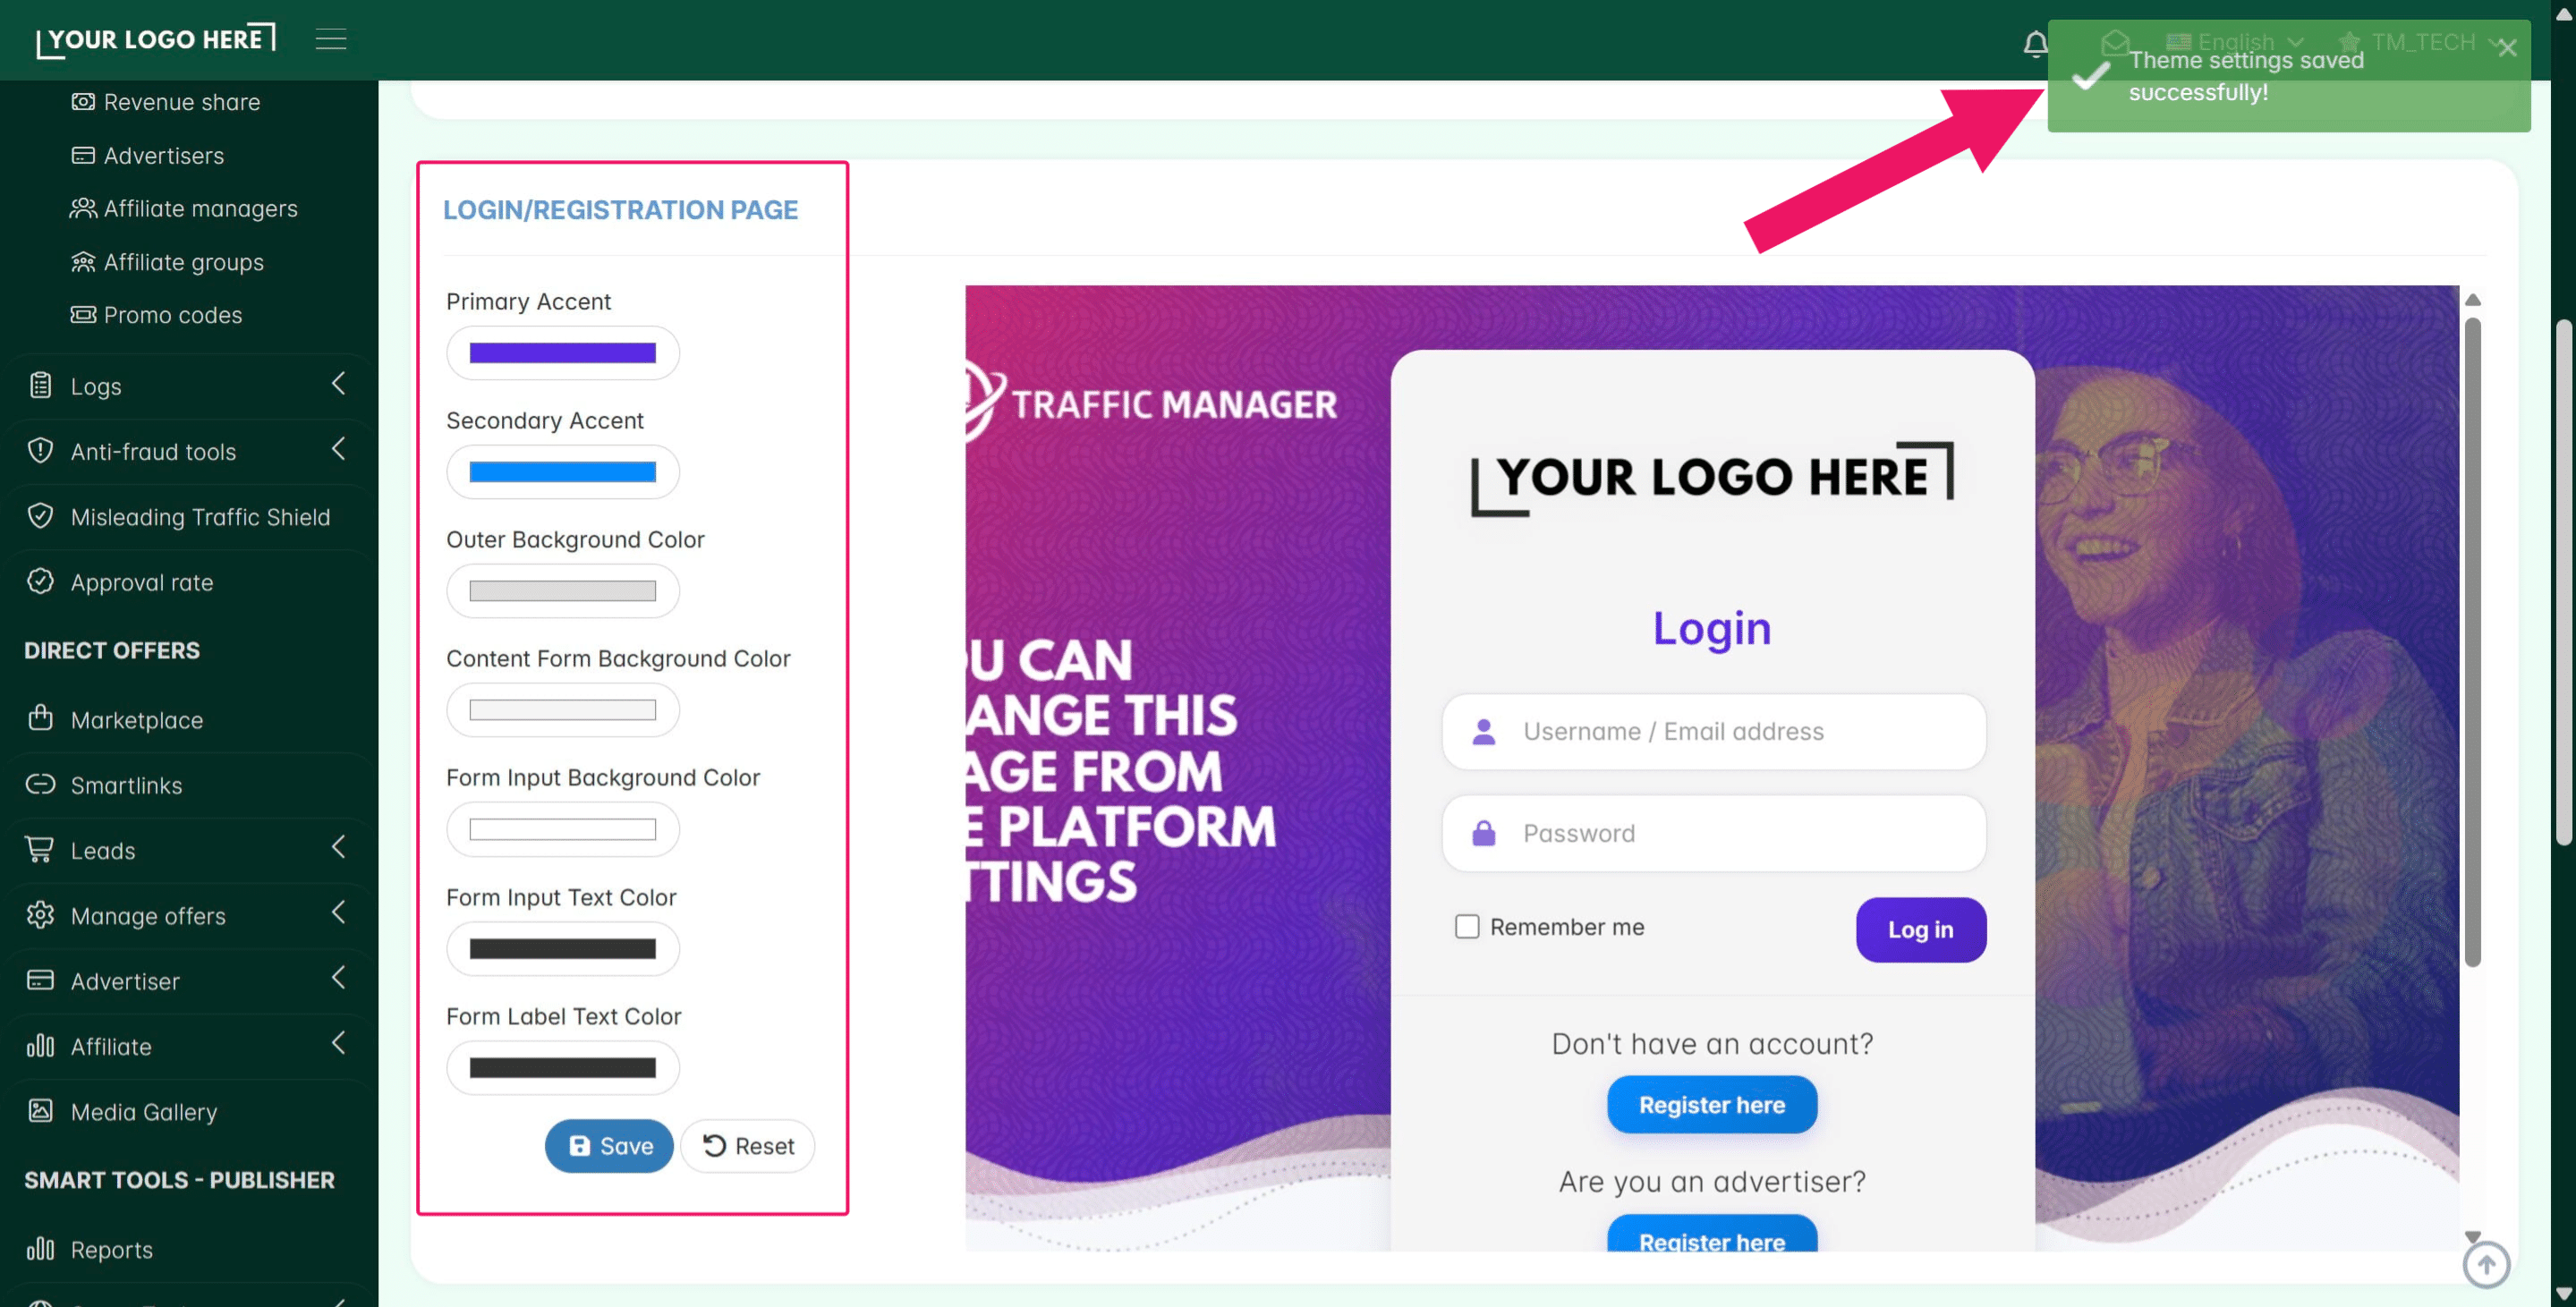
For extra customization of the colors for both the platform dashboard and the affiliate login or registration pages, you can use the options present on this same page after the new theme has been selected and saved. (Don't forget to save your modifications again.)
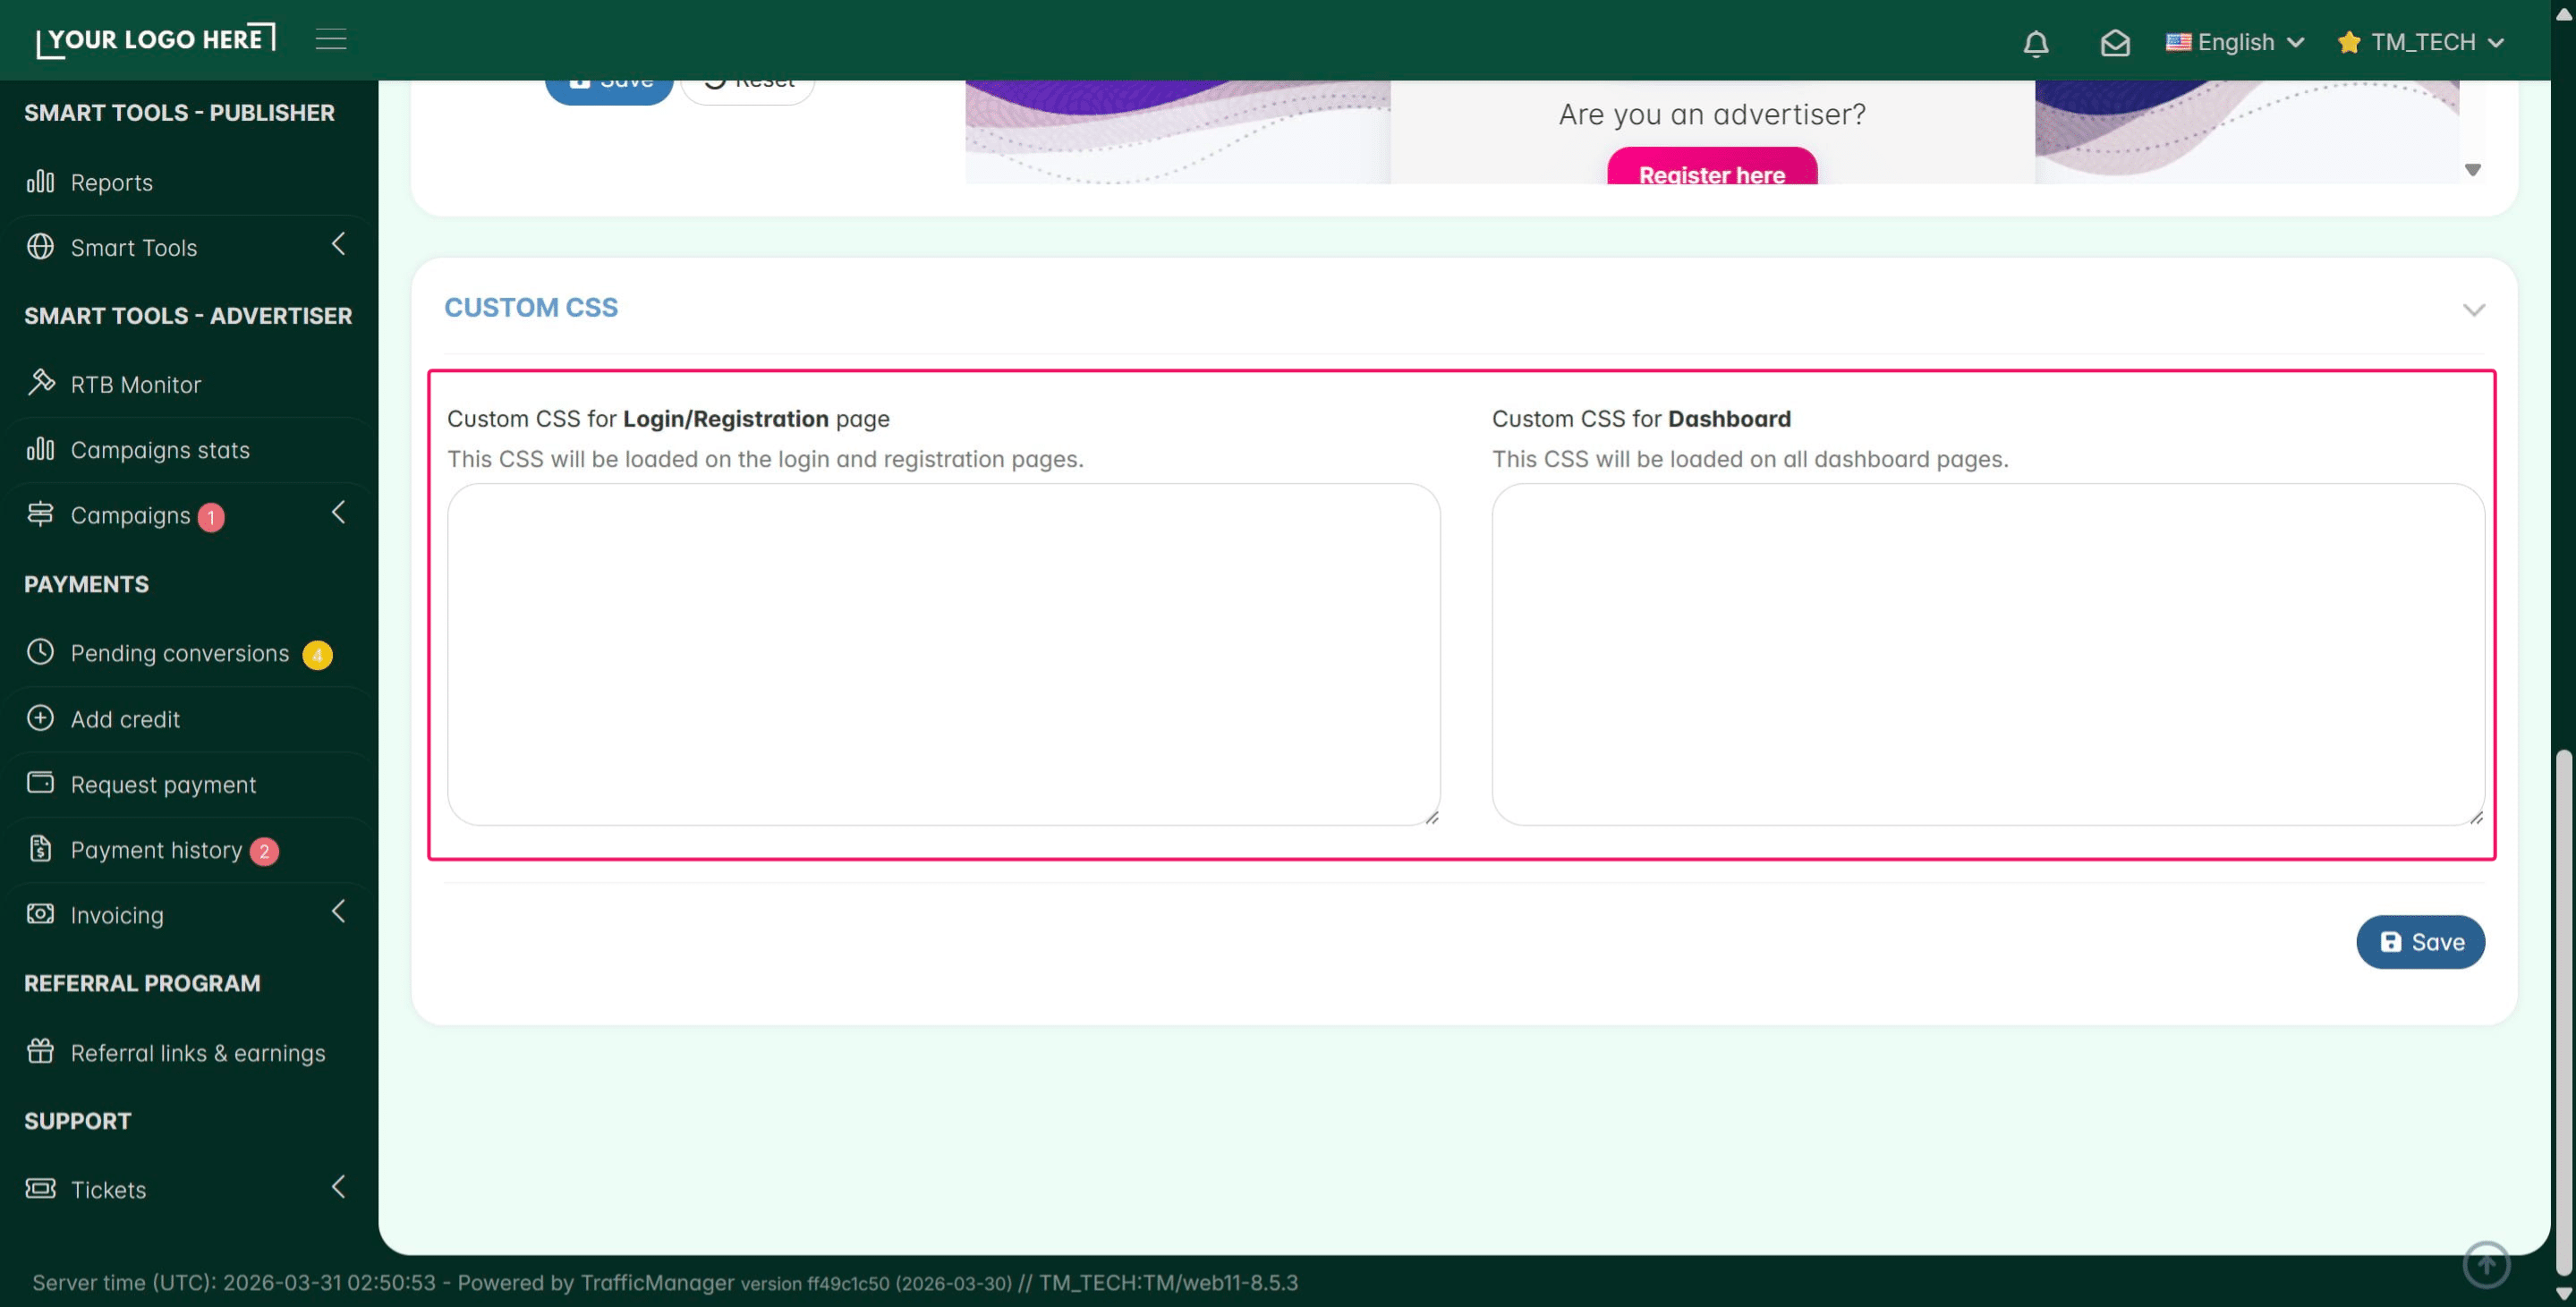
If you need to add some custom CSS, scroll down and add it to the specific section, then click Save.
3. Affiliate Payment modes, Company Information & Legal Pages.
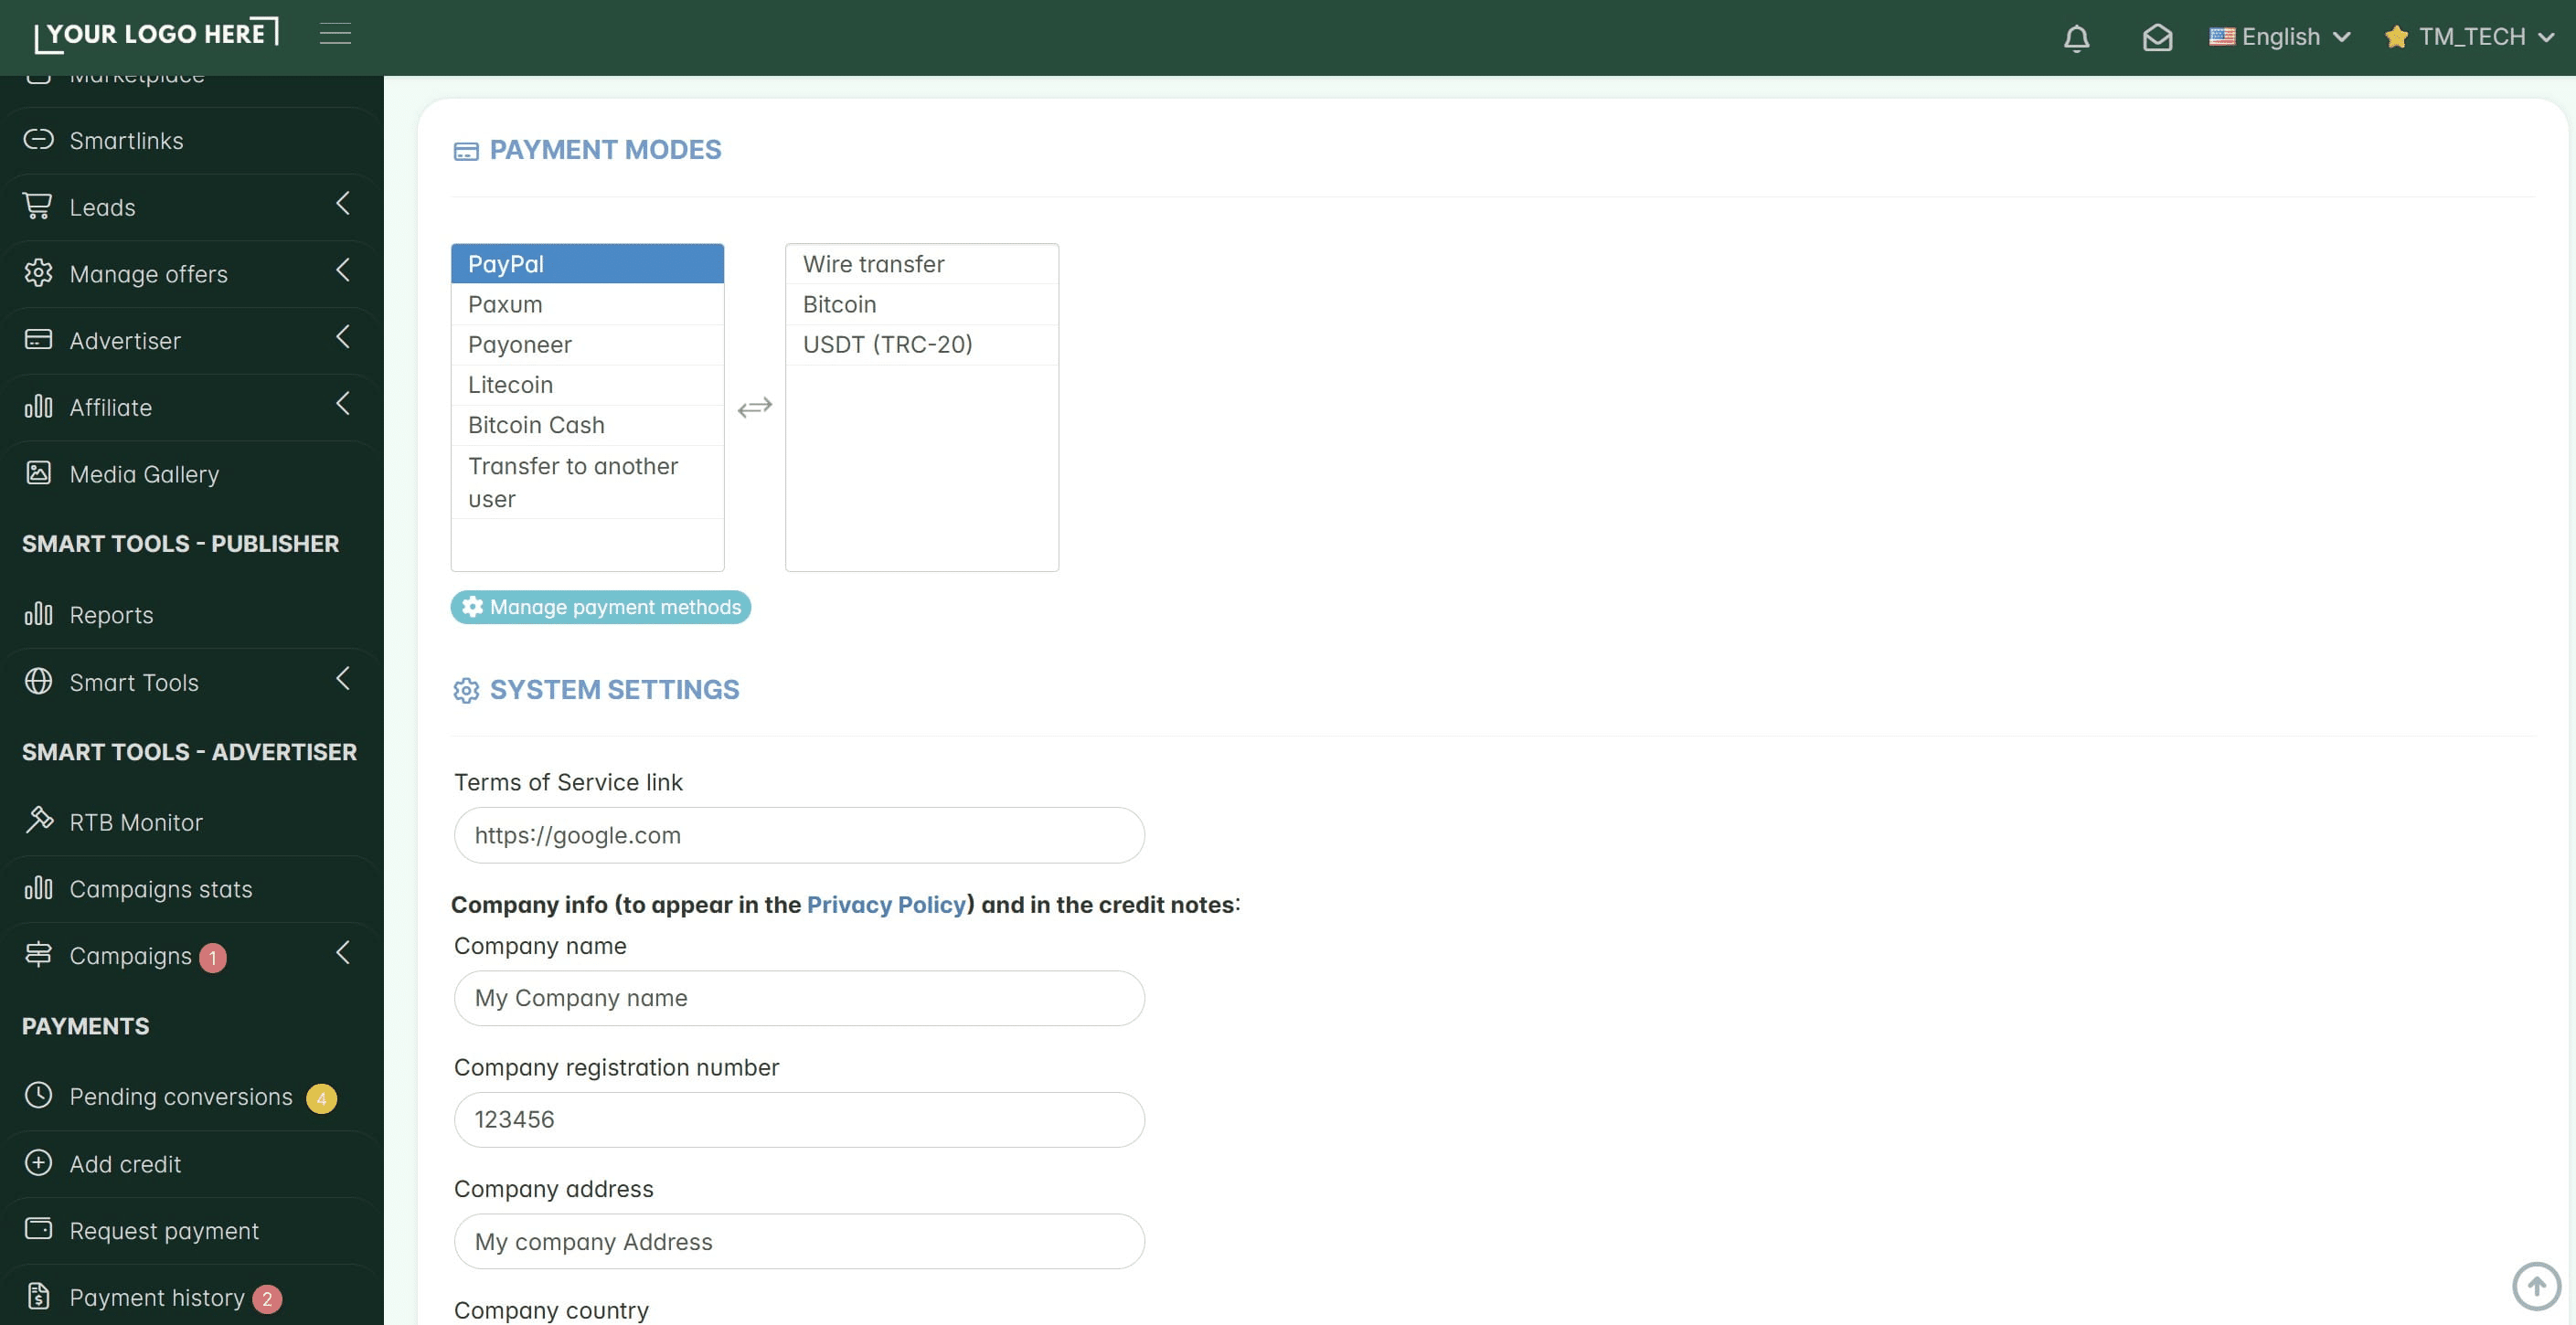
Open the System settings page again and scroll down within the General tab to find the affiliate Payment Modes (profiles) and the Company info section.
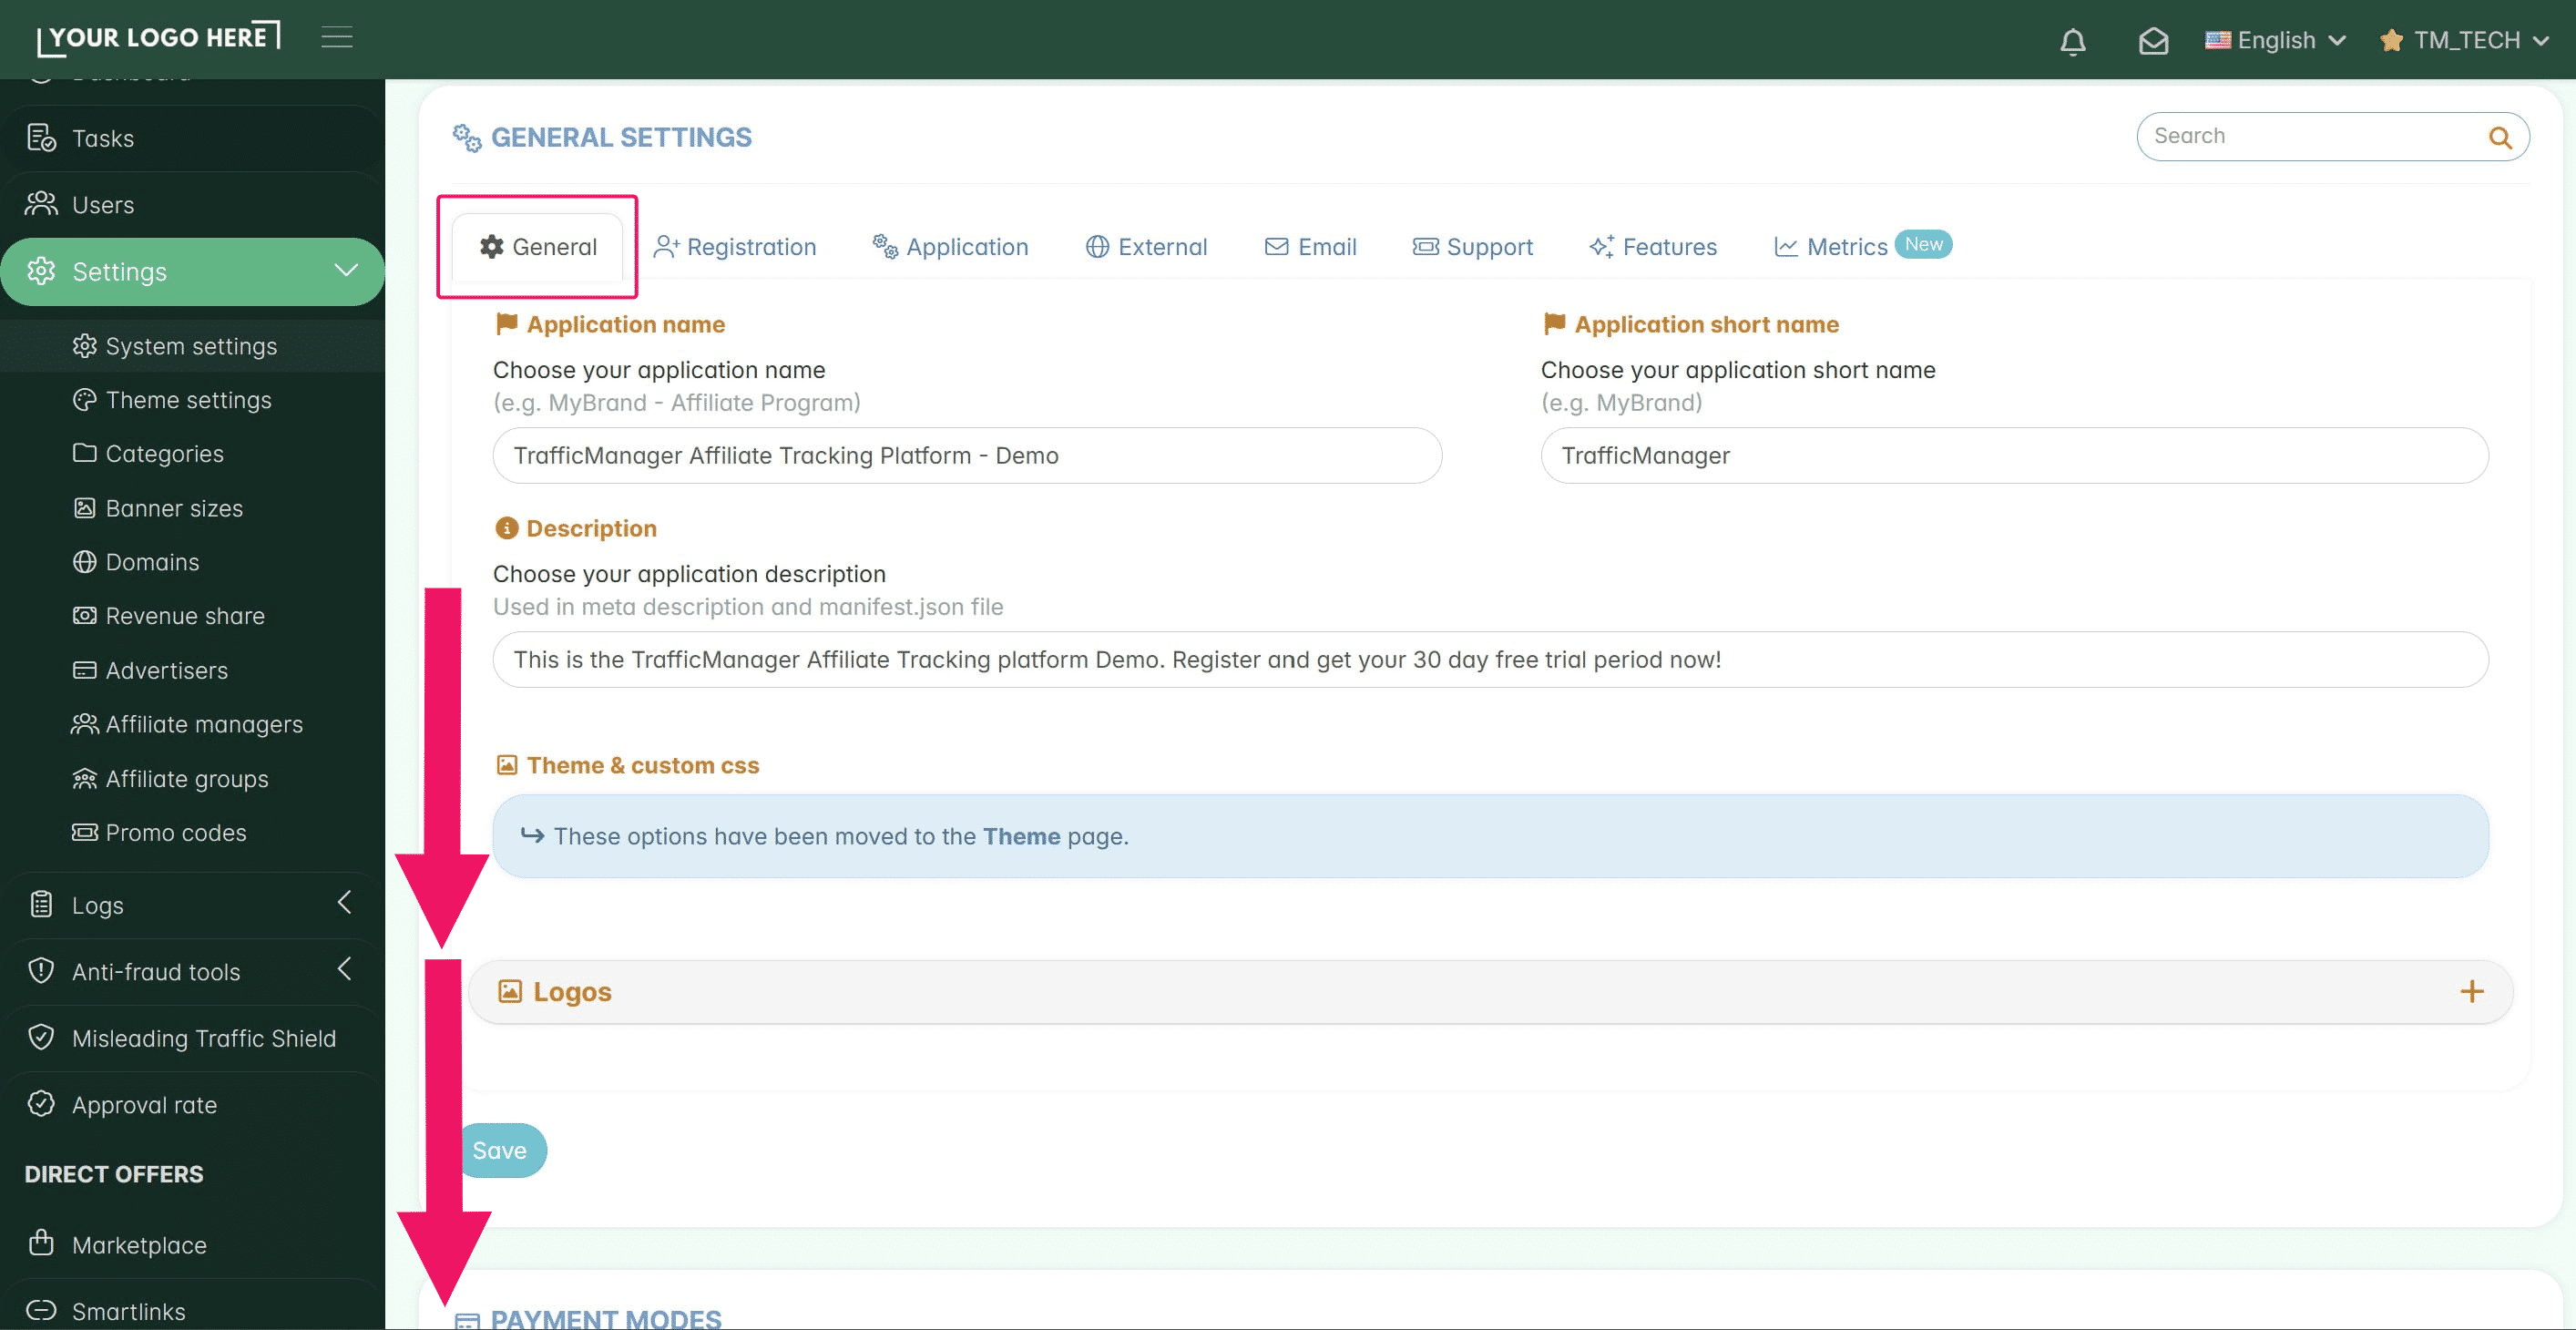
- Affiliate Payment Method Profiles Here you can select from the preconfigured options or create new "containers" for affiliate payment data and their payment profiles. Info: TrafficManager does not process the actual movement of money. These profiles simply collect specific account details from the affiliate so you can pay them manually.
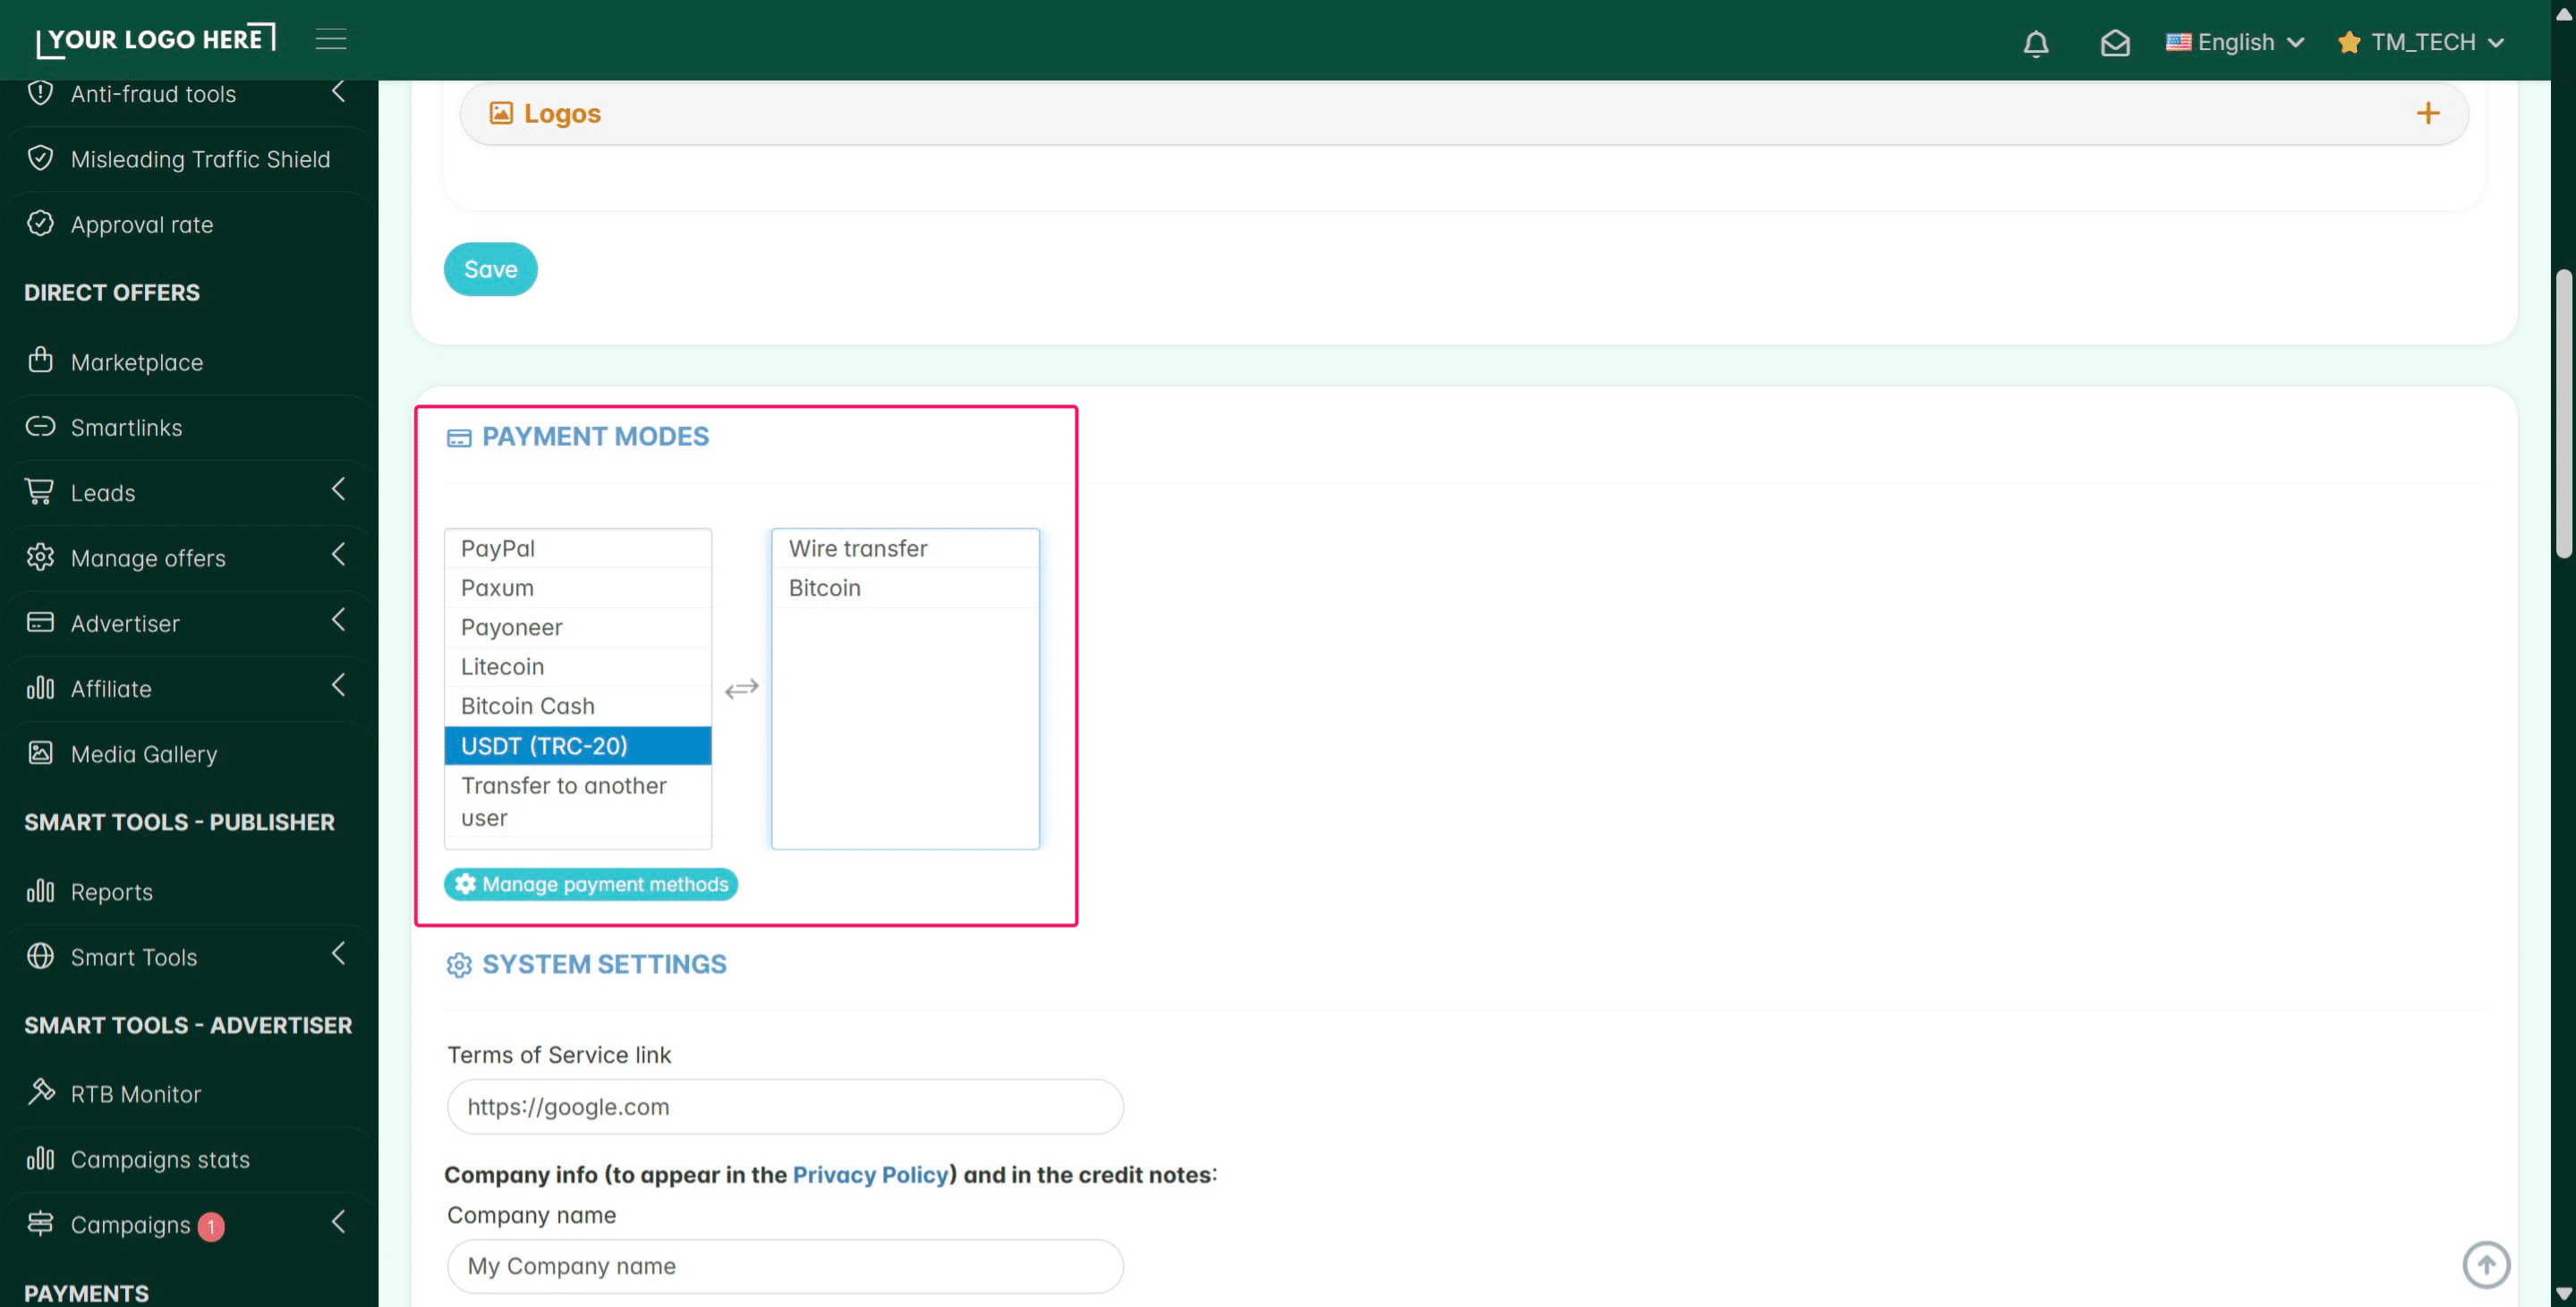
To create a custom "container" for your affiliate payment data, click on the Manage Payment Methods button.
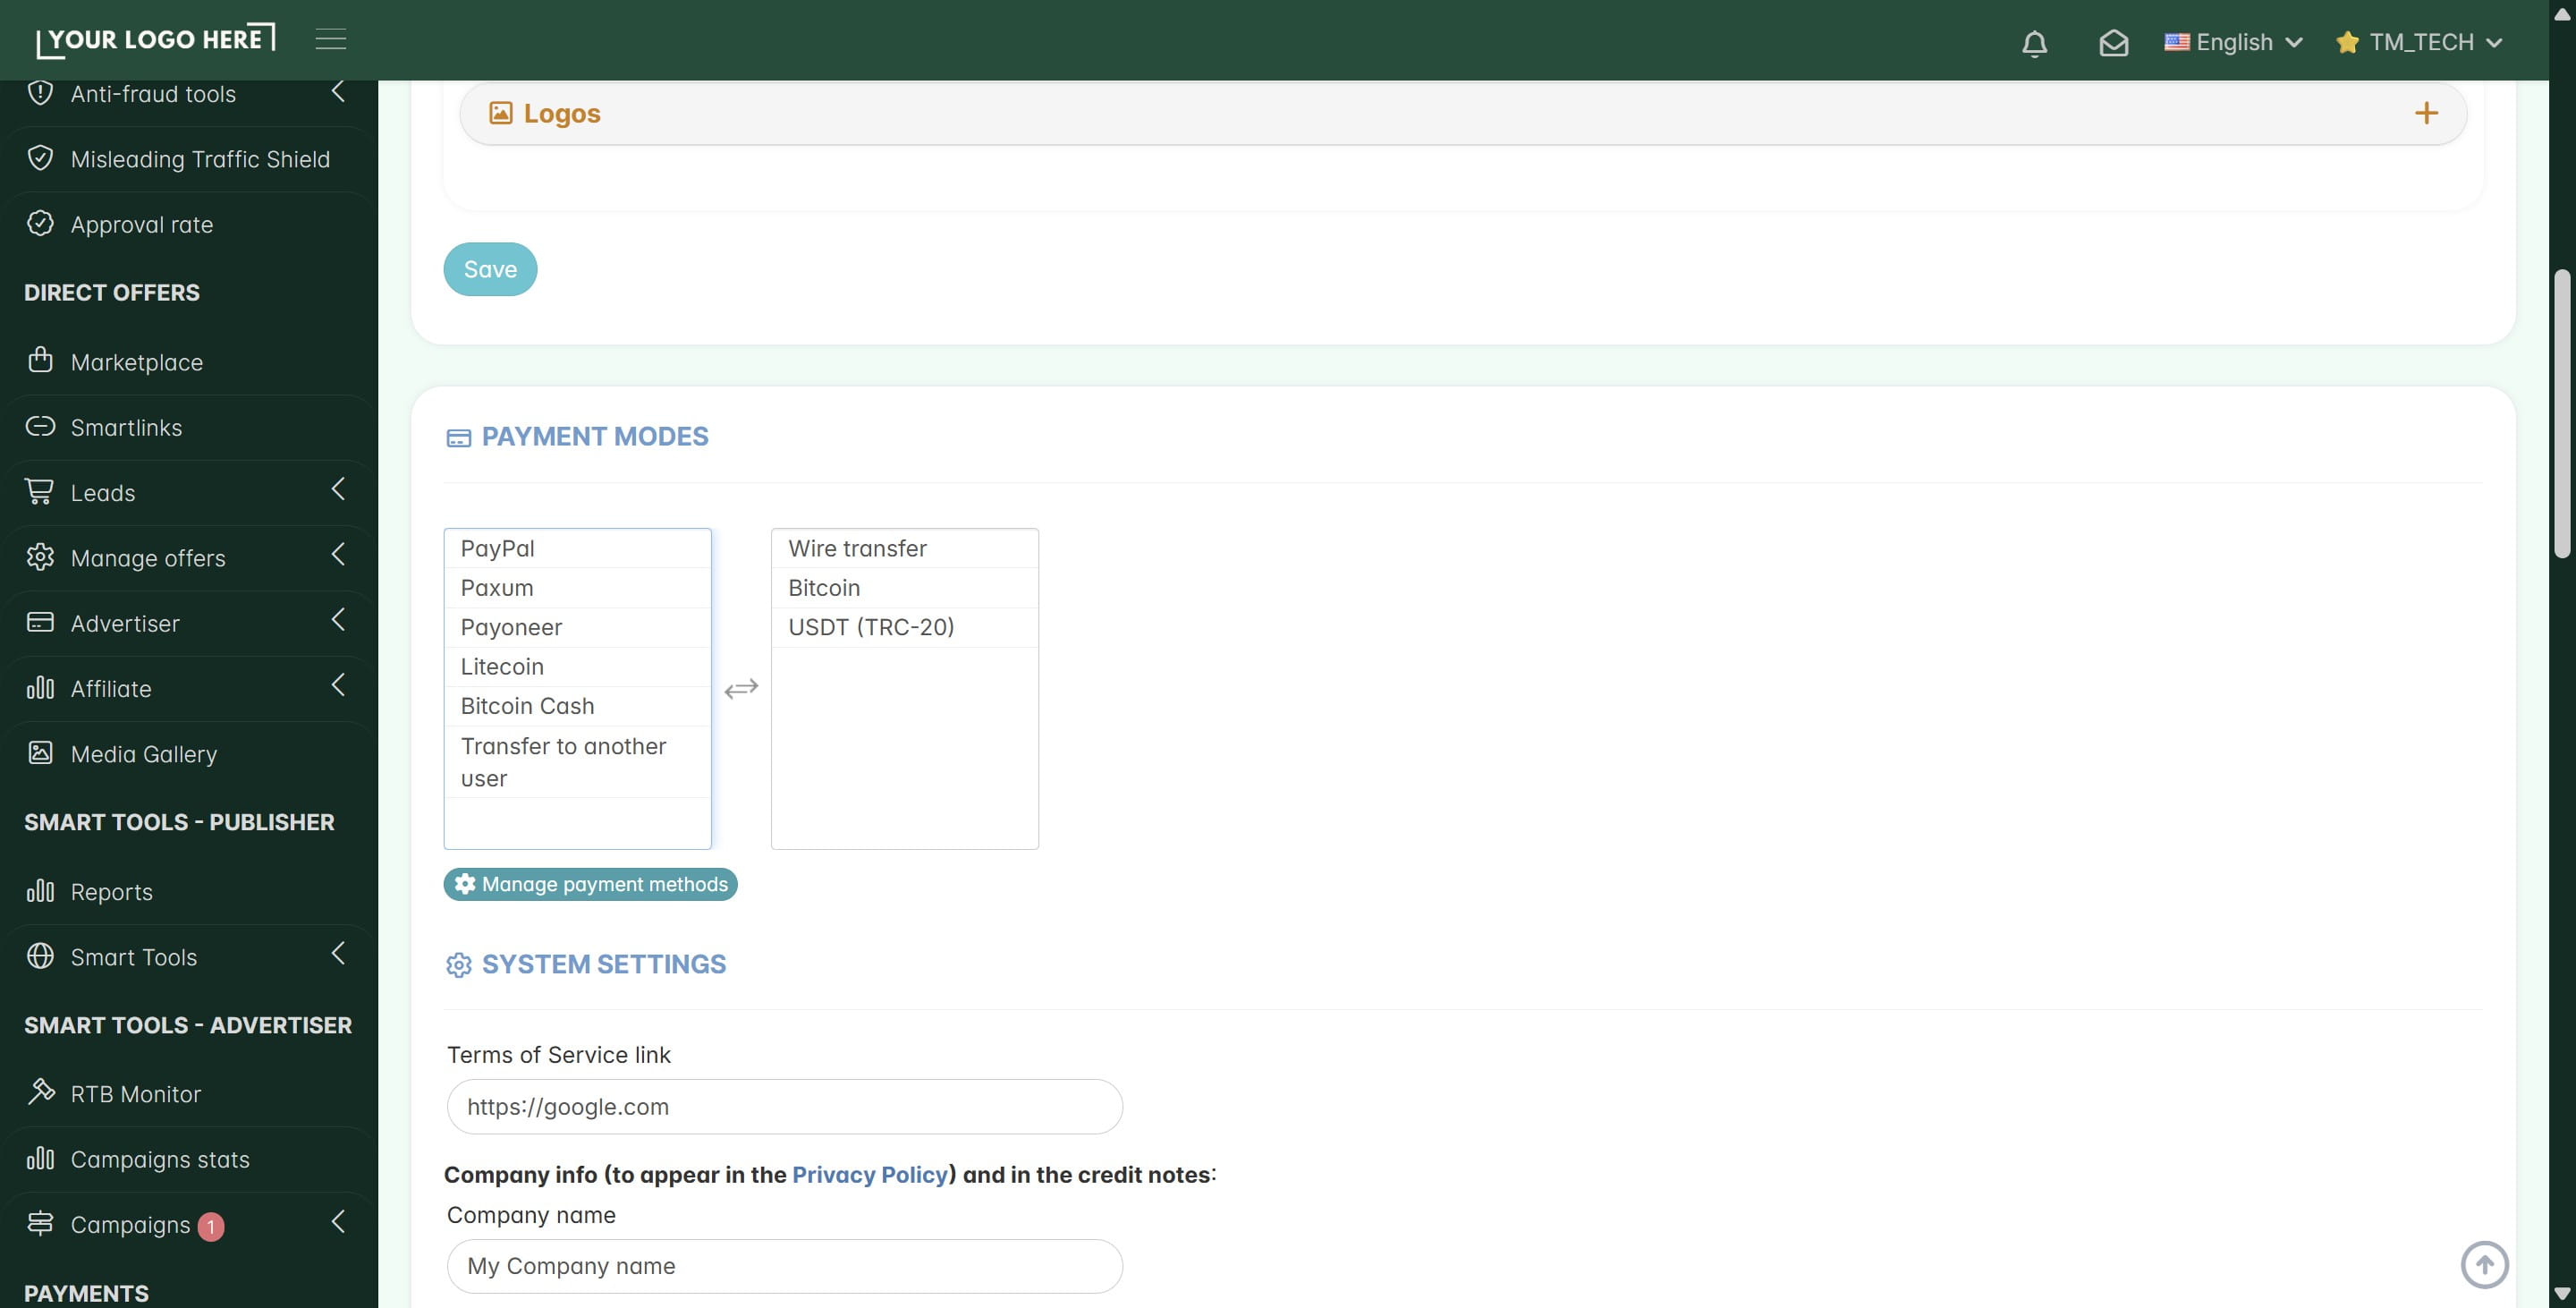
and Add a new payment method
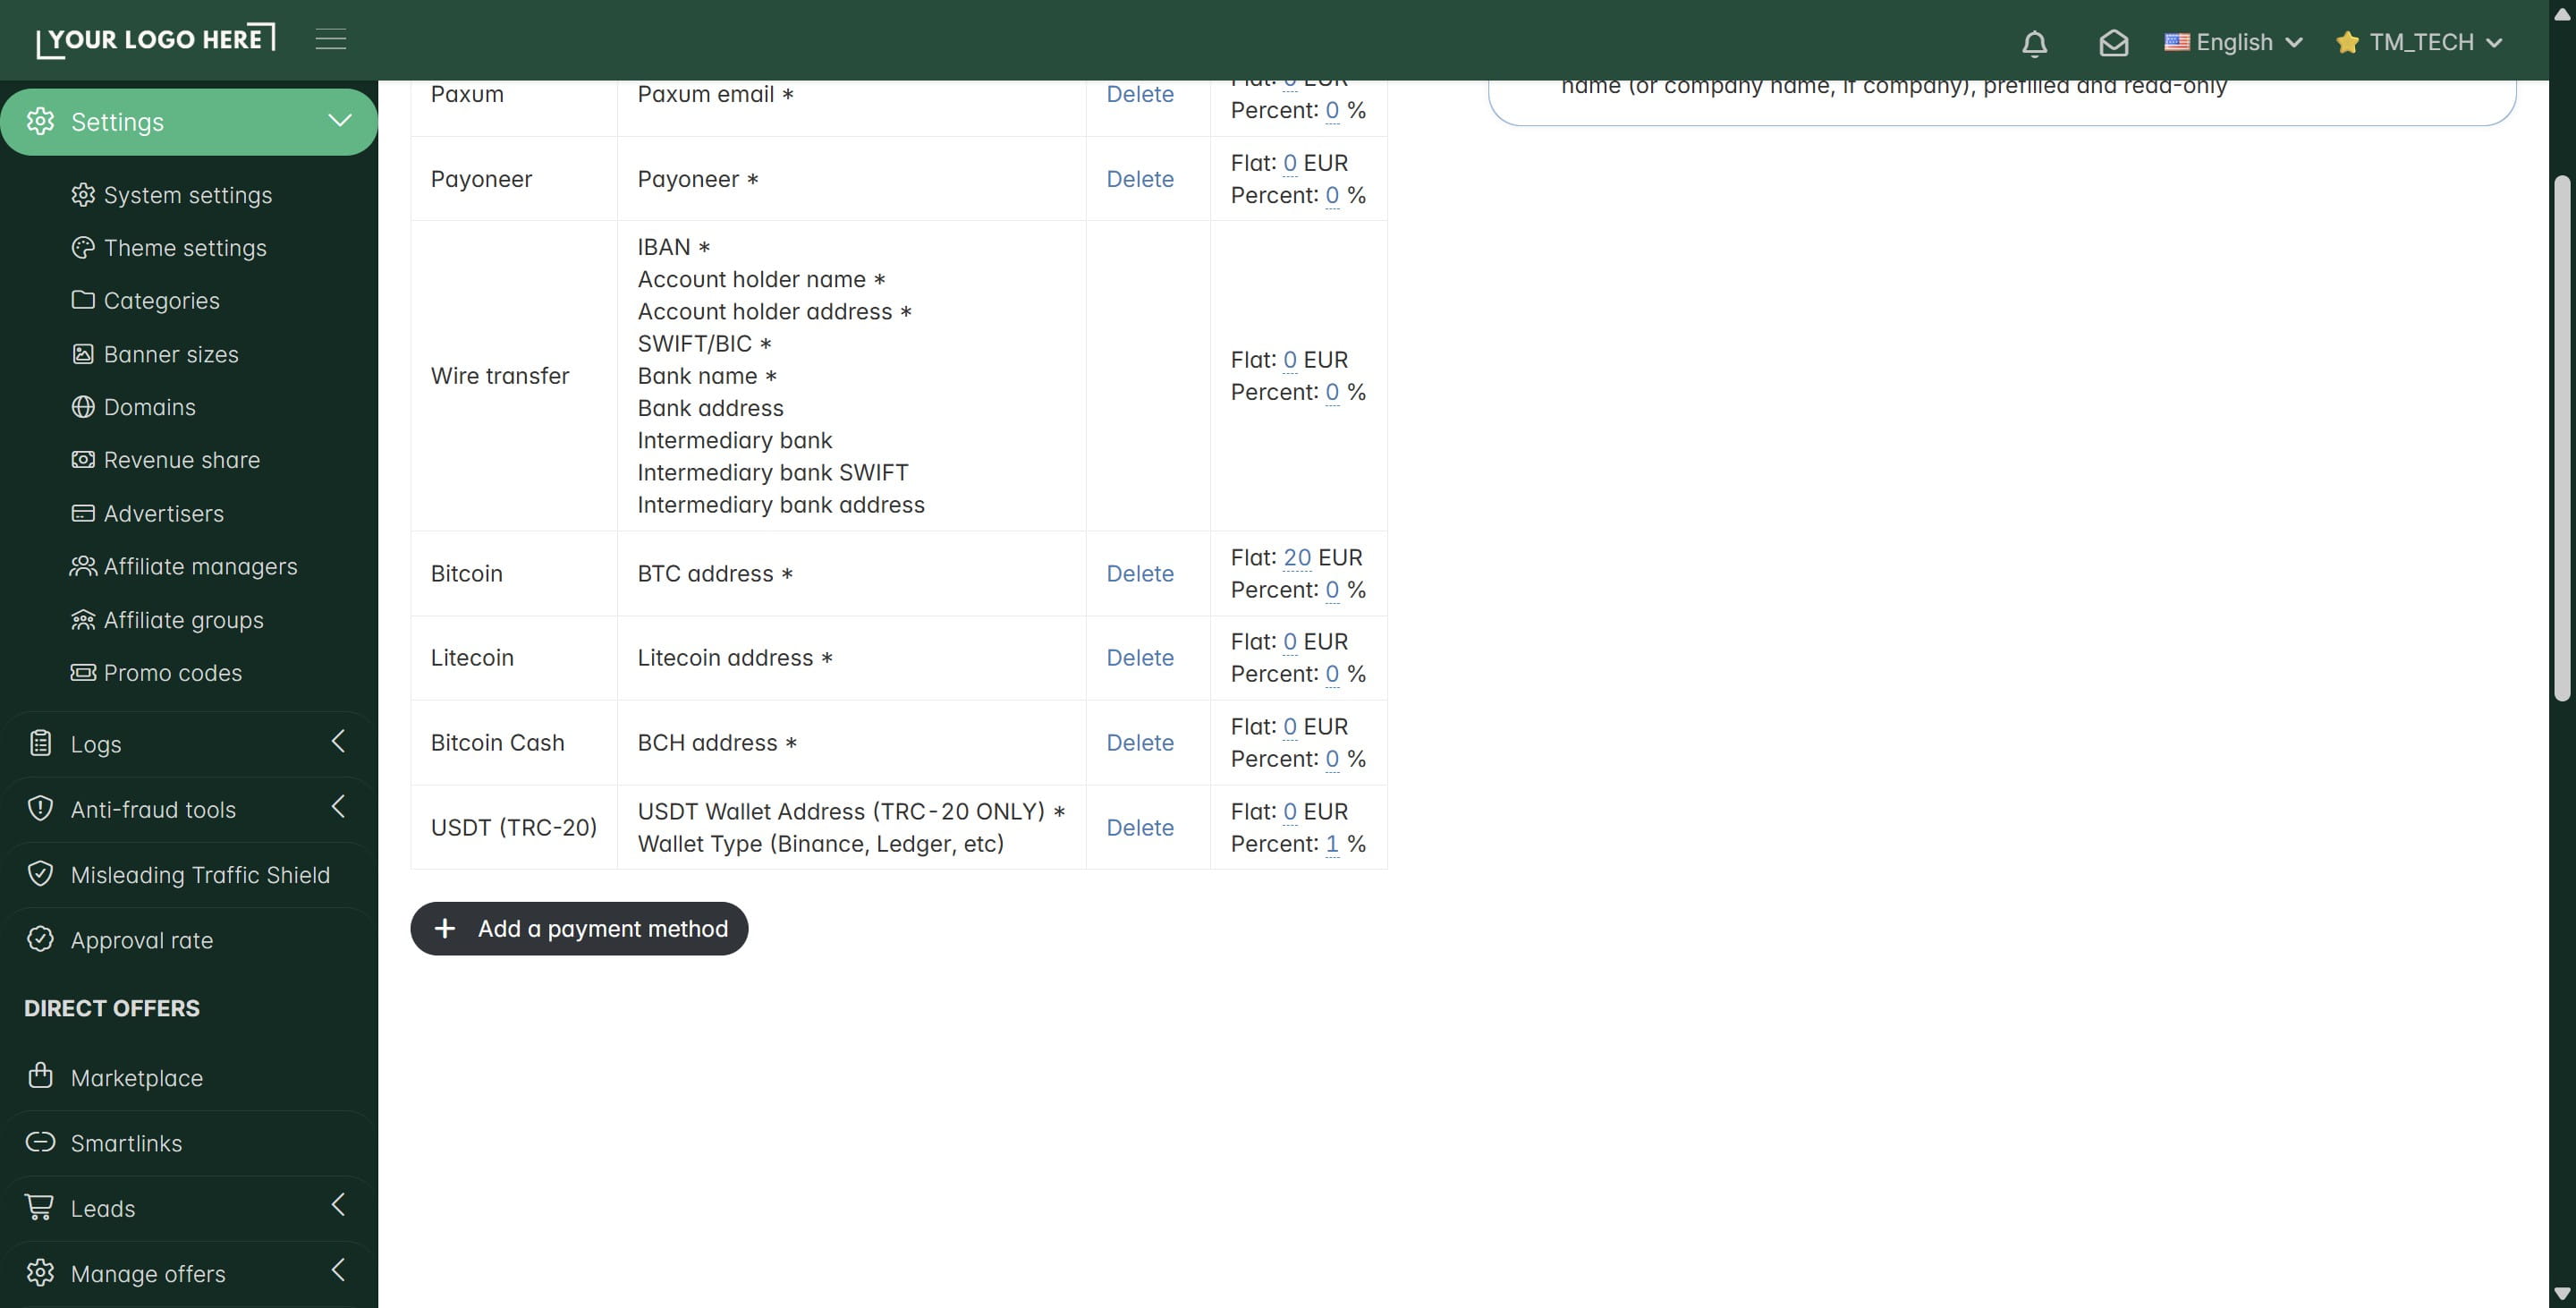
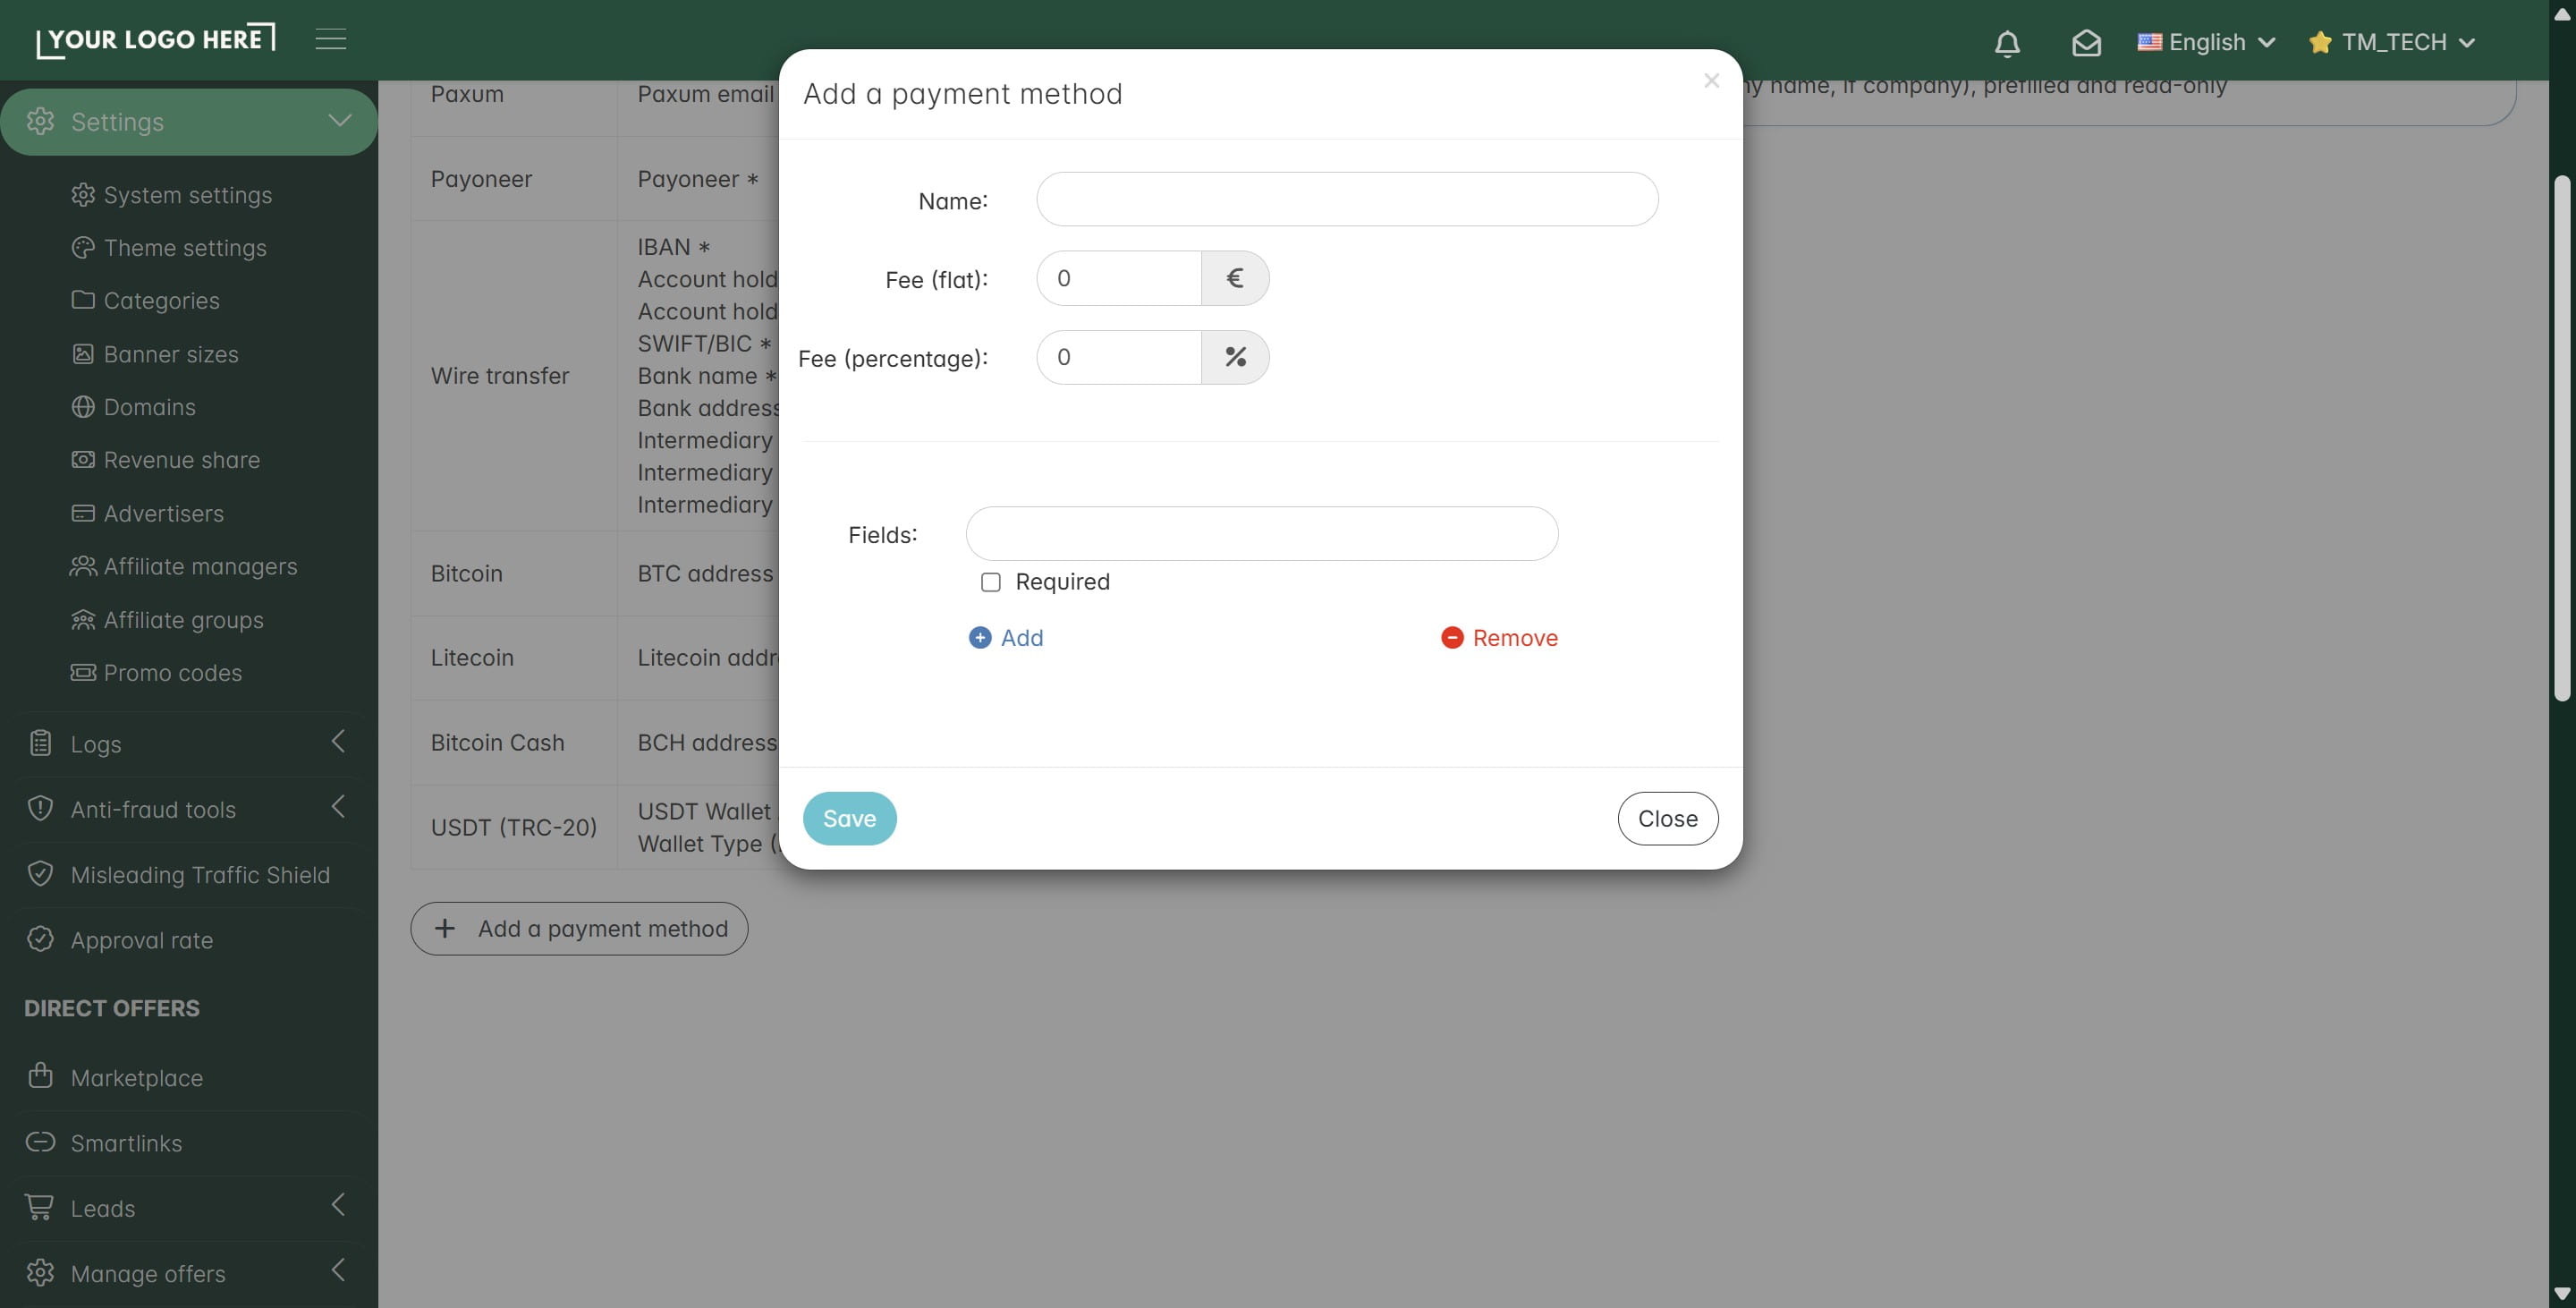
Here you can set up the new payment profile name and the fields that the affiliate needs to fill. You can also add fees that will be deducted from the affiliate's credit if you need to cover your own payment processing fees.
- Your affiliate network company info and legal pages VERY IMPORTANT: The company information you add in this section and the link in the Terms of Service field will appear at the bottom of the registration page of your affiliate network within the Terms of Service and Privacy Policy pages.
When registering for your affiliate network, affiliates must accept these legal agreements by clicking the specific checkboxes in the registration form. Please ensure the company details added are correct, as they will appear on the Privacy Policy page
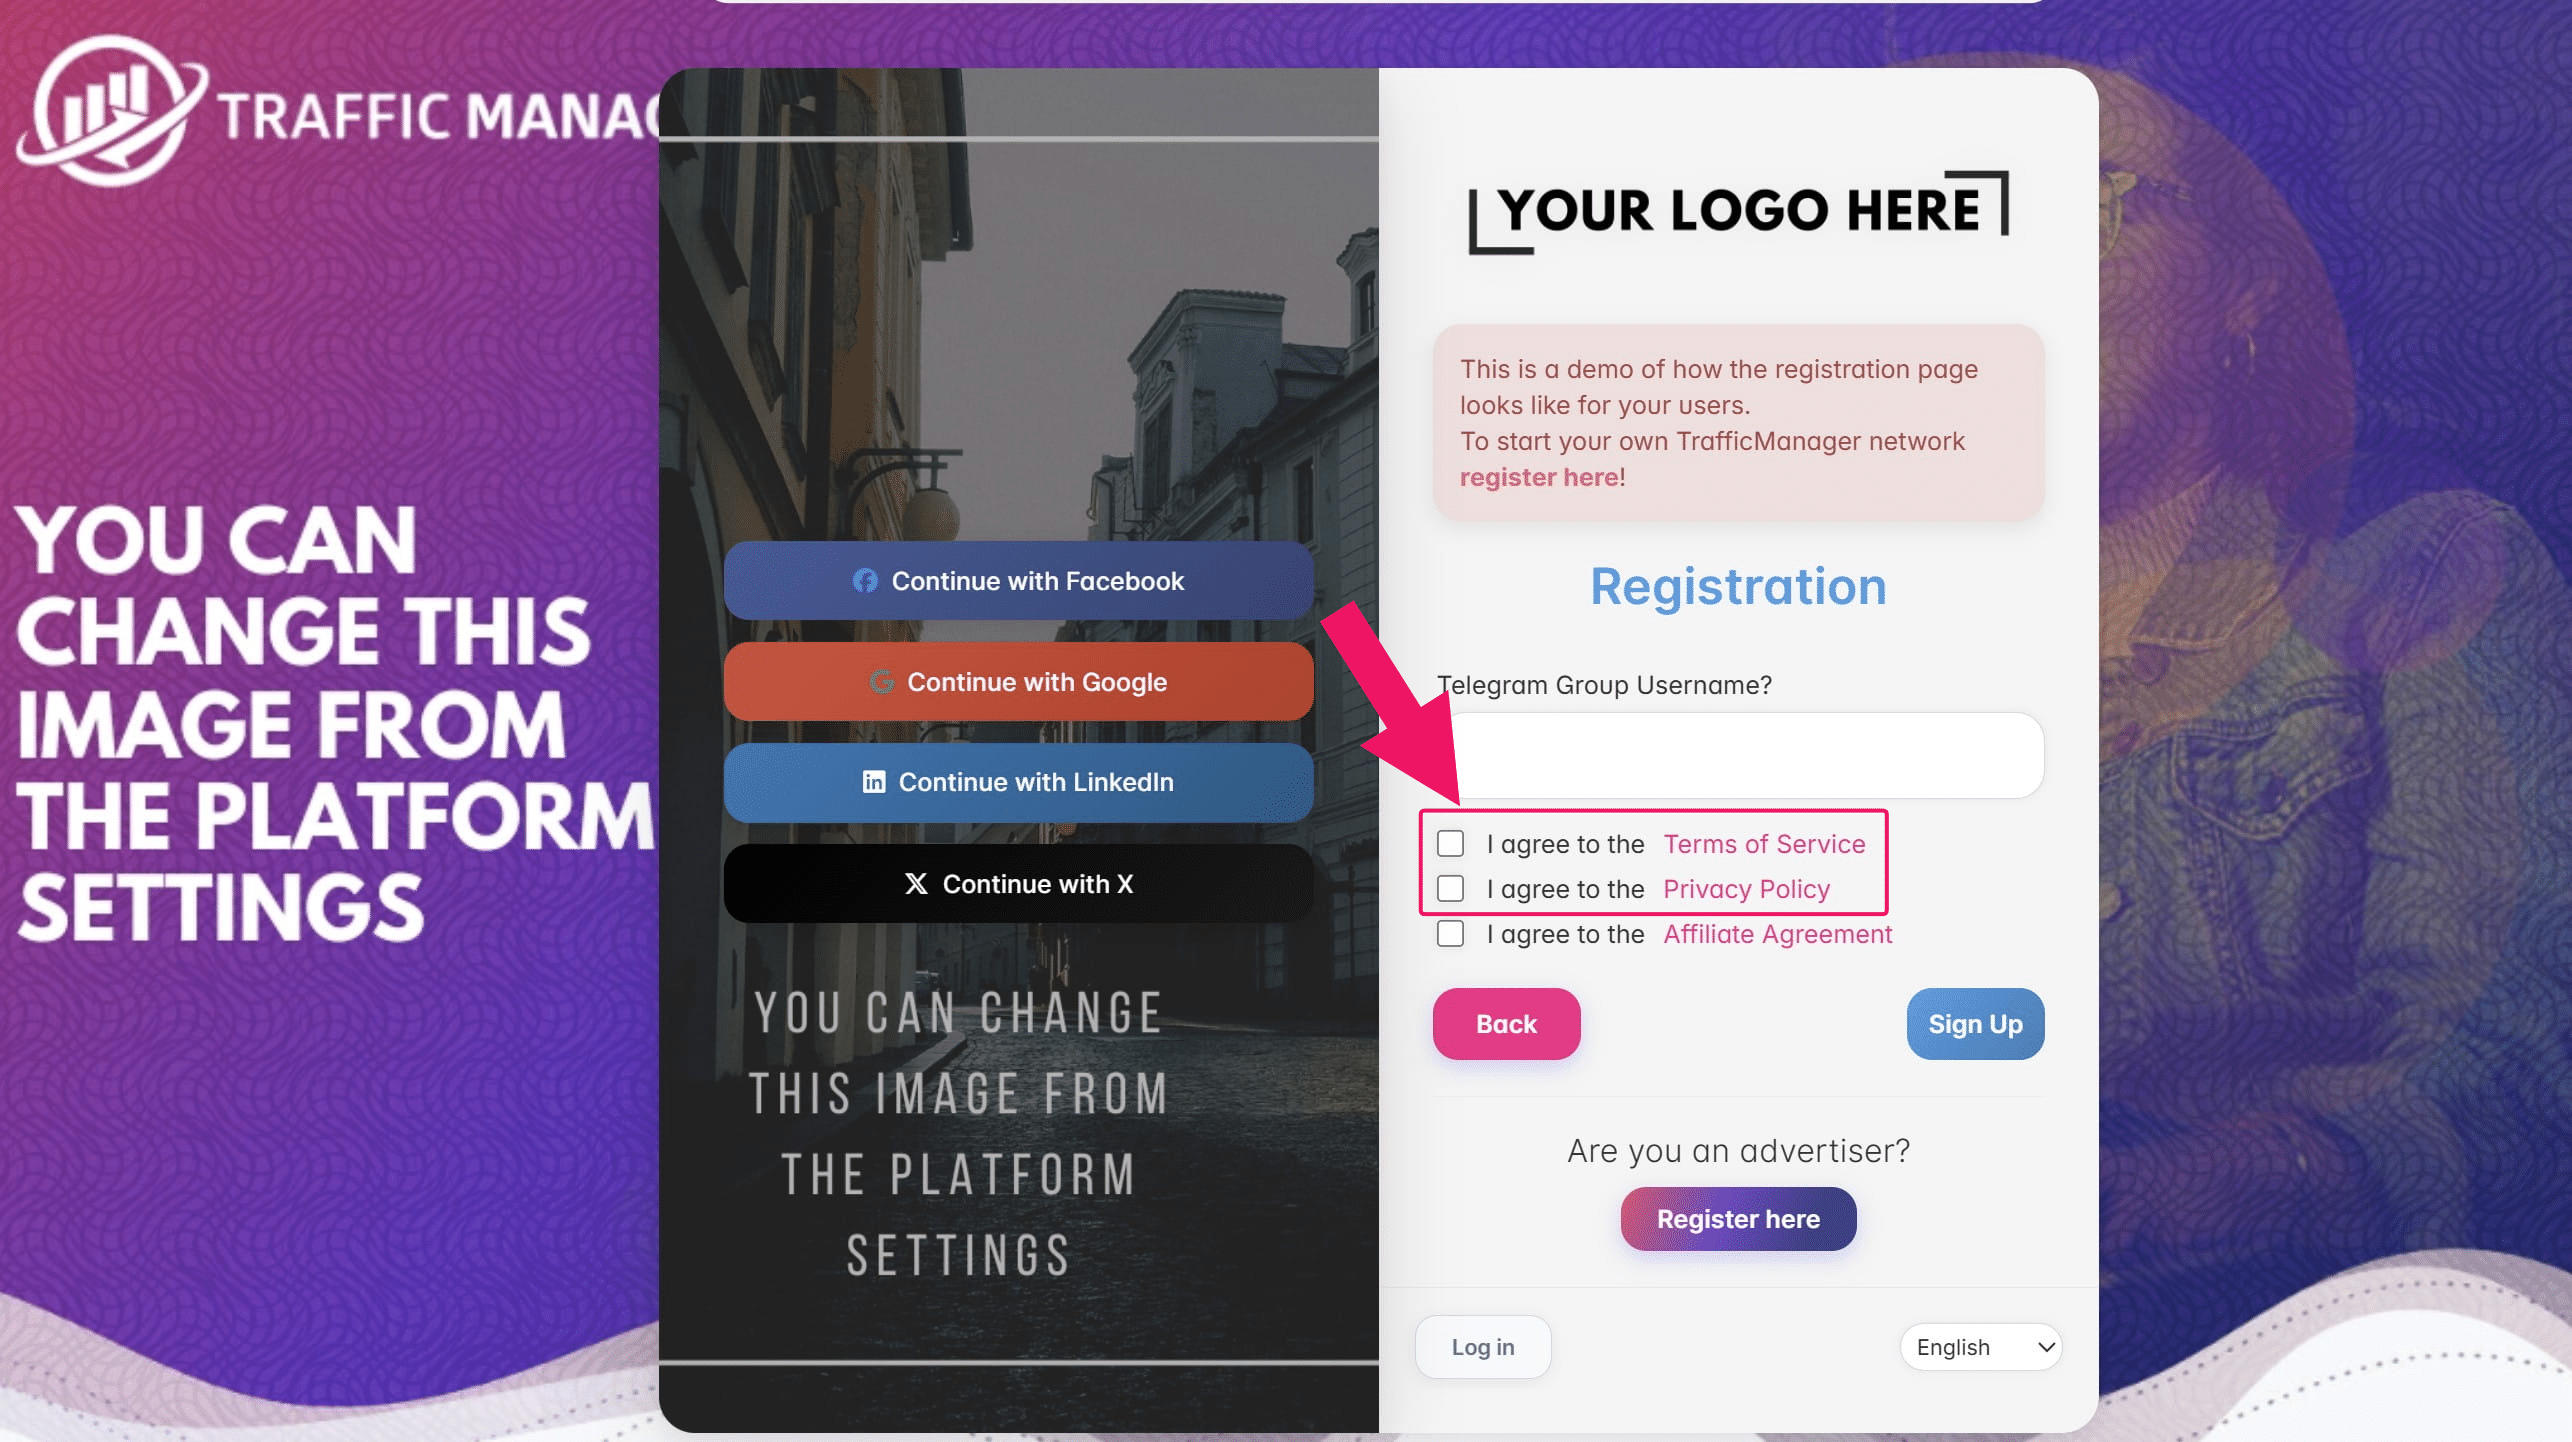
While you must host your own Terms of Service page on your company website or landing page (as each company has its own specific requirements) and link it to your TrafficManager platform as described above, the Privacy Policy page is auto-generated by our system using those same company details, because we process the data on your behalf.
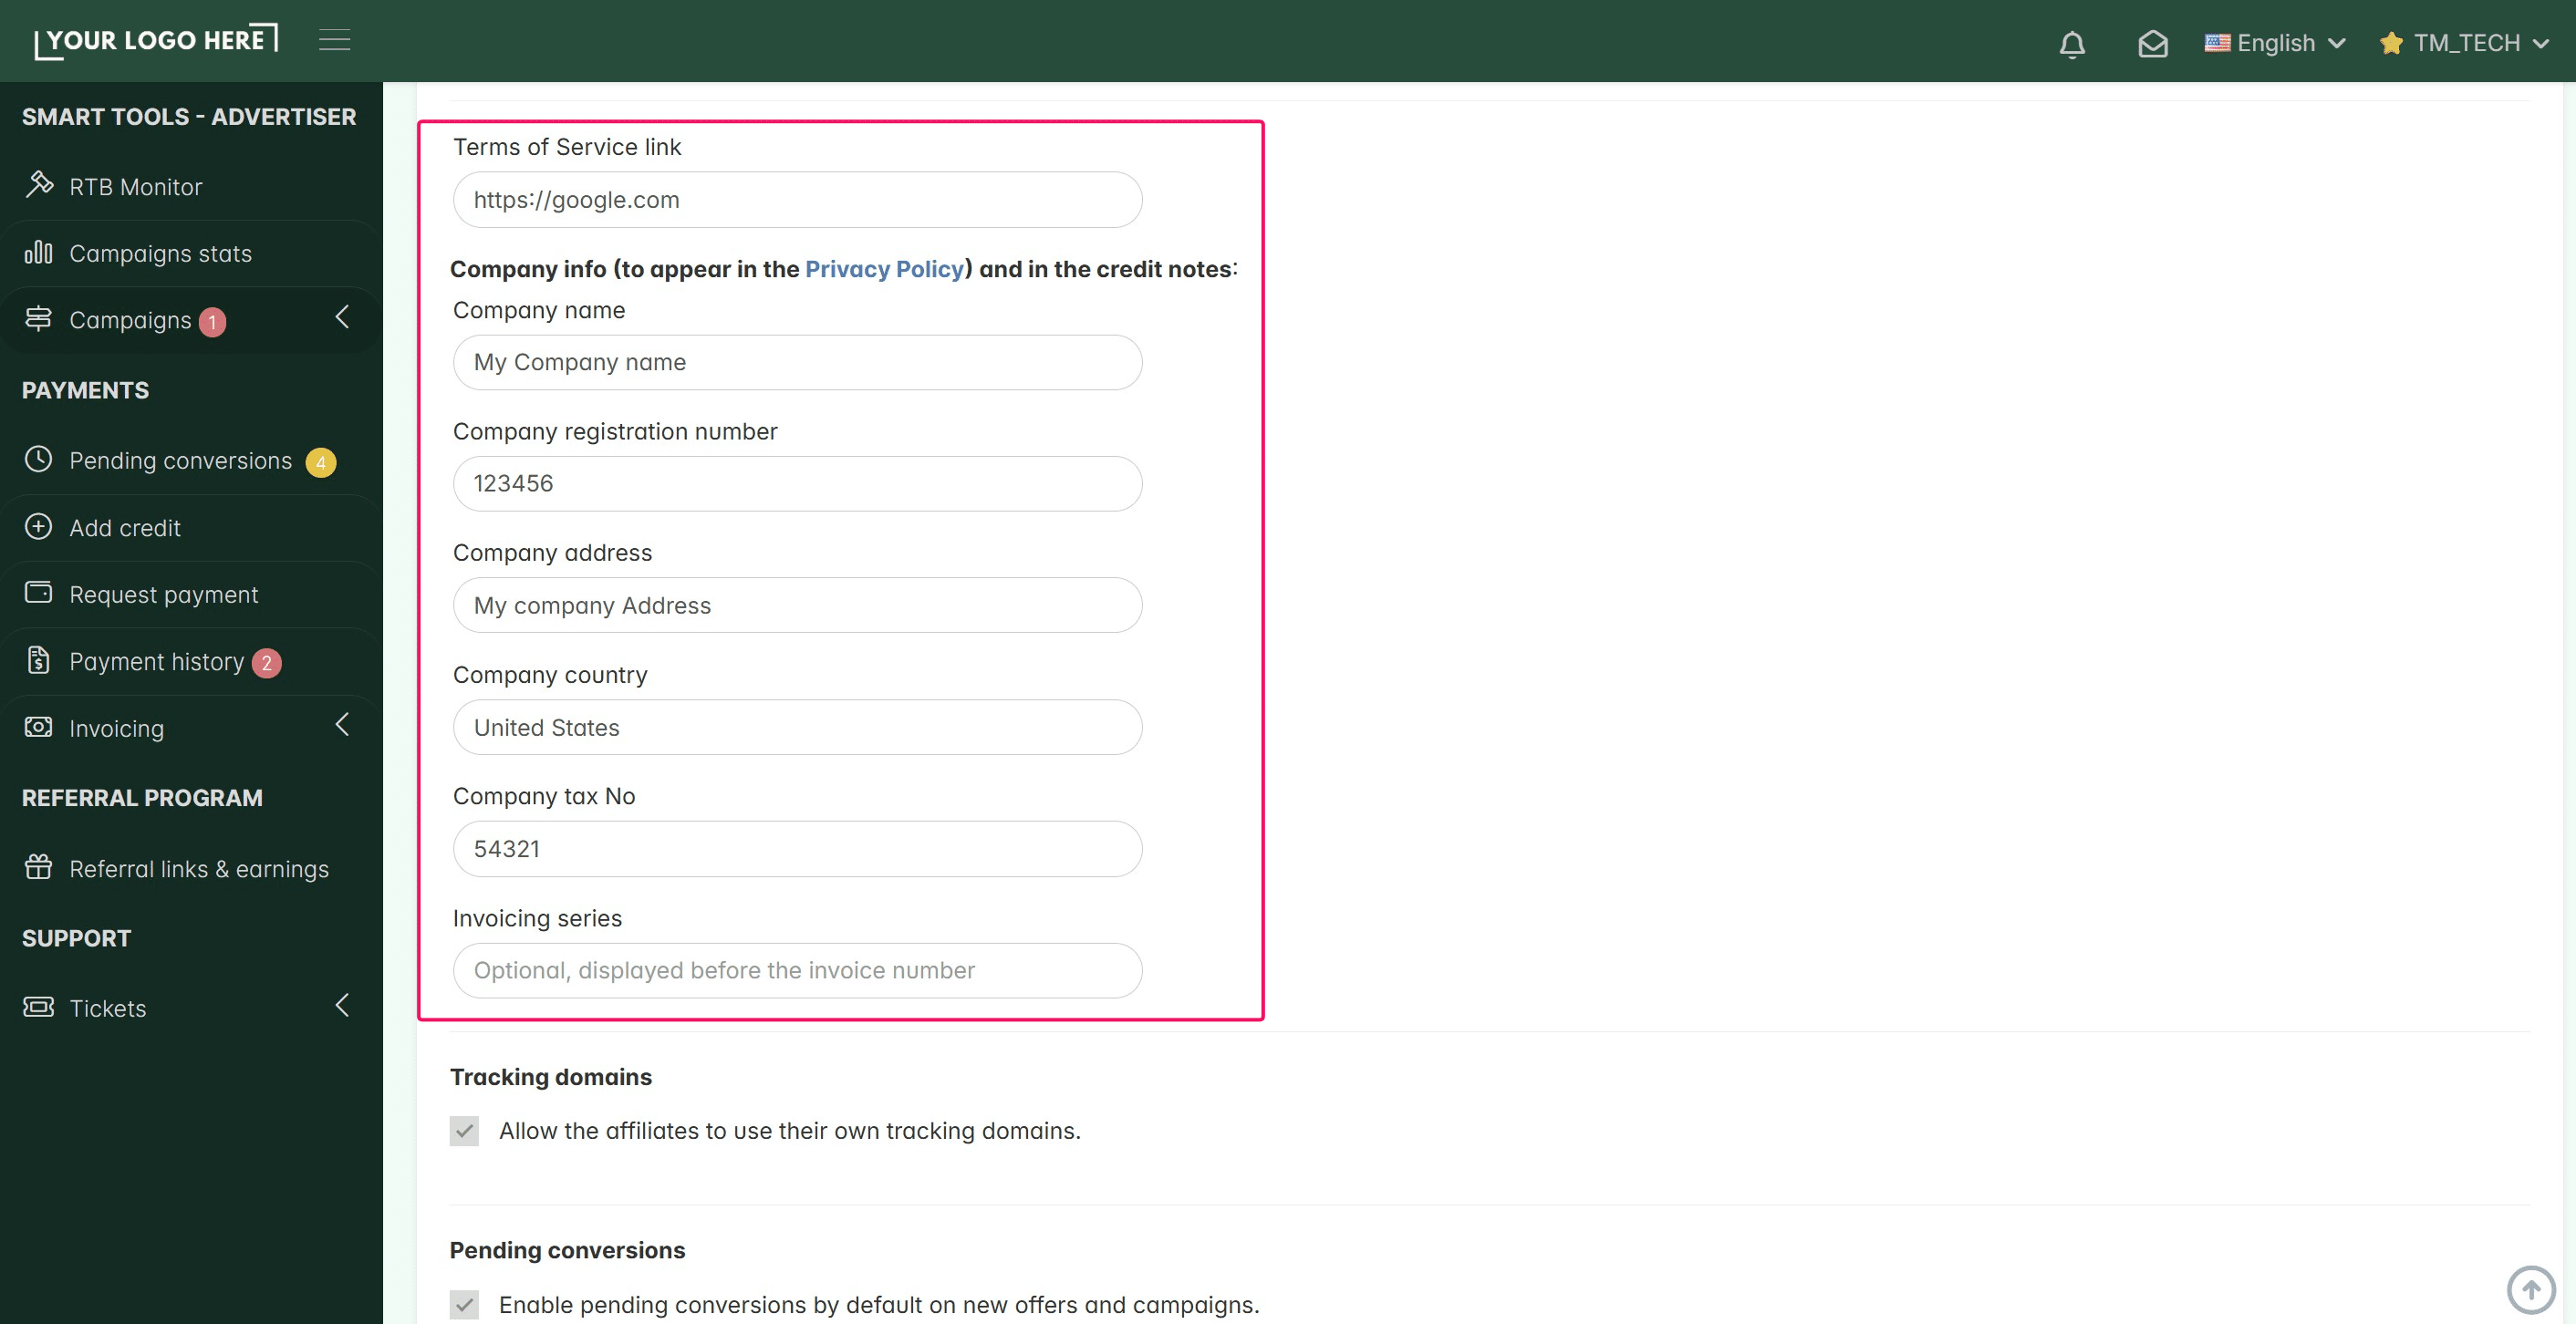
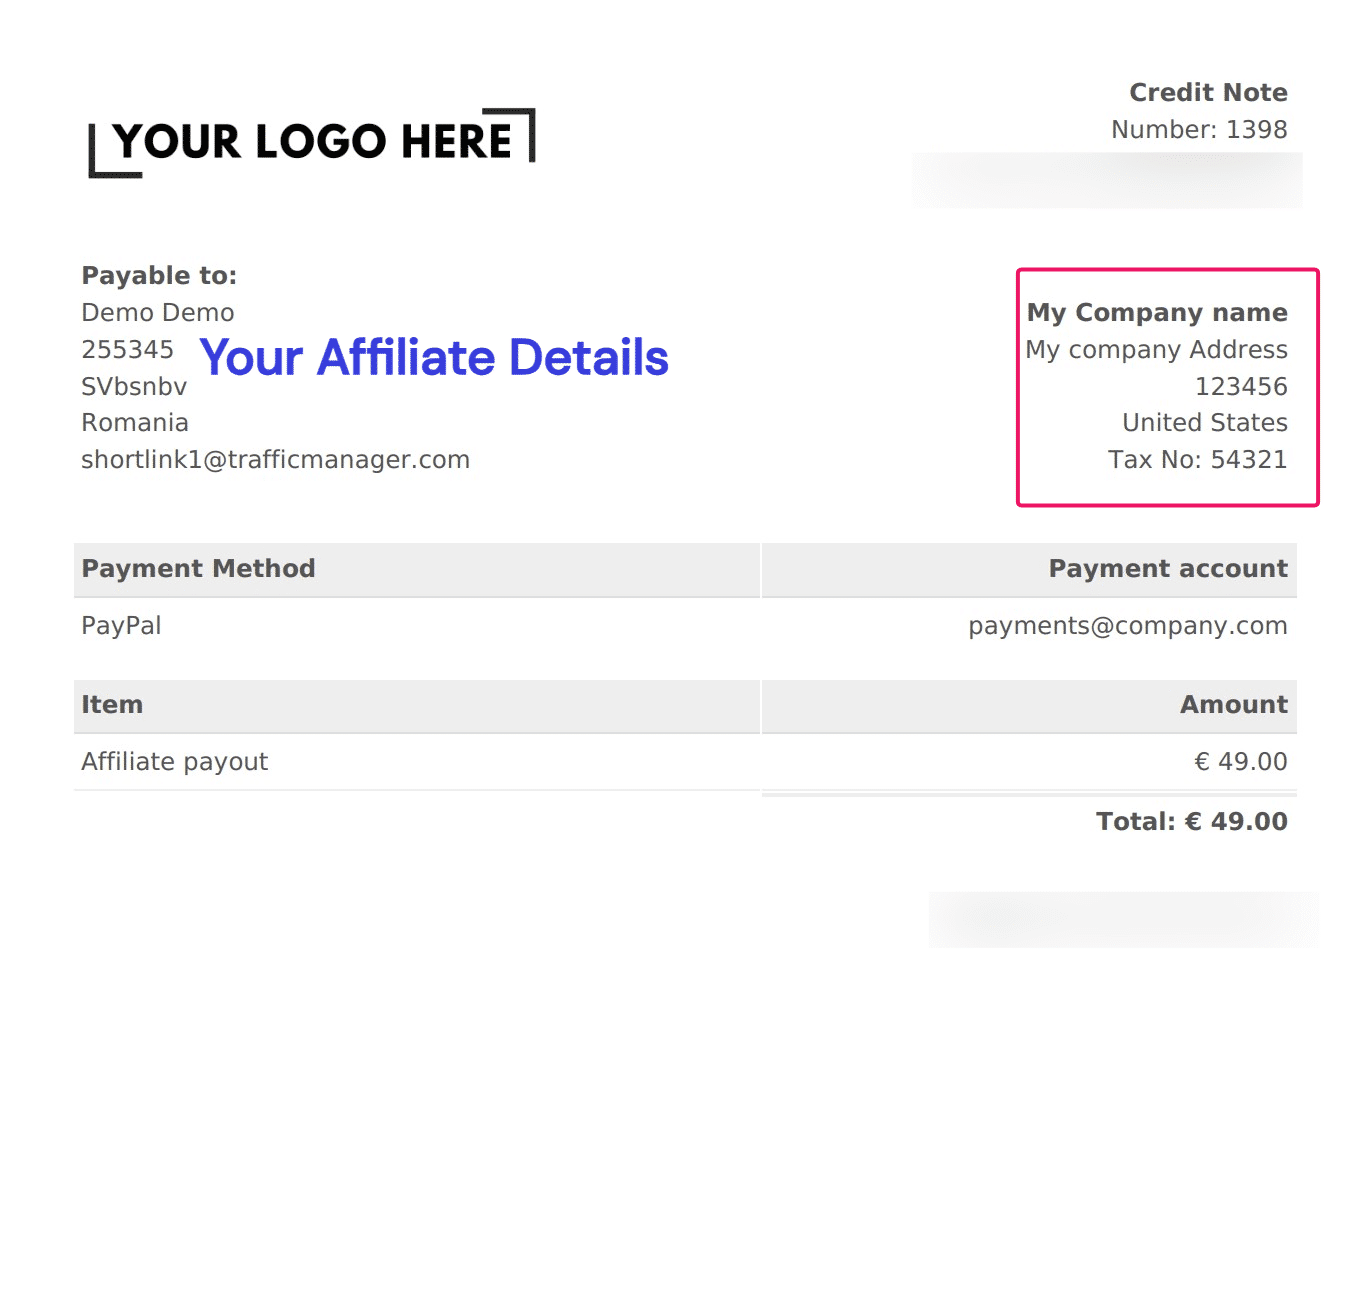
The same company details added to that section will also be included on the affiliate credit notes our system generates automatically once you mark a payment as "Paid."
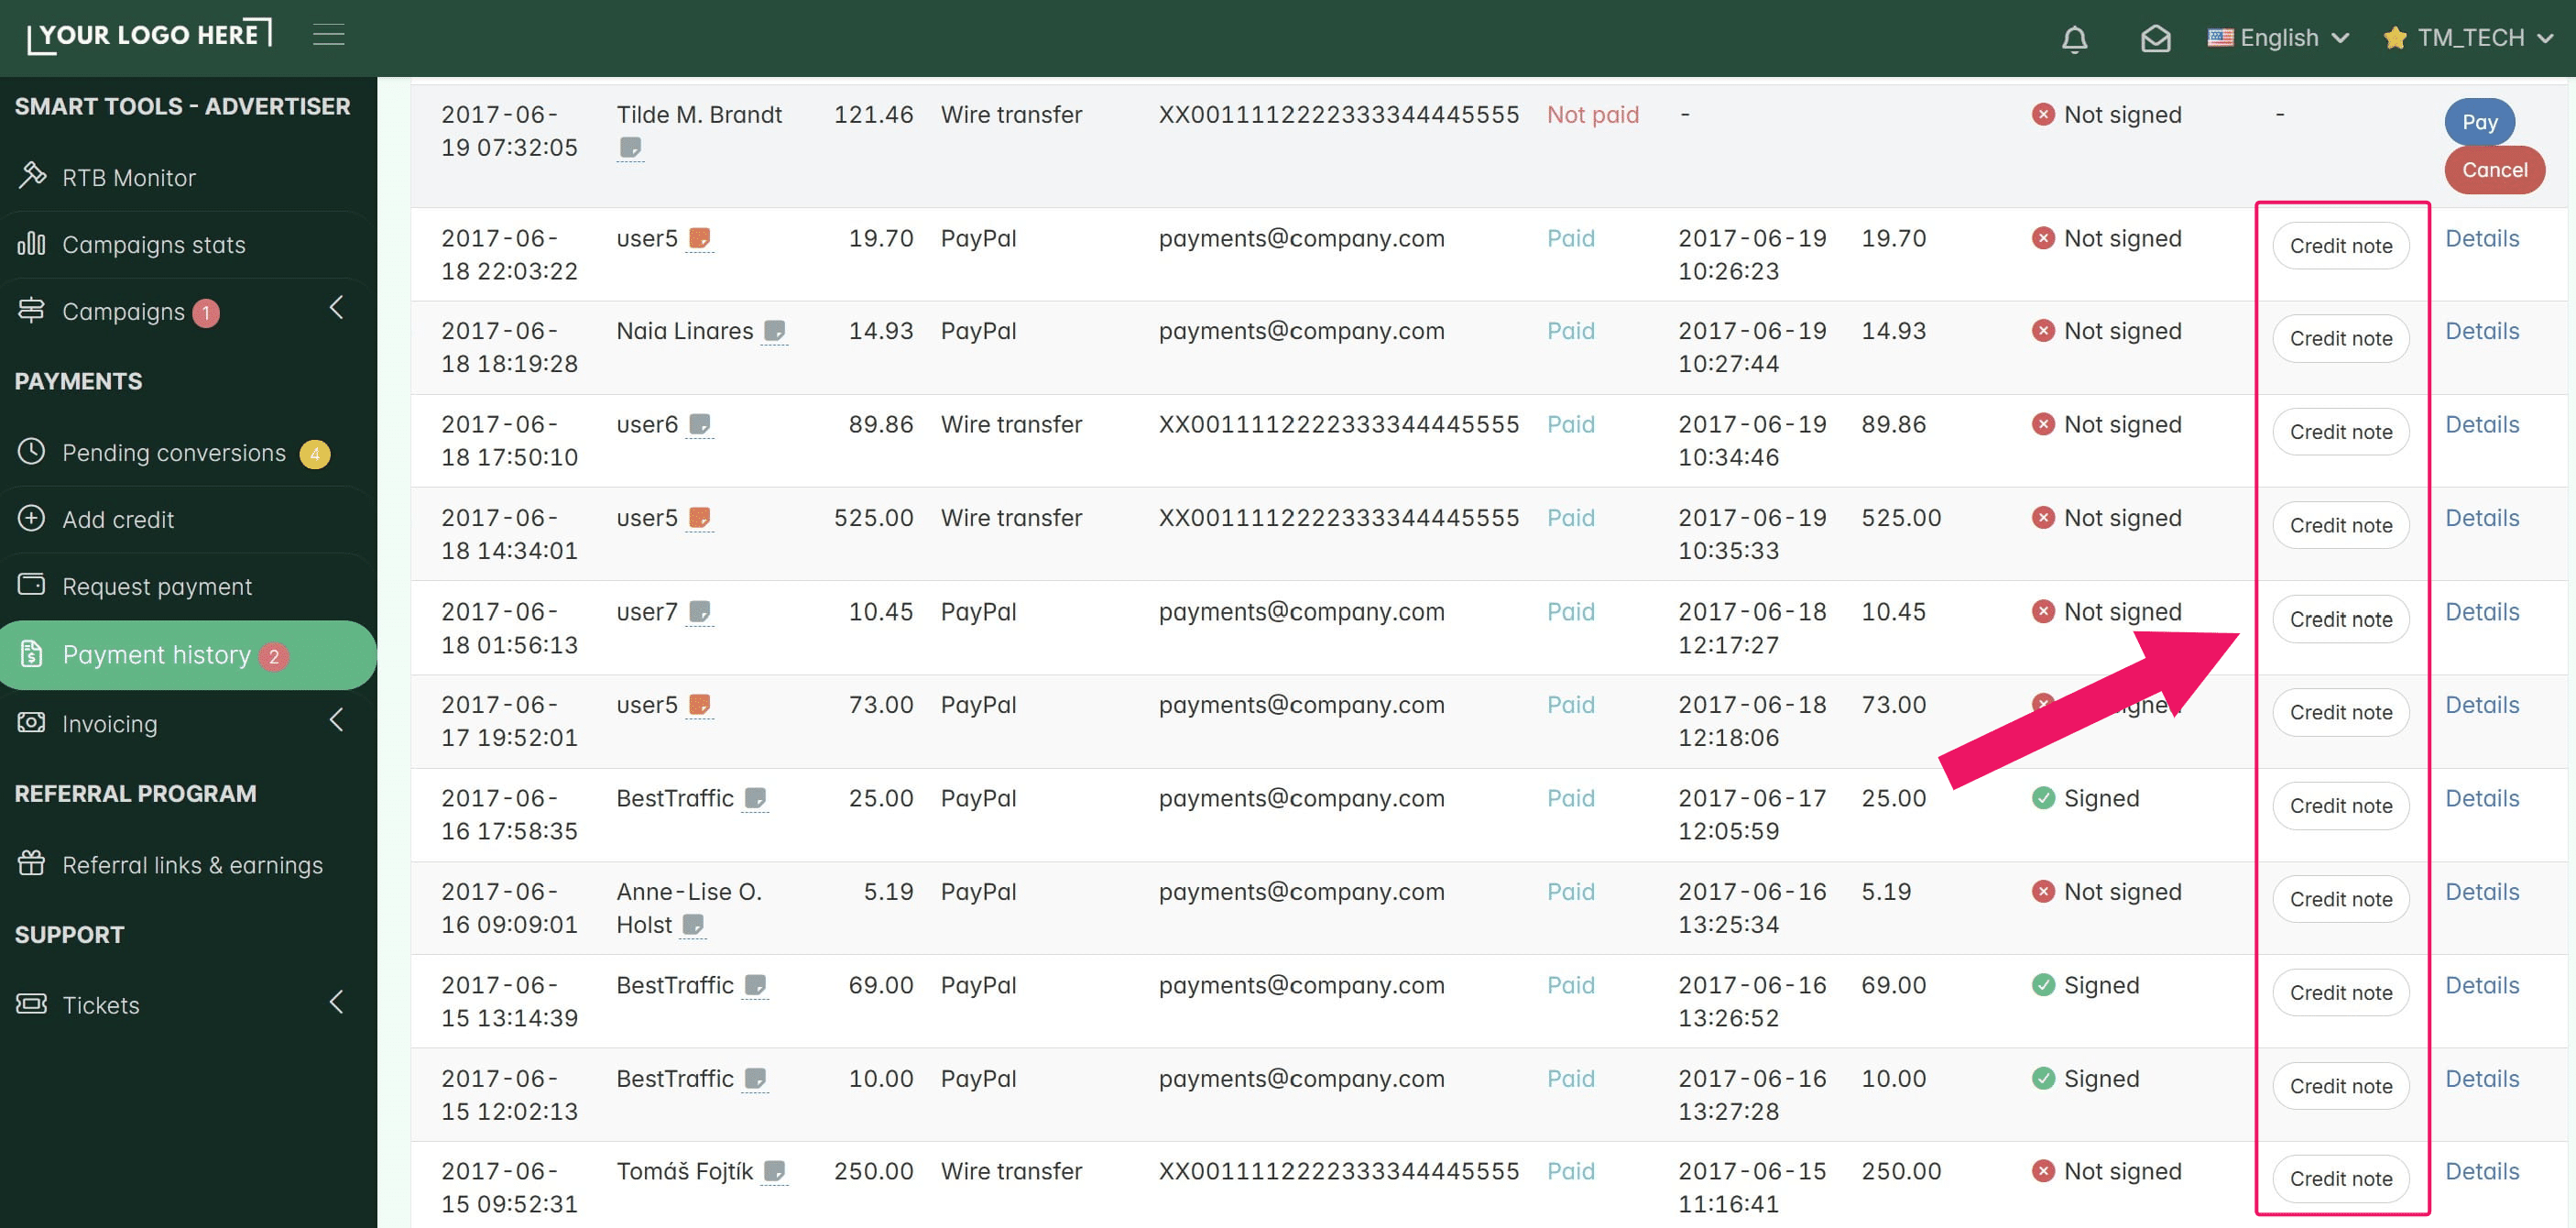
Like in this example
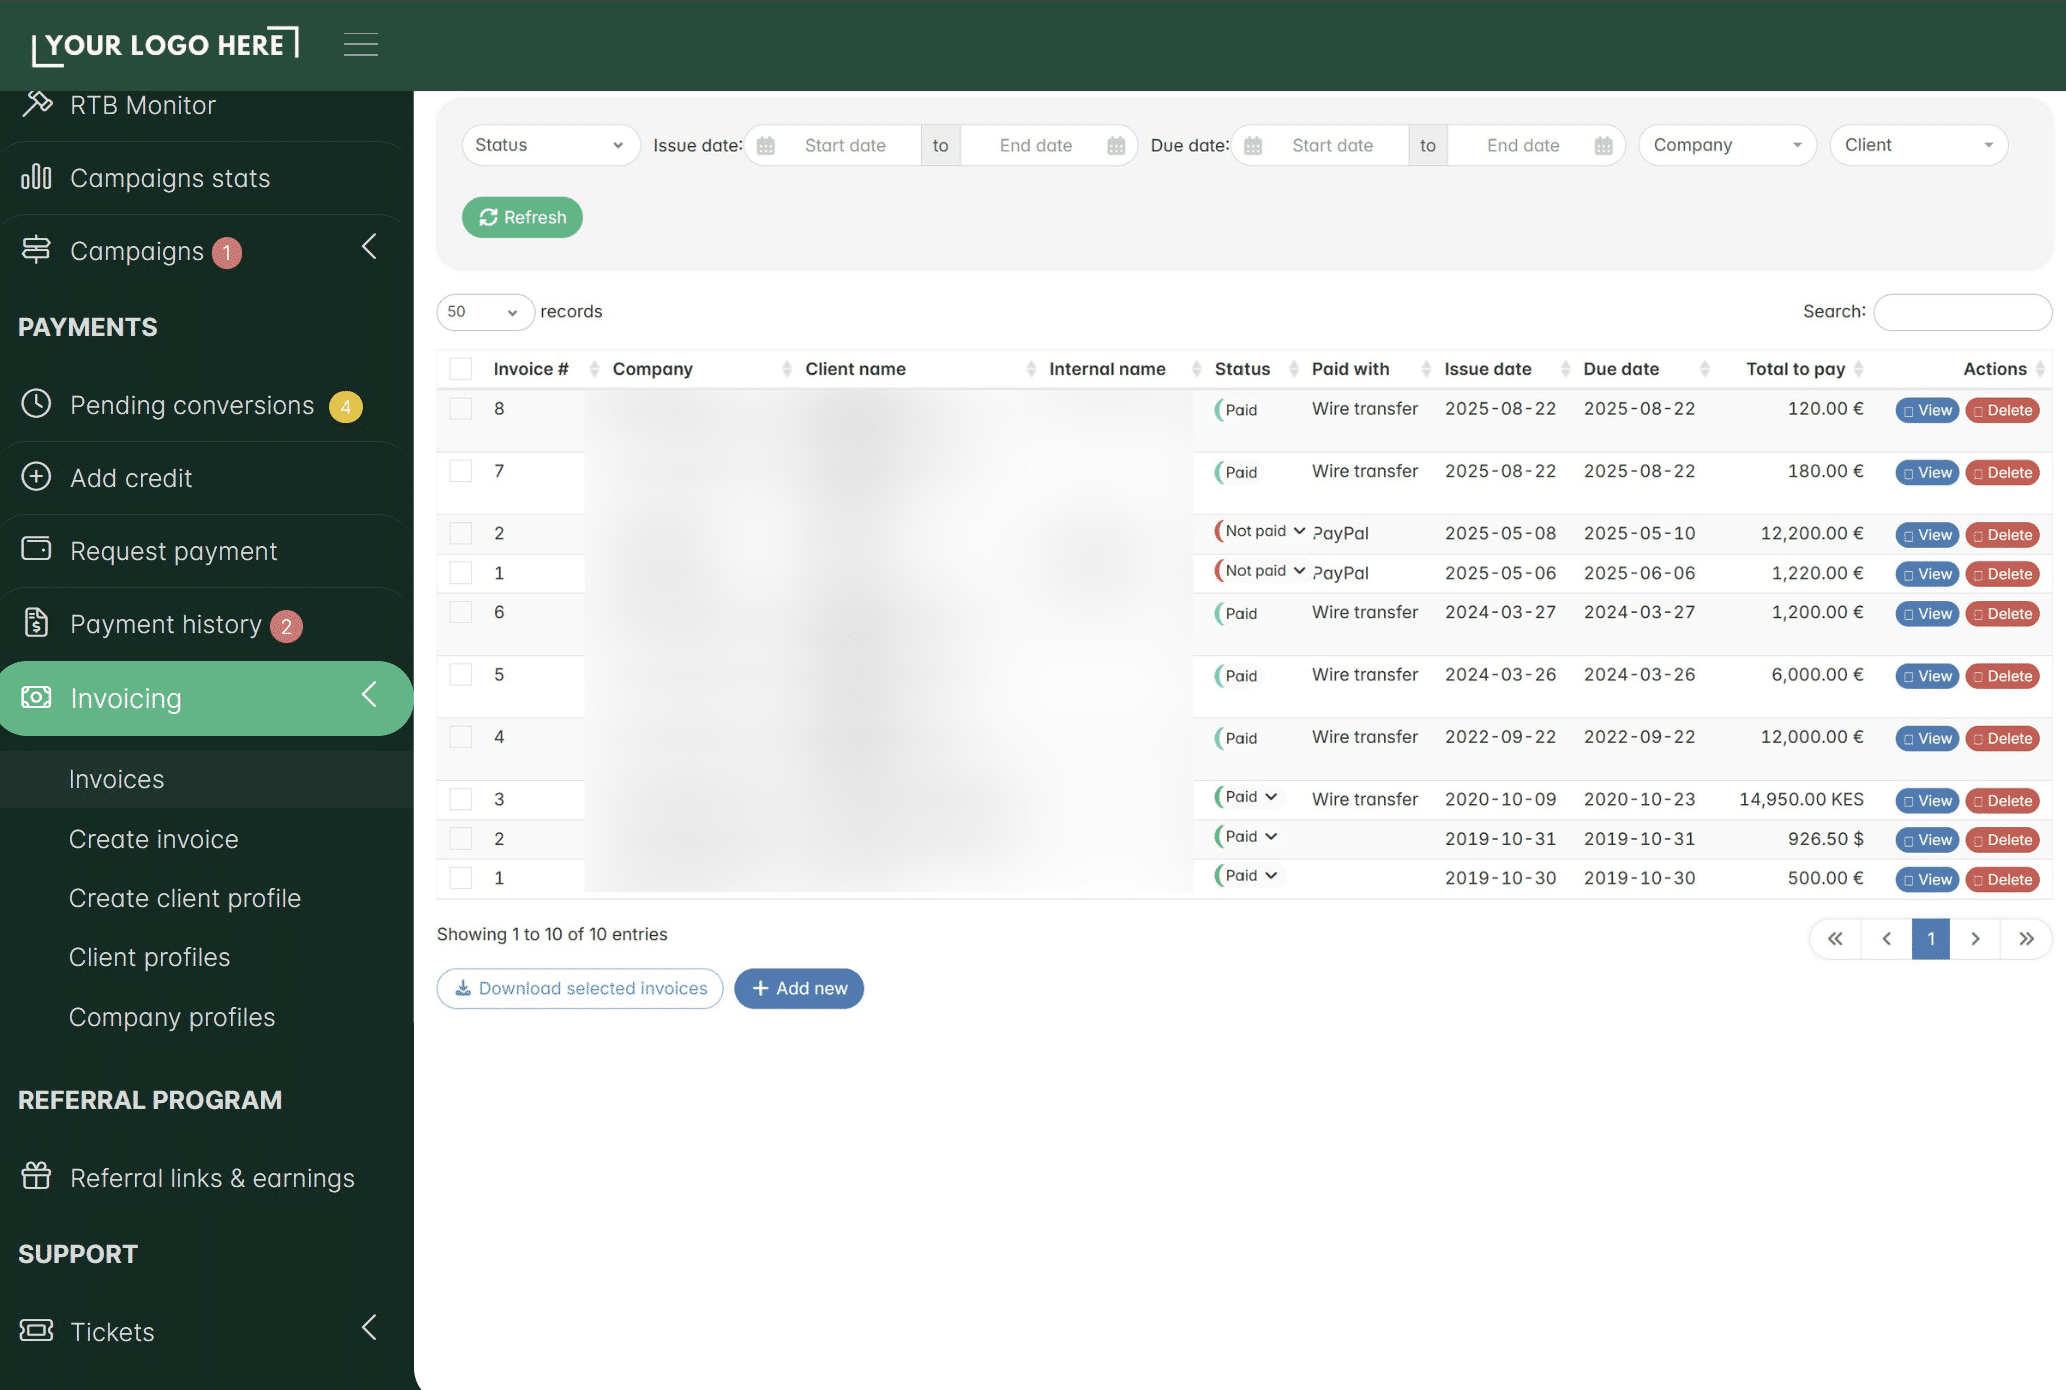
The same company details will also be used to auto-generate invoices once an advertiser loads funds into their account (prepay), or every time you generate an invoice for an external partner using the invoicing feature. This feature is located in the left menu of your Admin Panel → Payments → Invoicing (if you choose to use either of these two features).
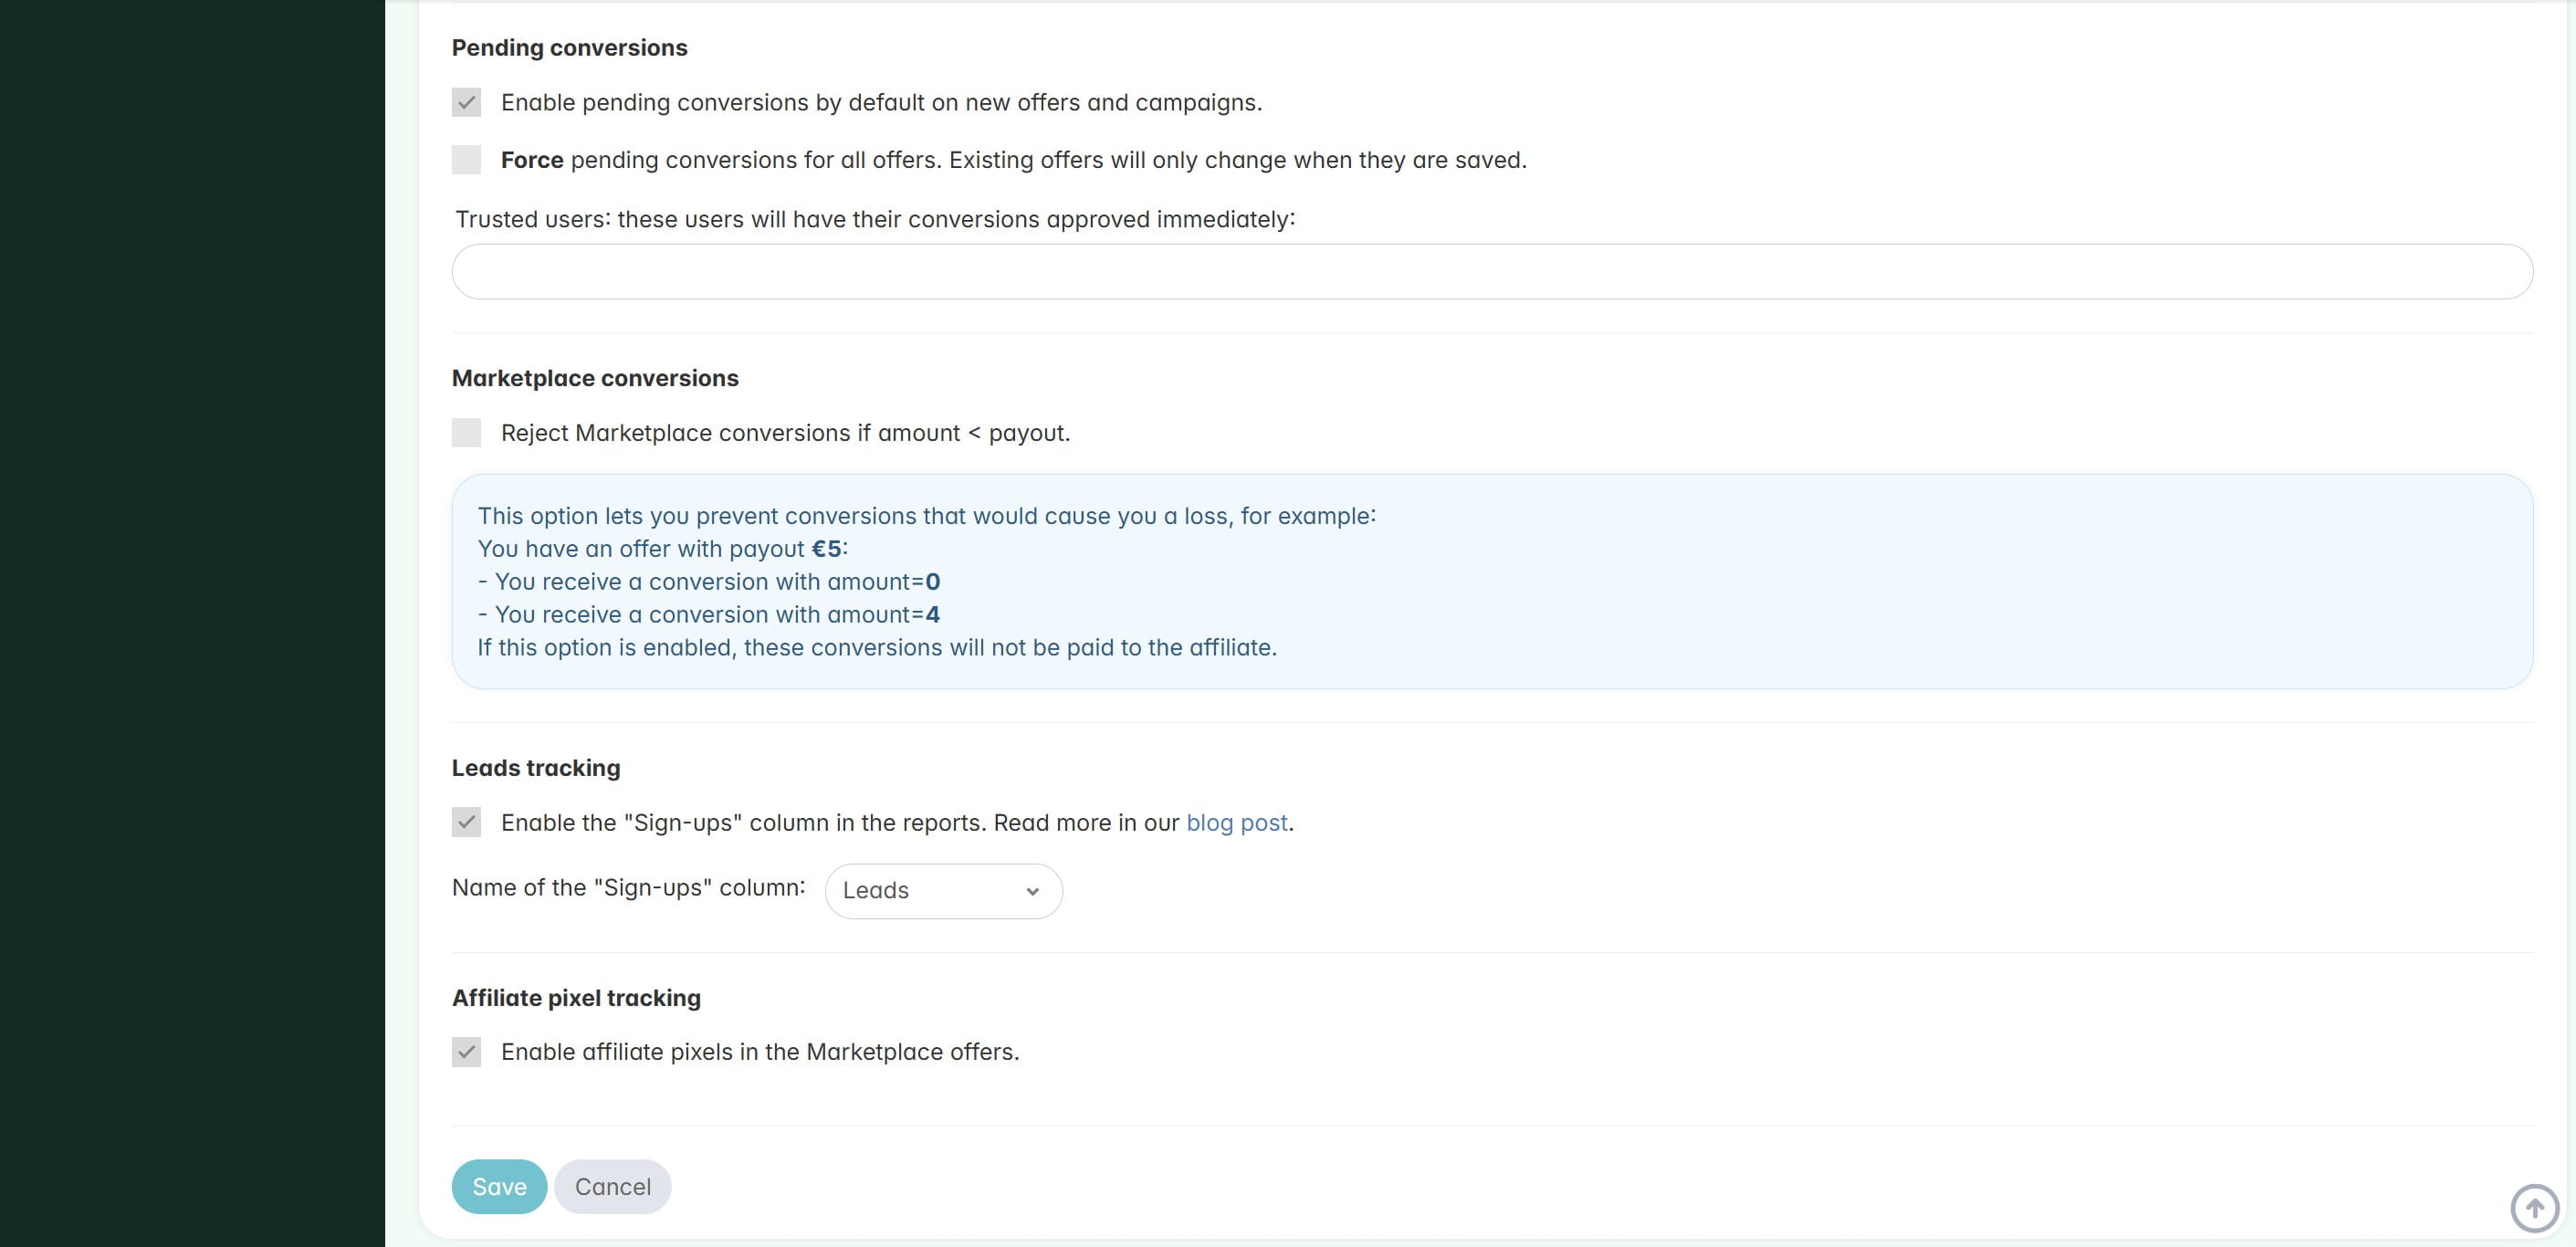
Pending Conversions: Enable this if you want all conversions to require manual approval by default. This is a global setting that applies to all new offers you create. You can still change this for specific offers later in the individual offer settings section.
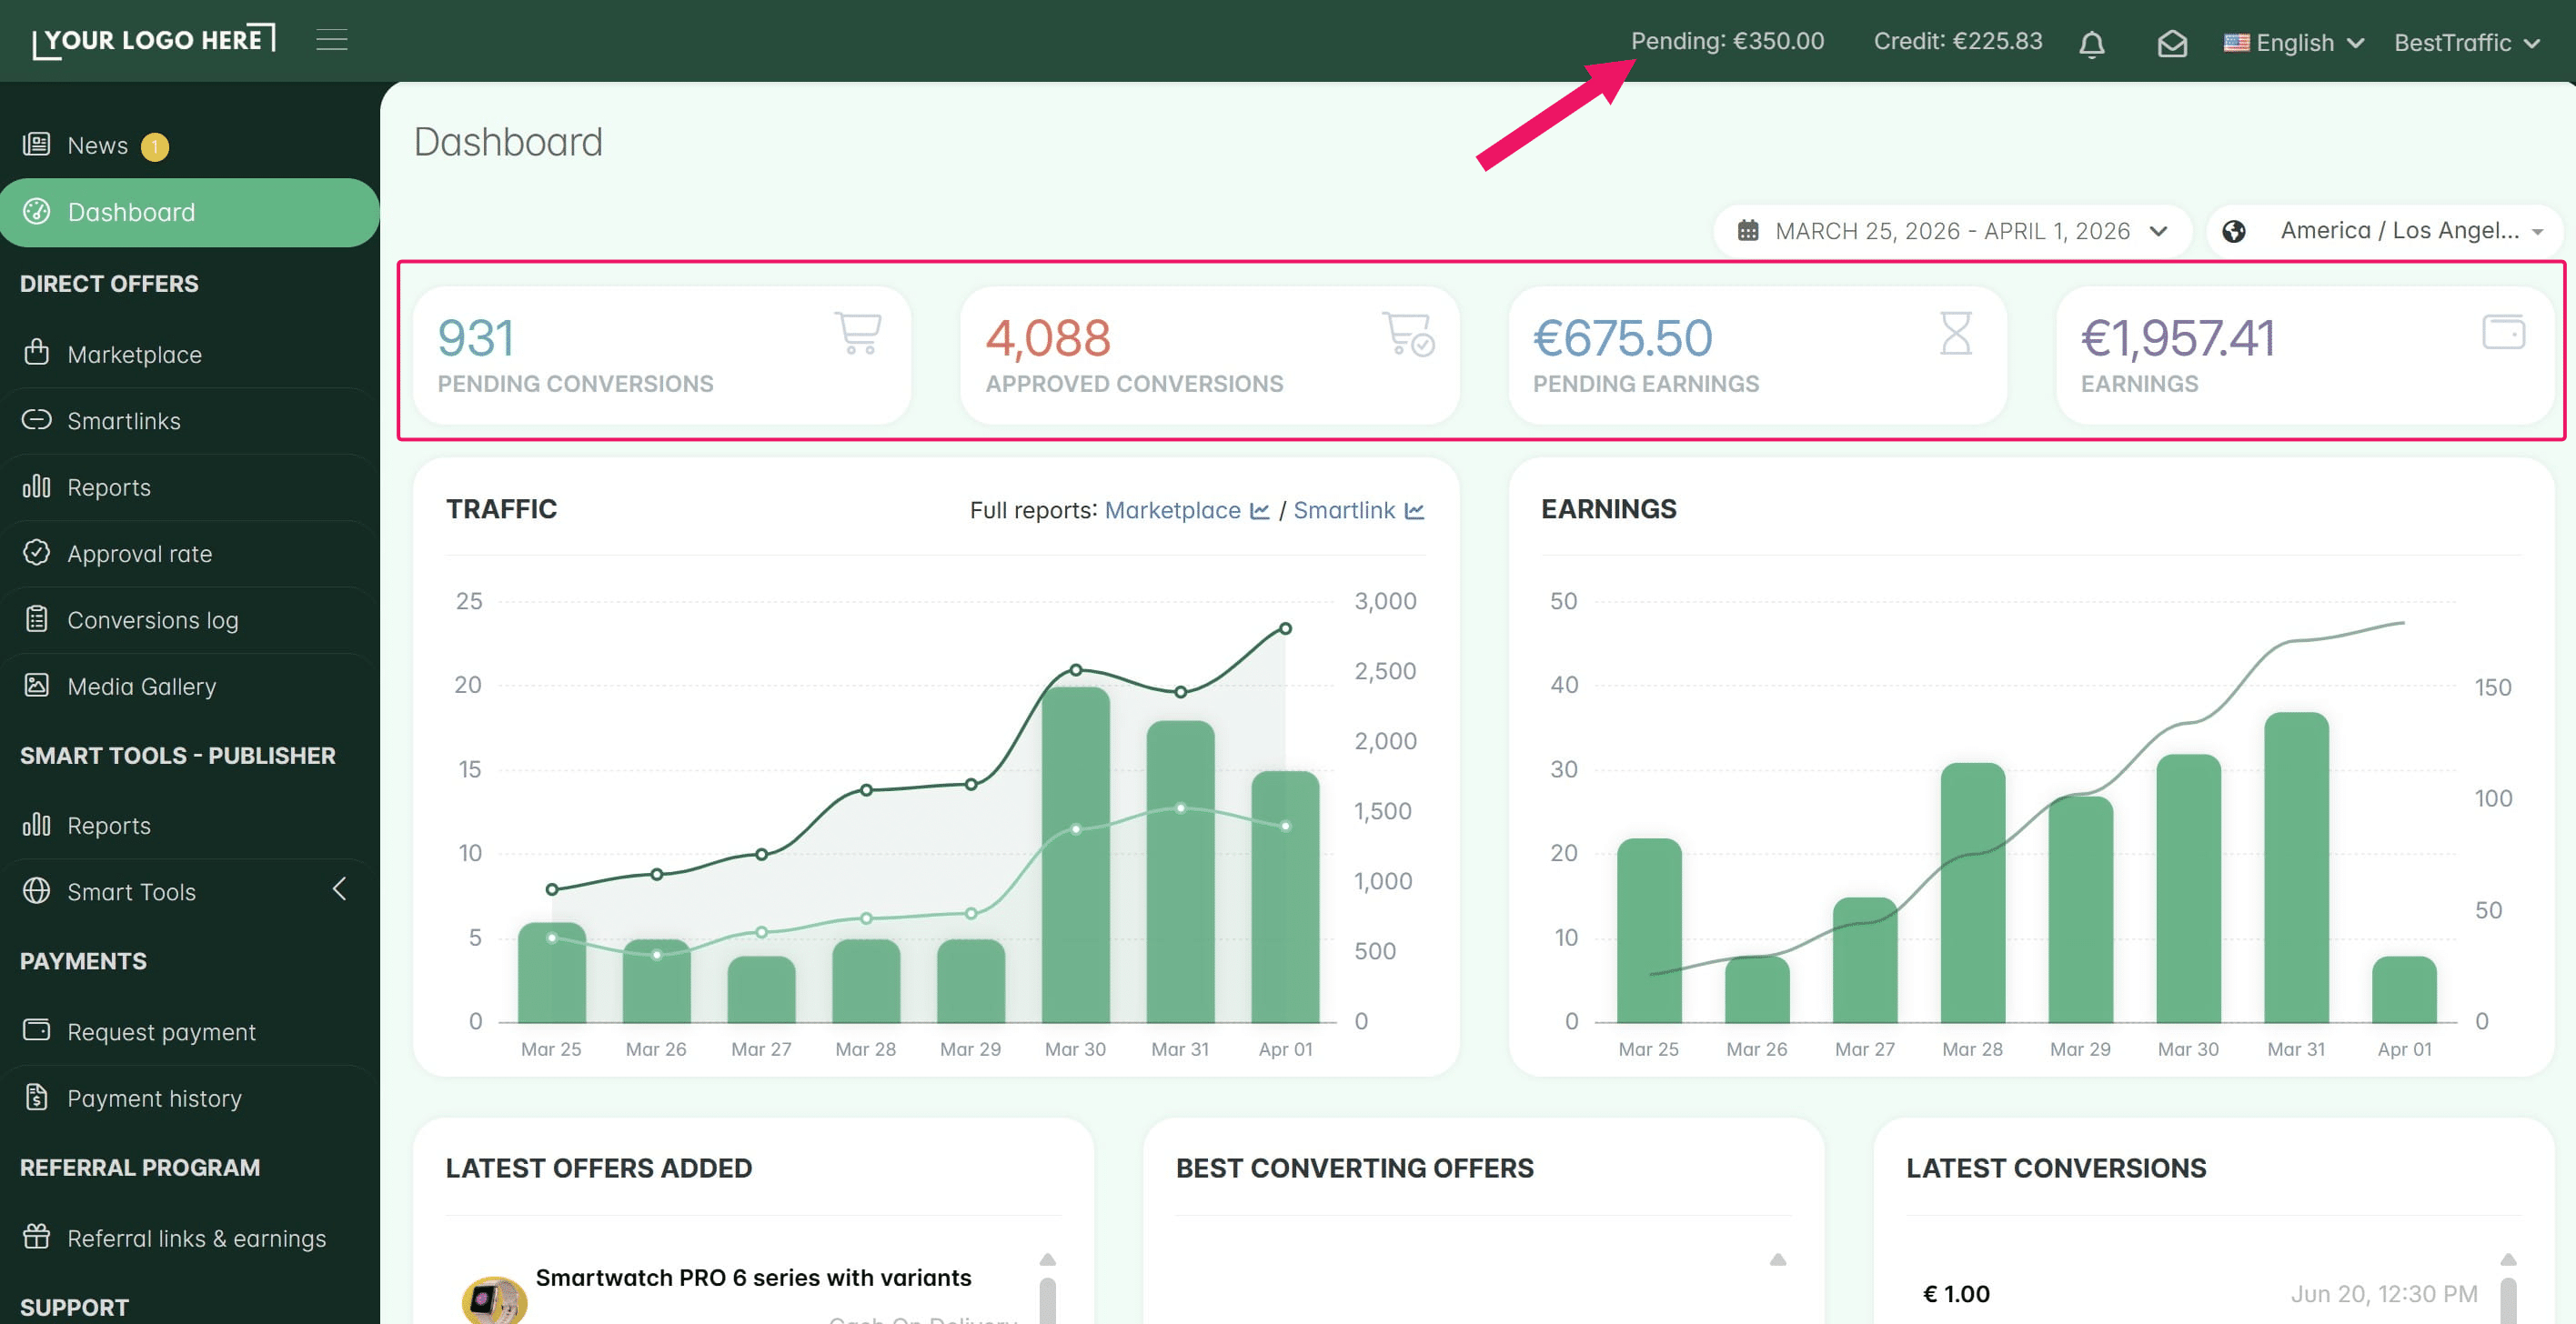
Info: If this option is active, affiliates will see two separate balances in their dashboard: a Pending balance and an Approved balance.
4. User Registration Experience (Affiliate/Advertiser Onboarding):
This section covers the onboarding process for your partners. From here, you can control compliance, customize registration fields, and manage affiliate and advertiser legal agreements. To start, open the System settings page again and access the Registration tab.
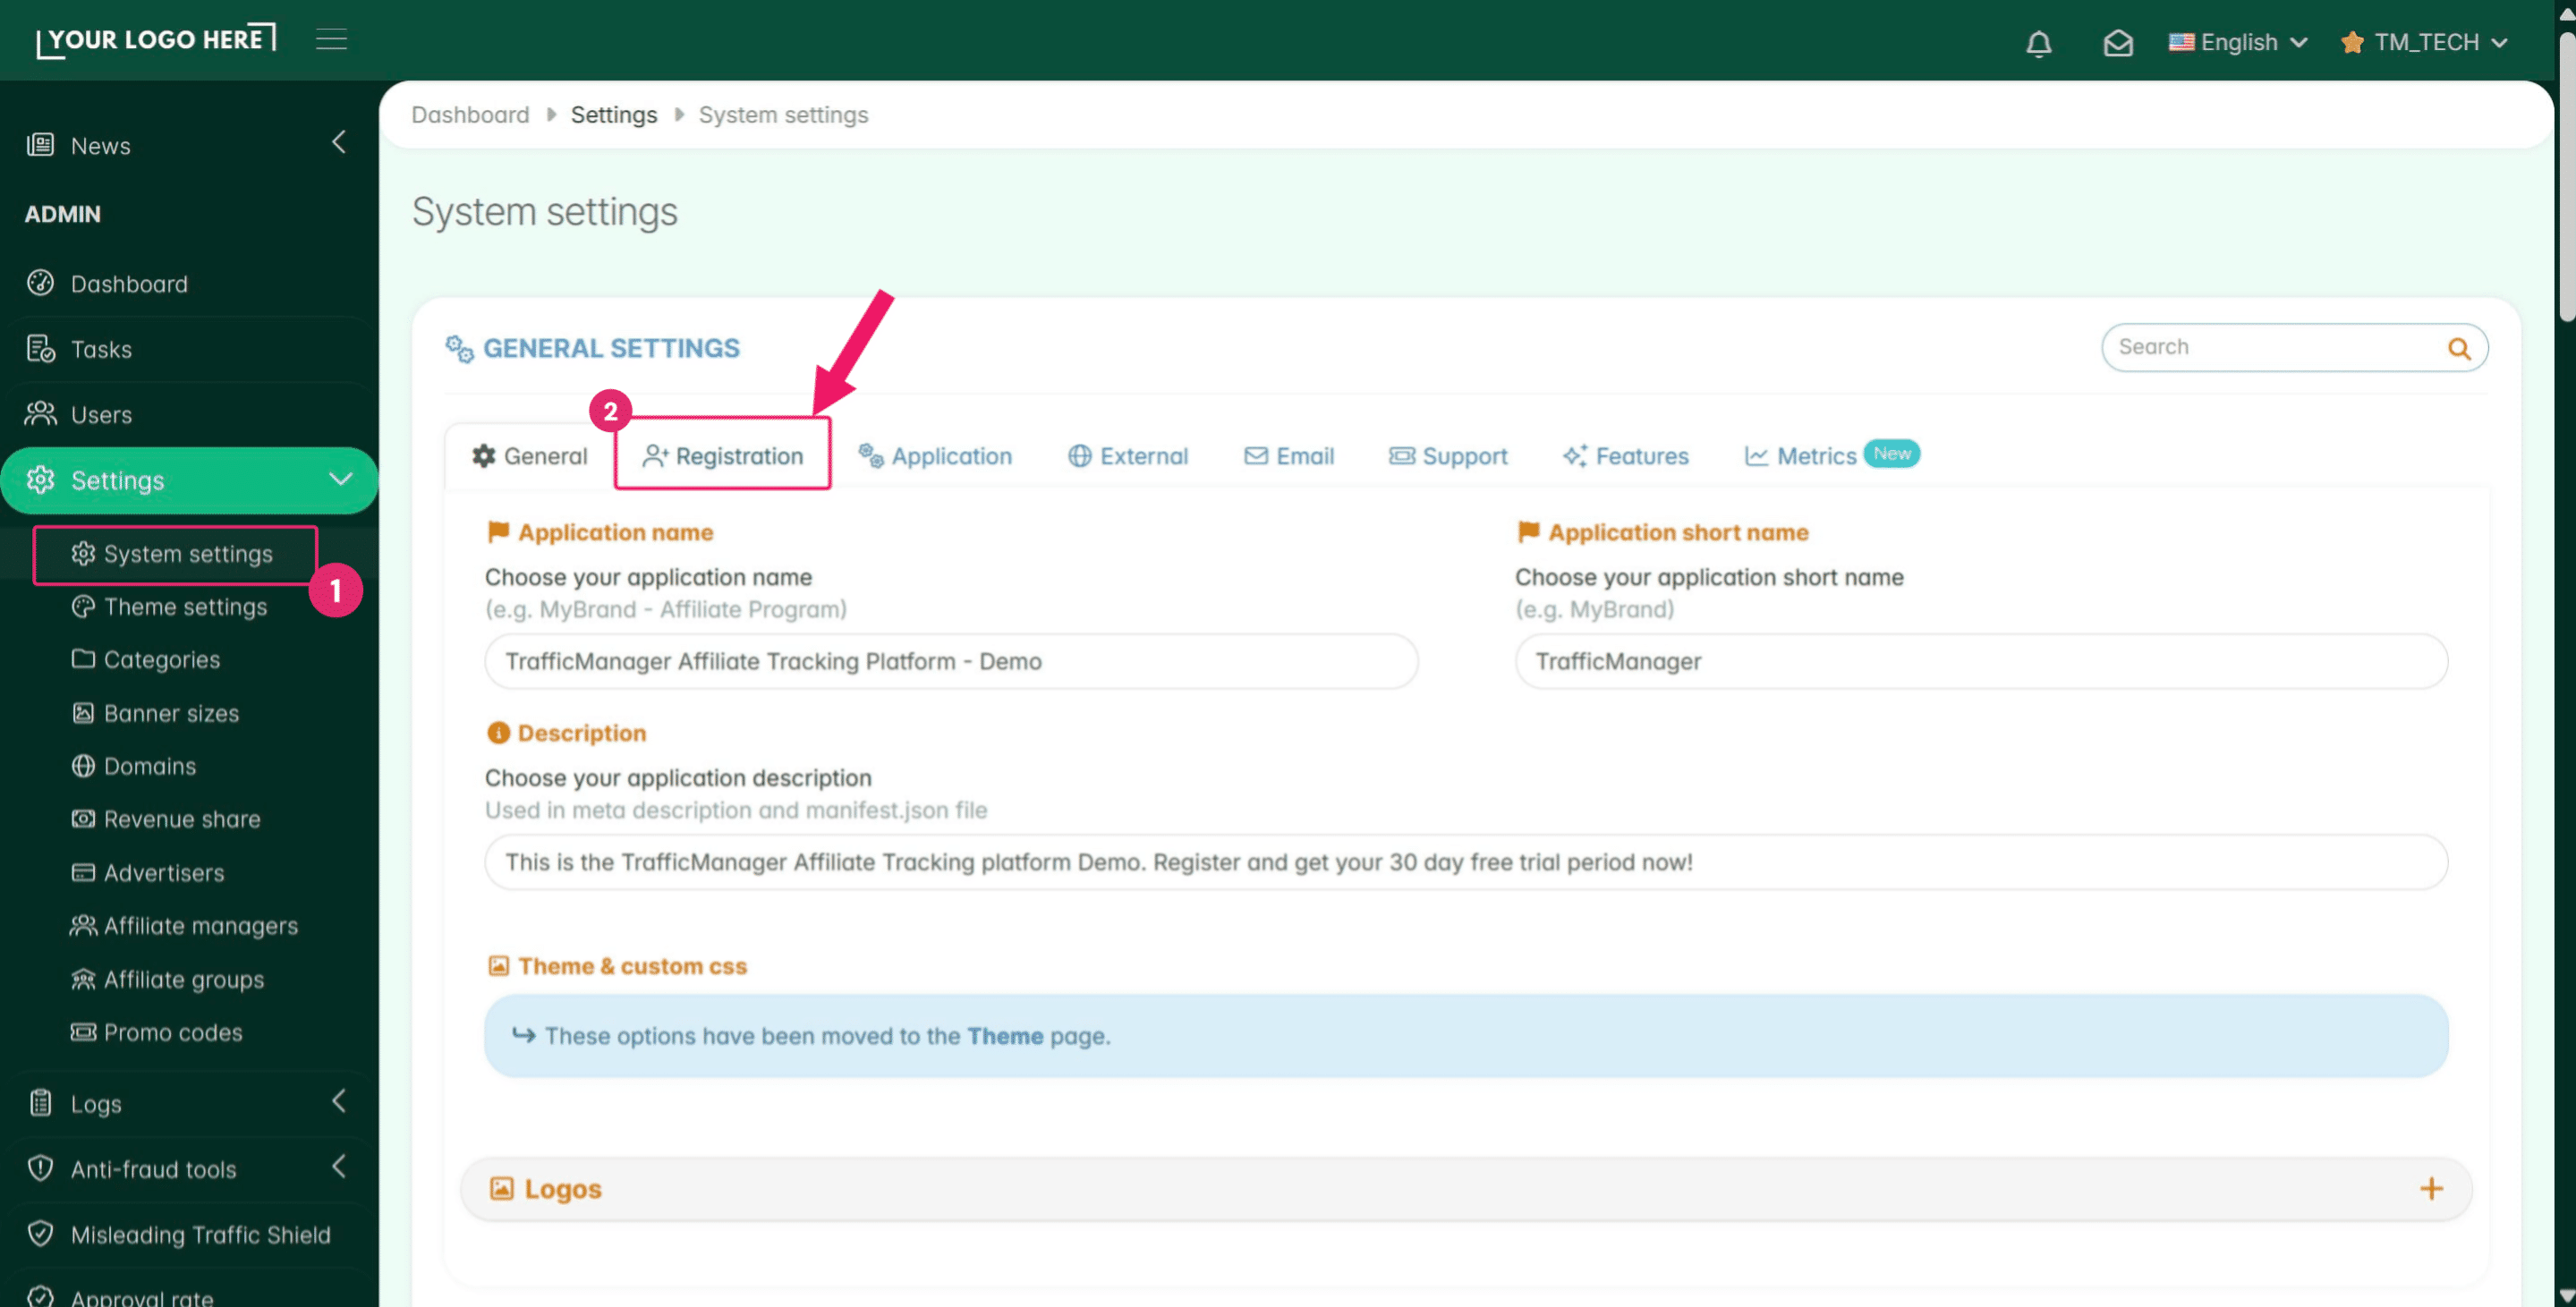
Here you can:
- change your user registration policy,
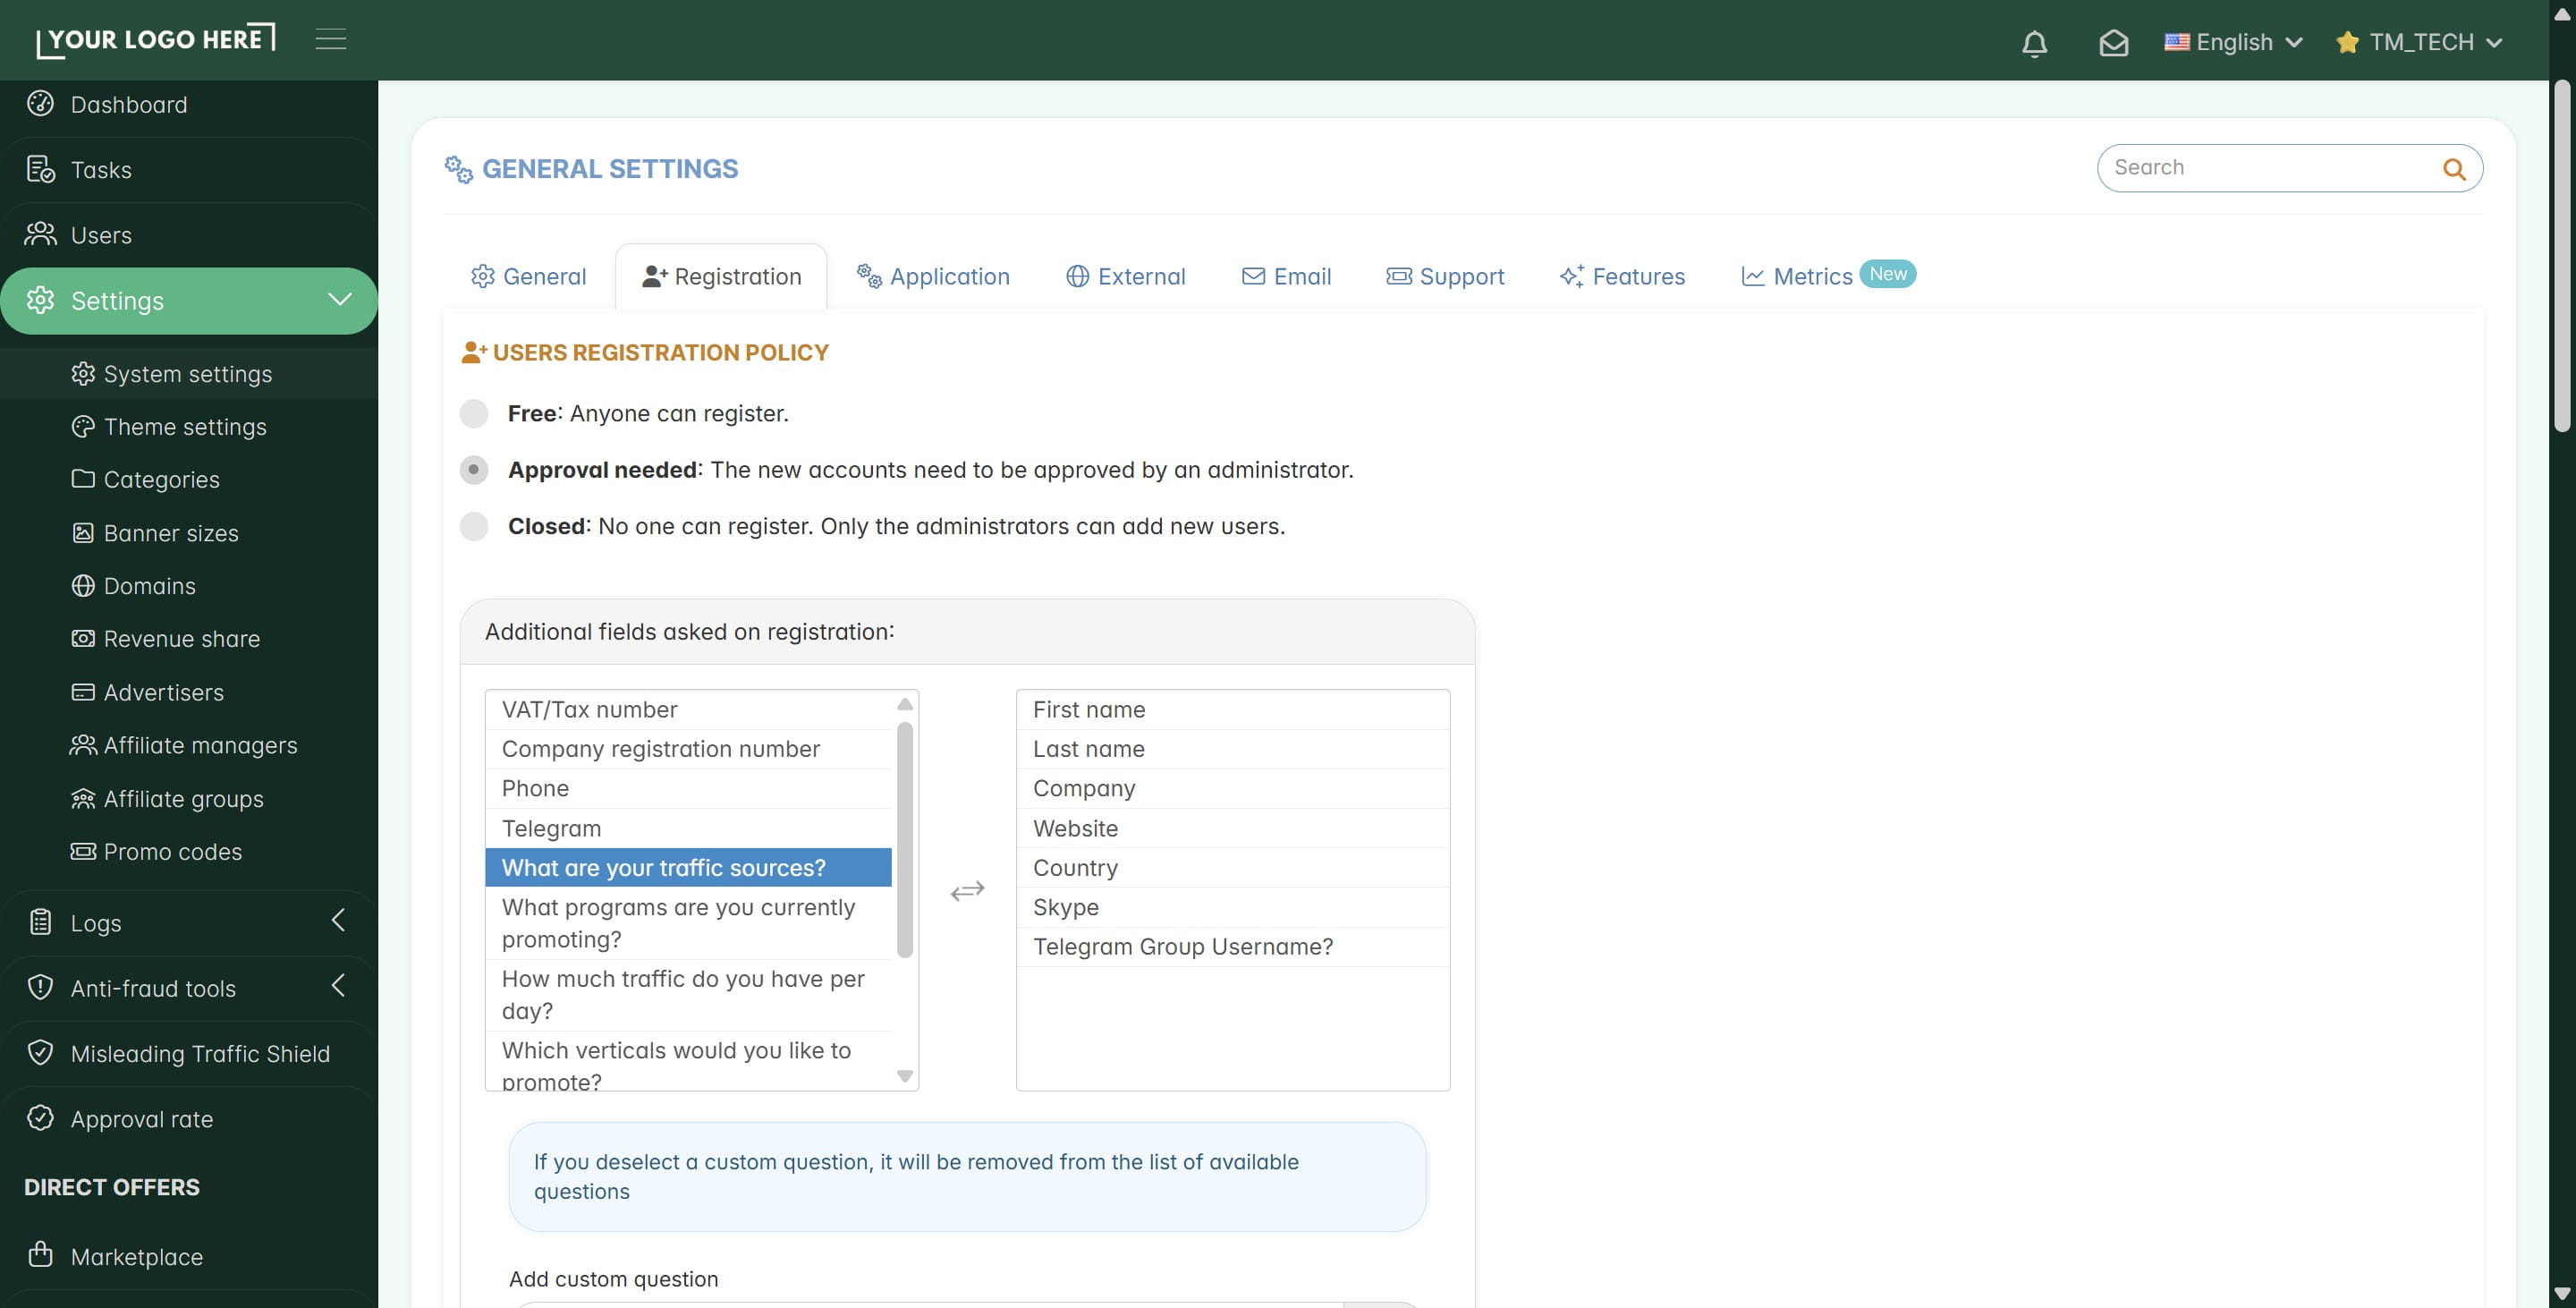
- add new fields to the registration/onboarding form to collect extra information, such as social media handles, specific traffic source details. etc.,
- create custom questions (if needed),
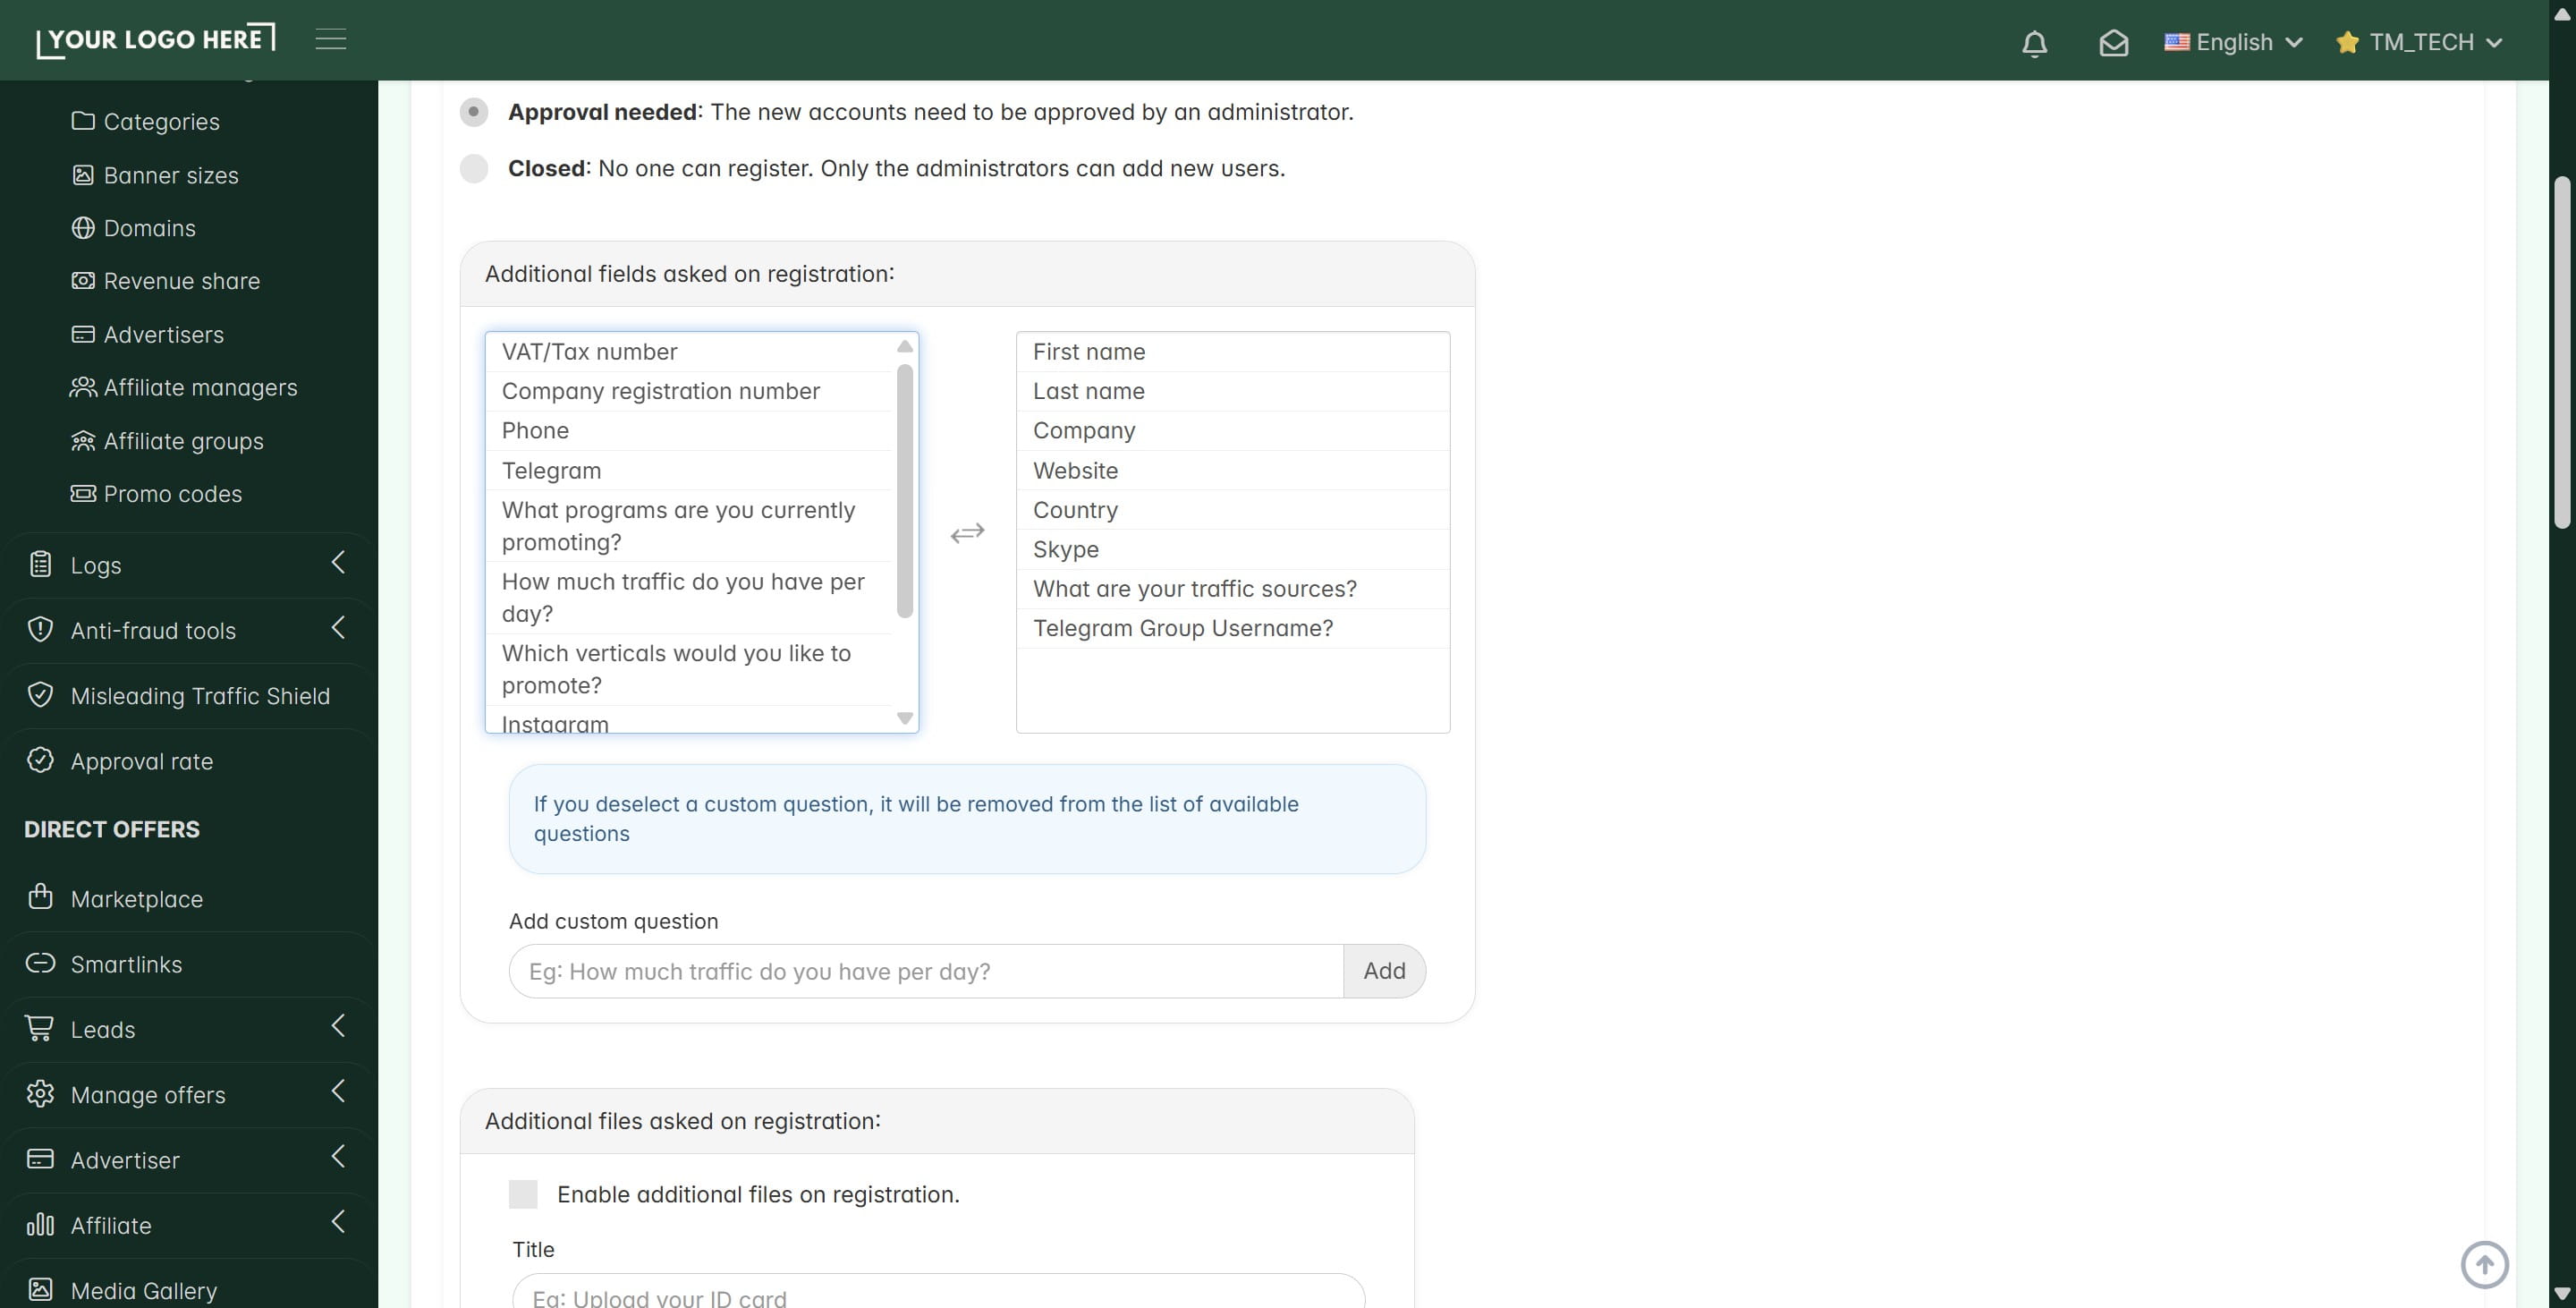
- enable File Upload fields for better compliance, This option allows you to require documentation—such as ID cards, tax forms, or company certificates—directly during the registration process.
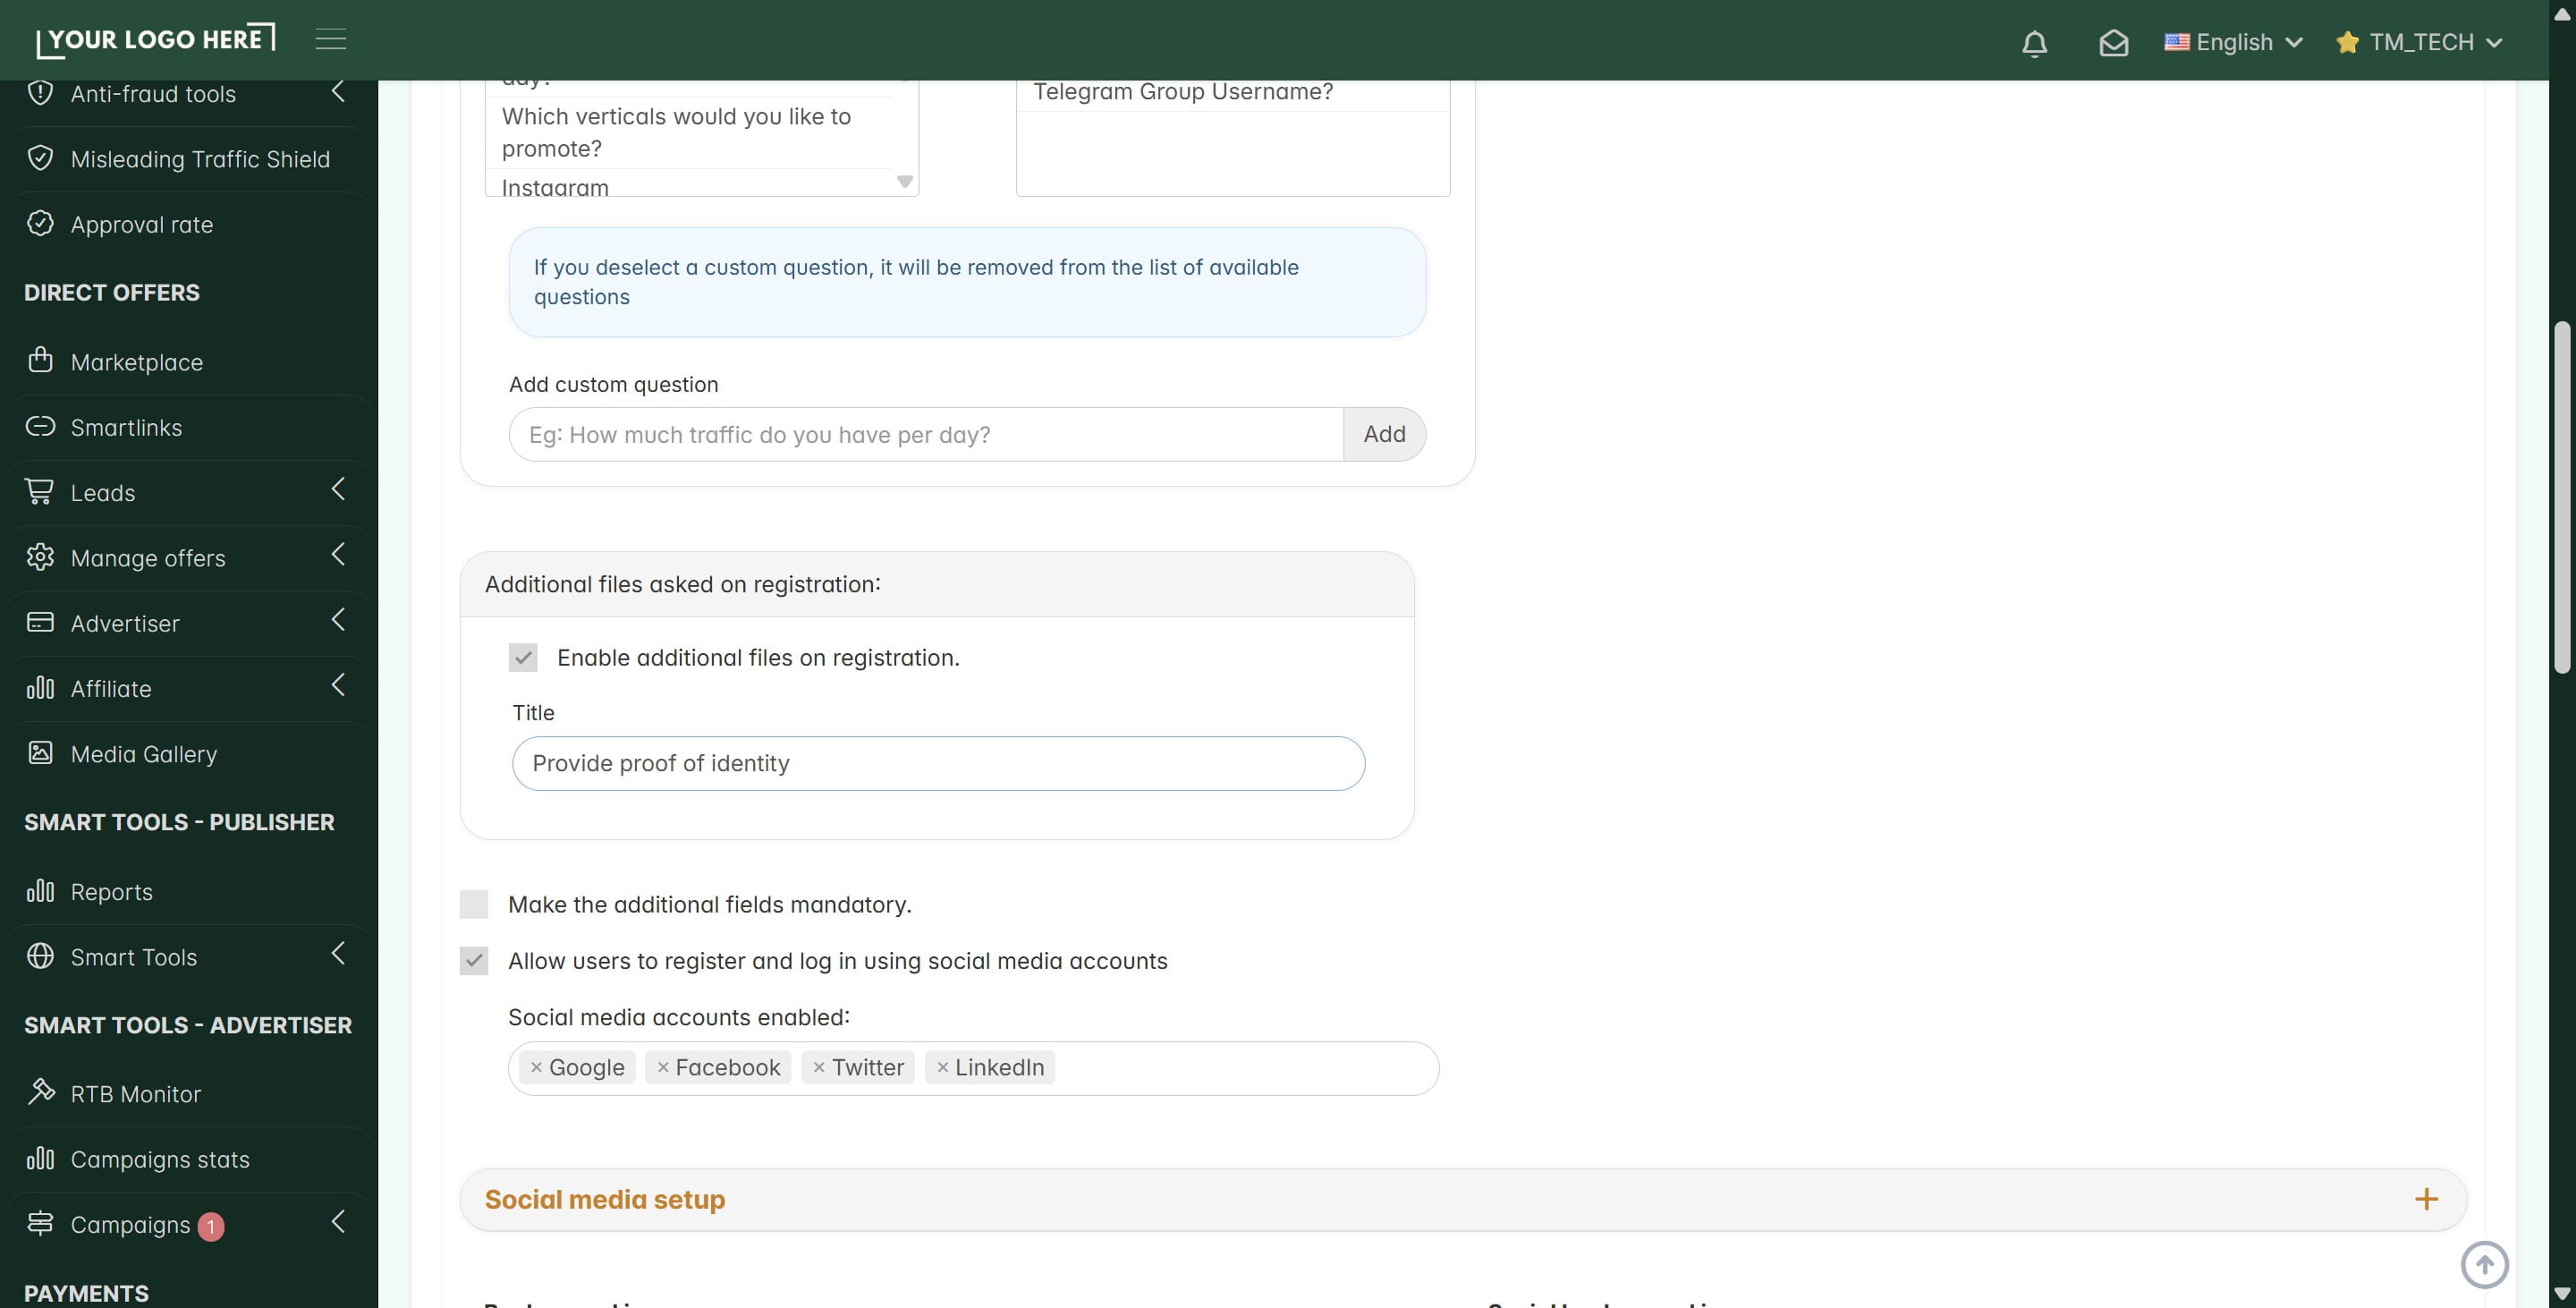
- configure registration and login using social media accounts,
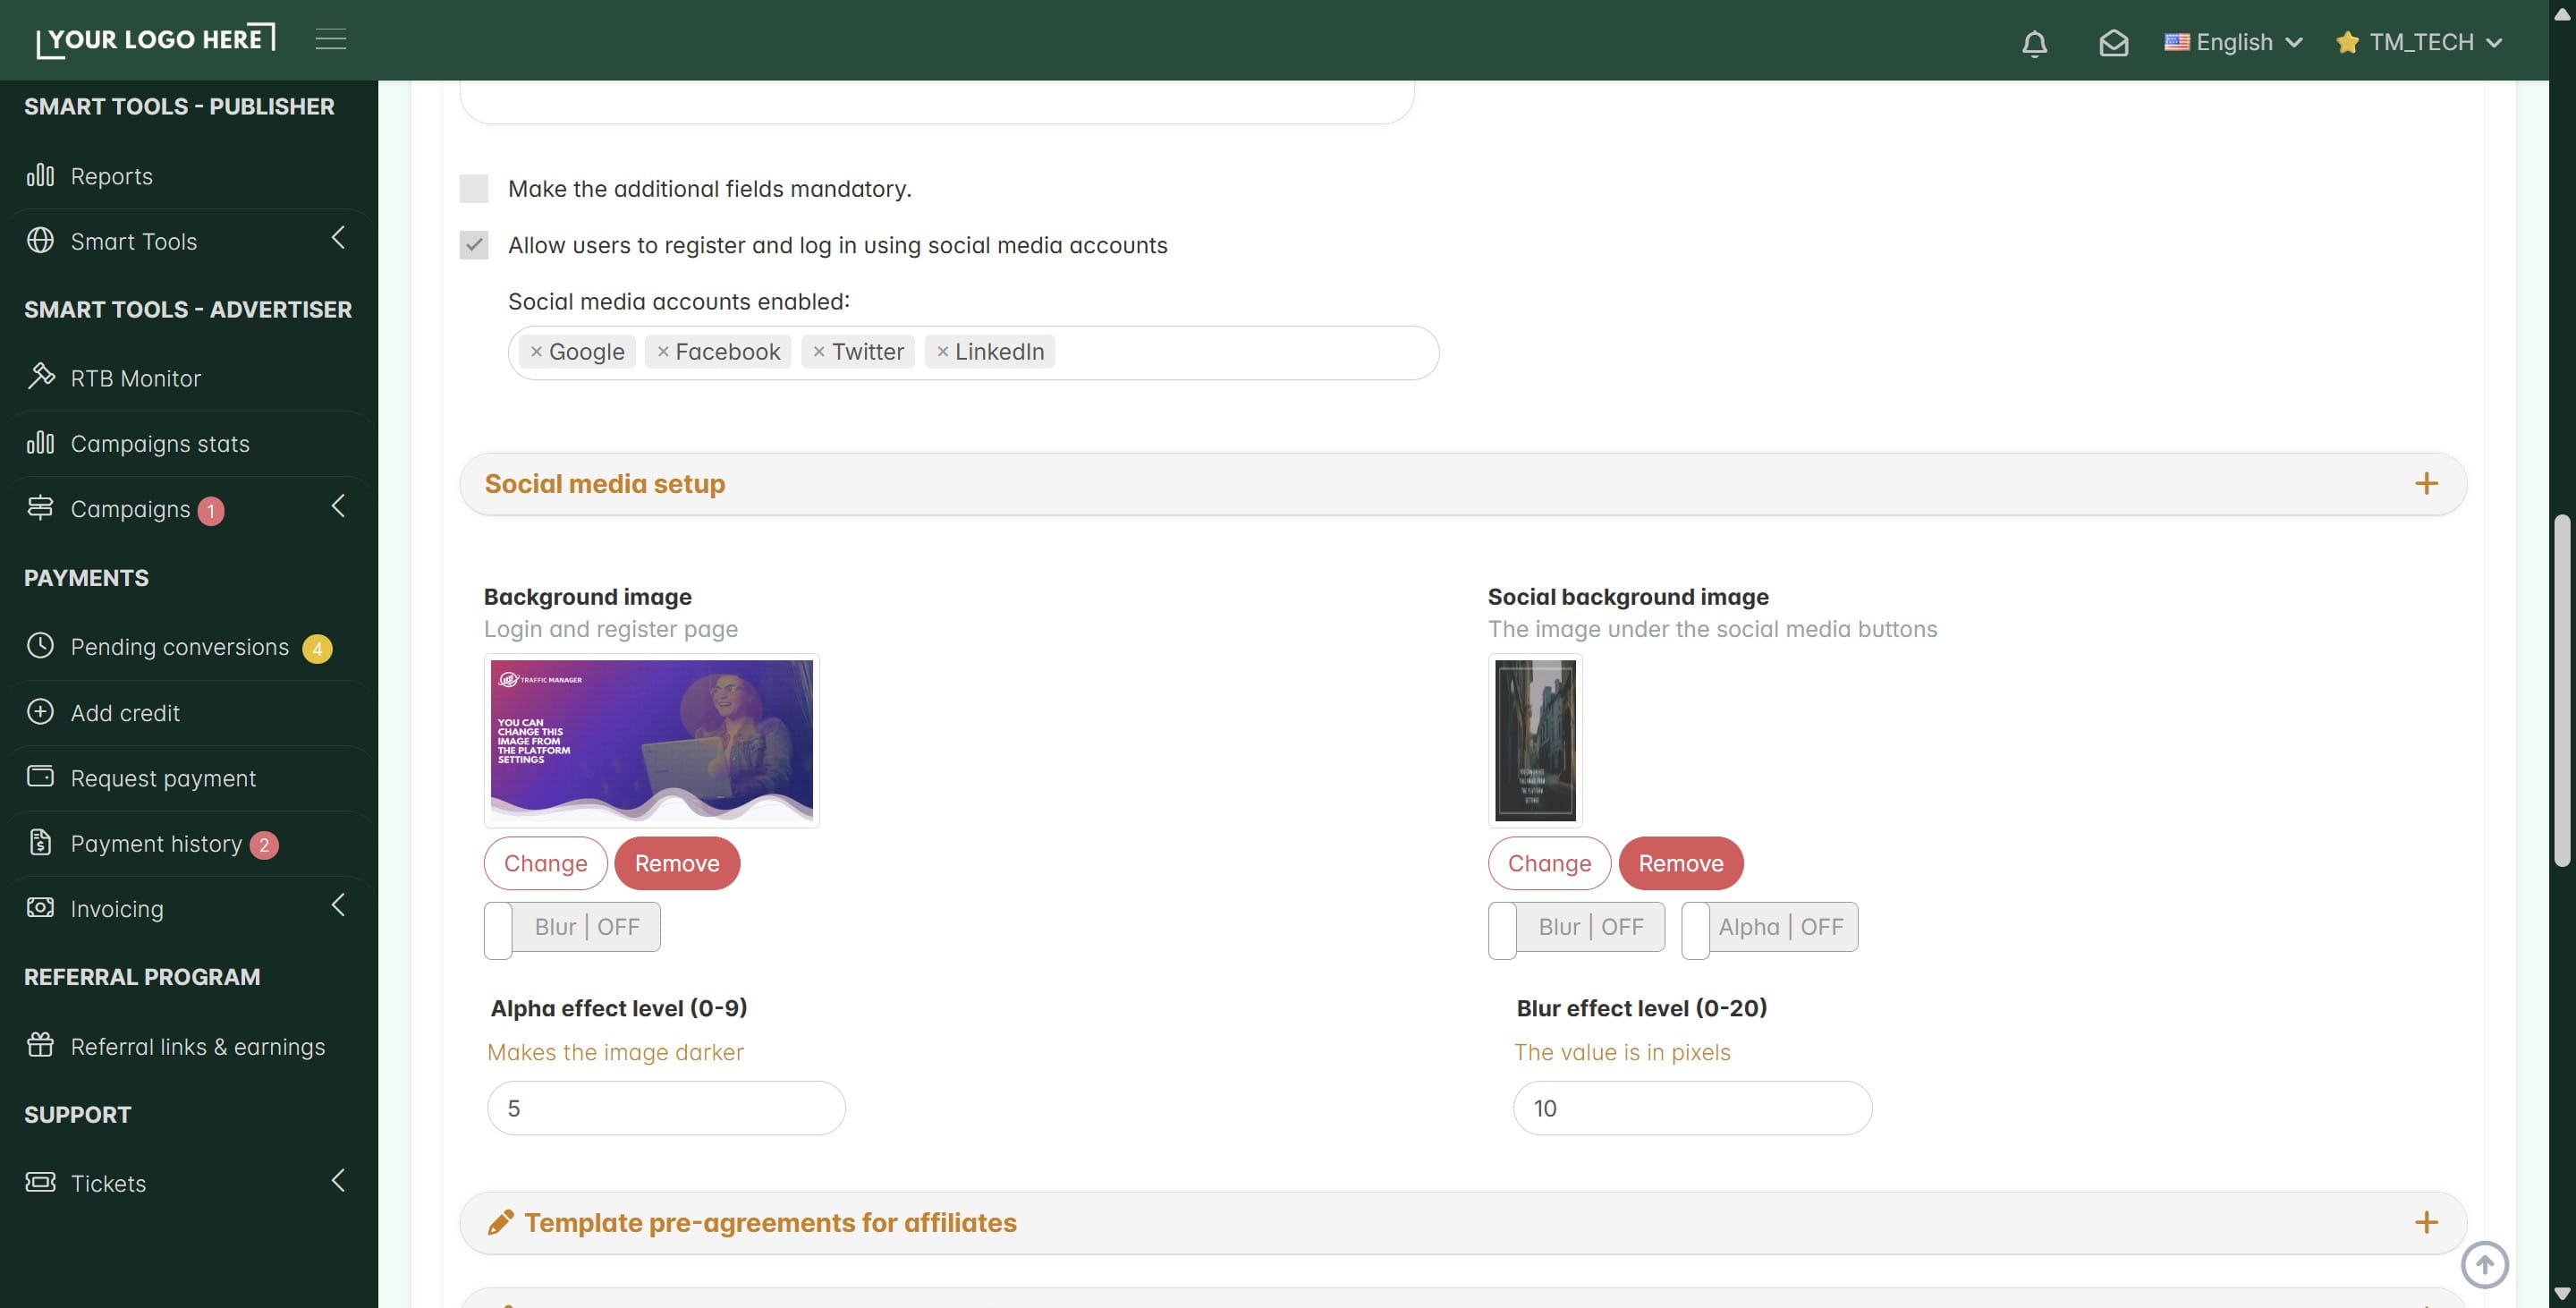
- and manage the onboarding agreements for affiliates and advertisers.
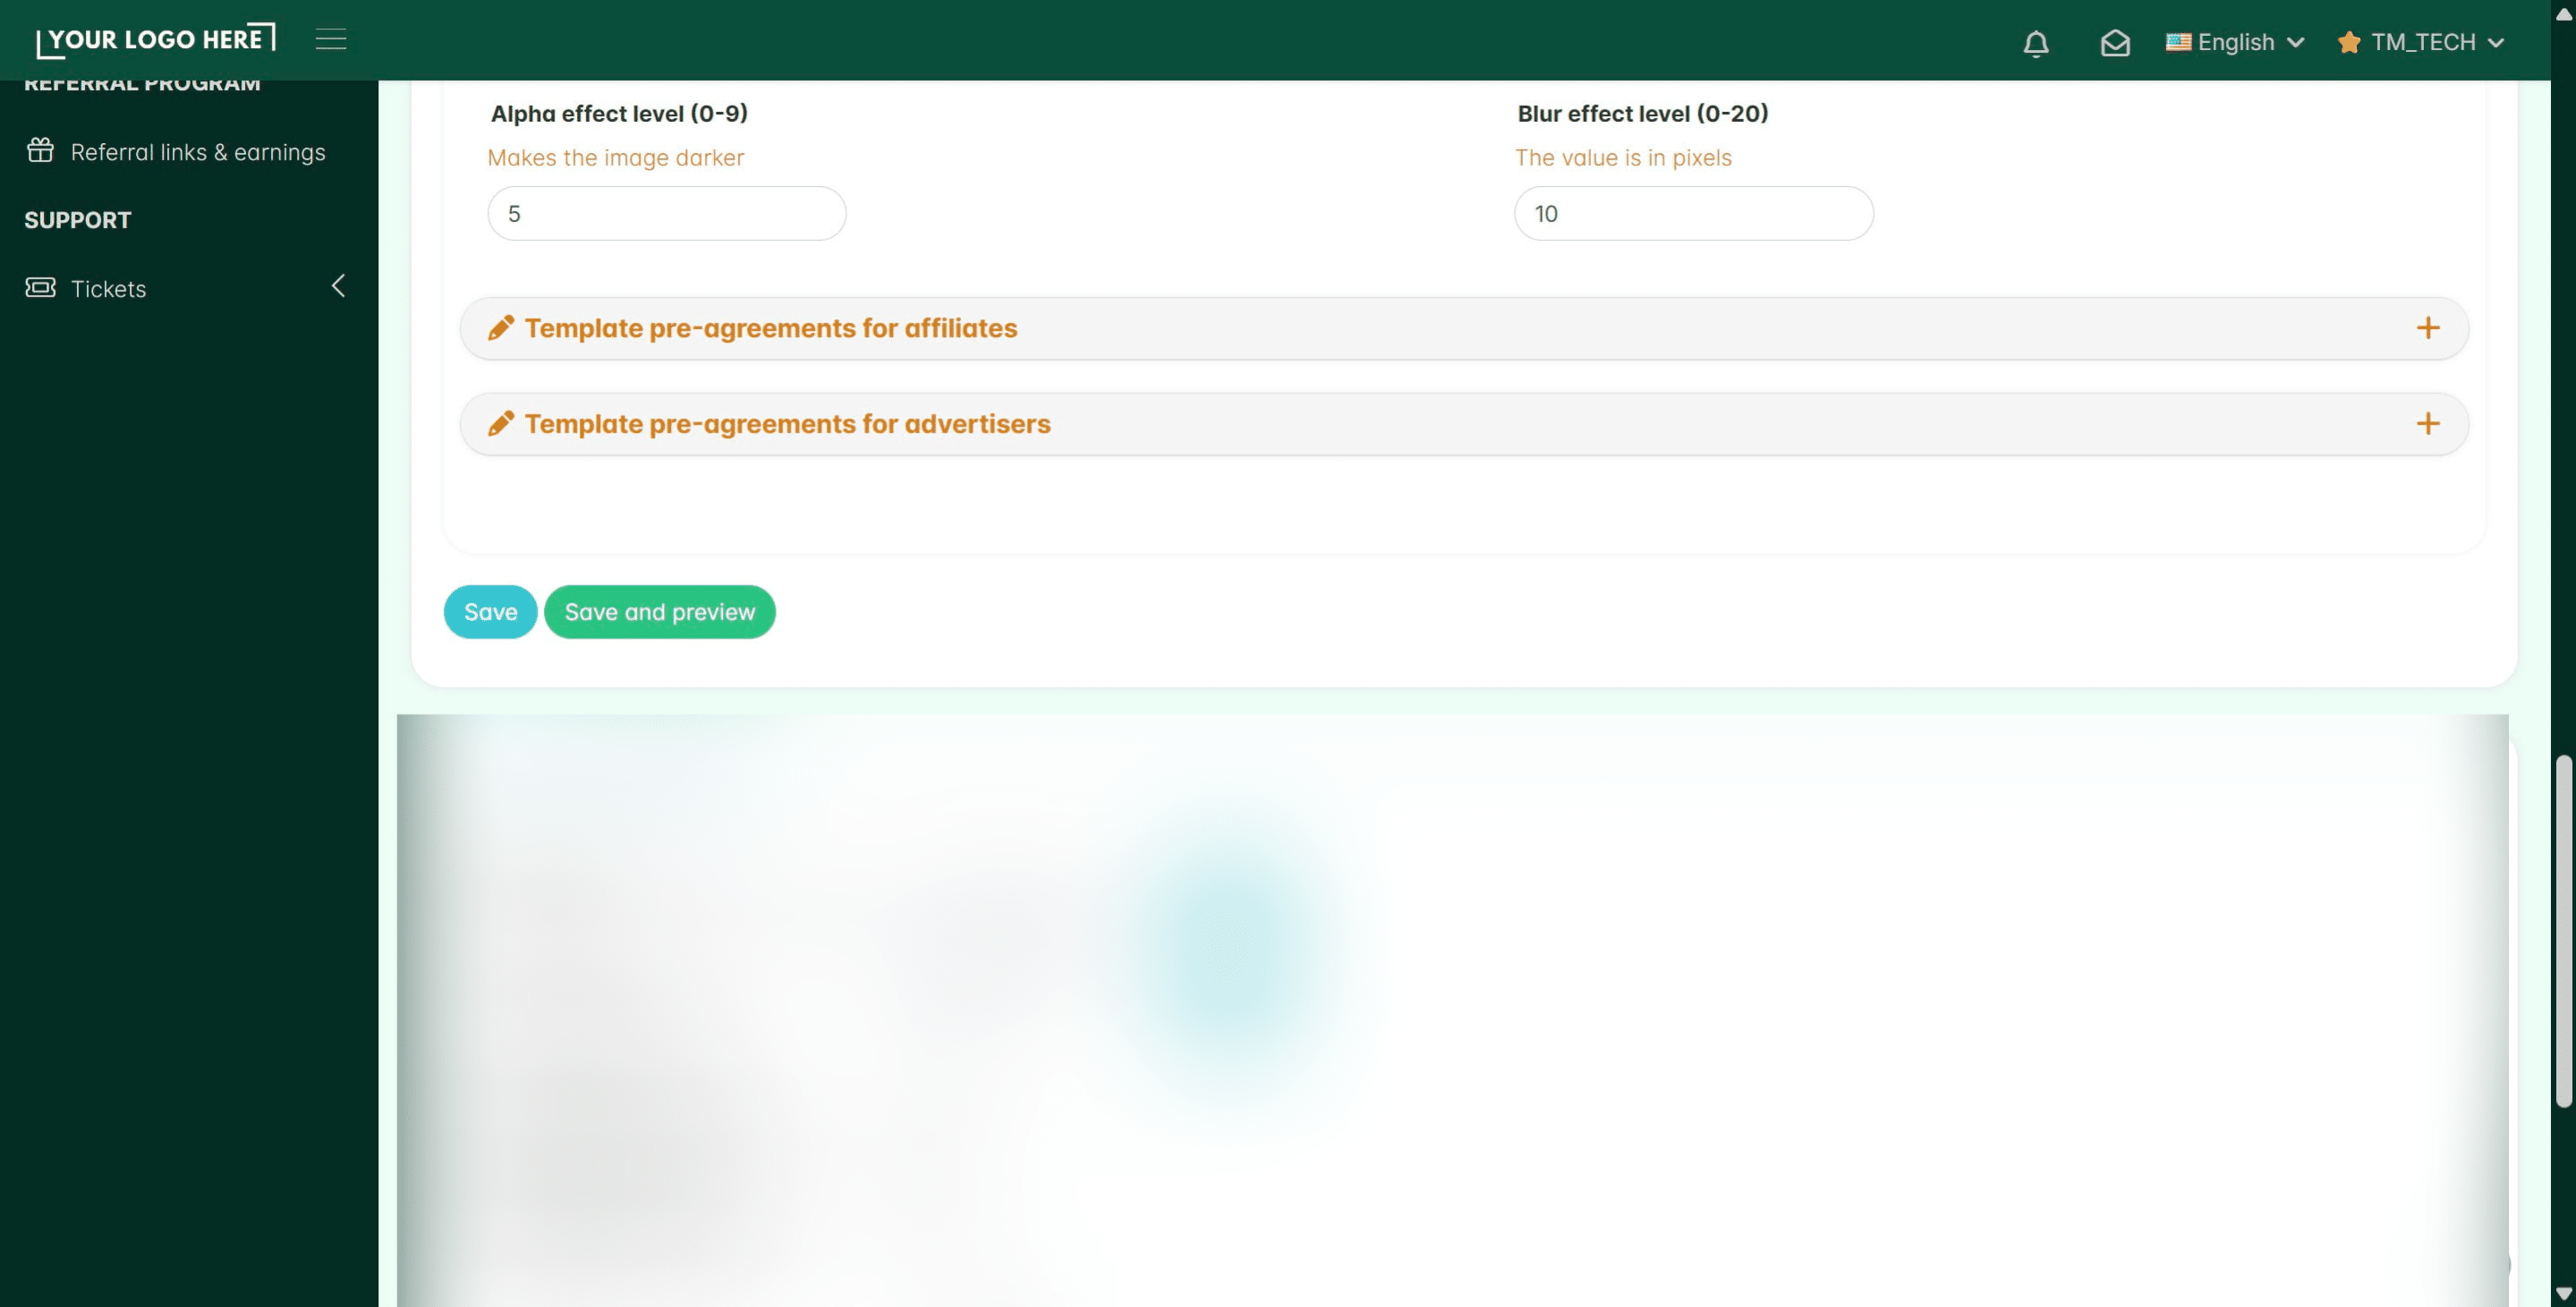
To streamline your onboarding, you can utilize the built-in agreement system for both affiliates and advertisers. The platform provides pre-made legal templates that you can use to get started immediately. Note: These templates are provided for convenience only. We strongly recommend that you consult with your own legal counsel and replace these with your own custom agreements to ensure they are 100% aligned with your specific company policies and local regulations.
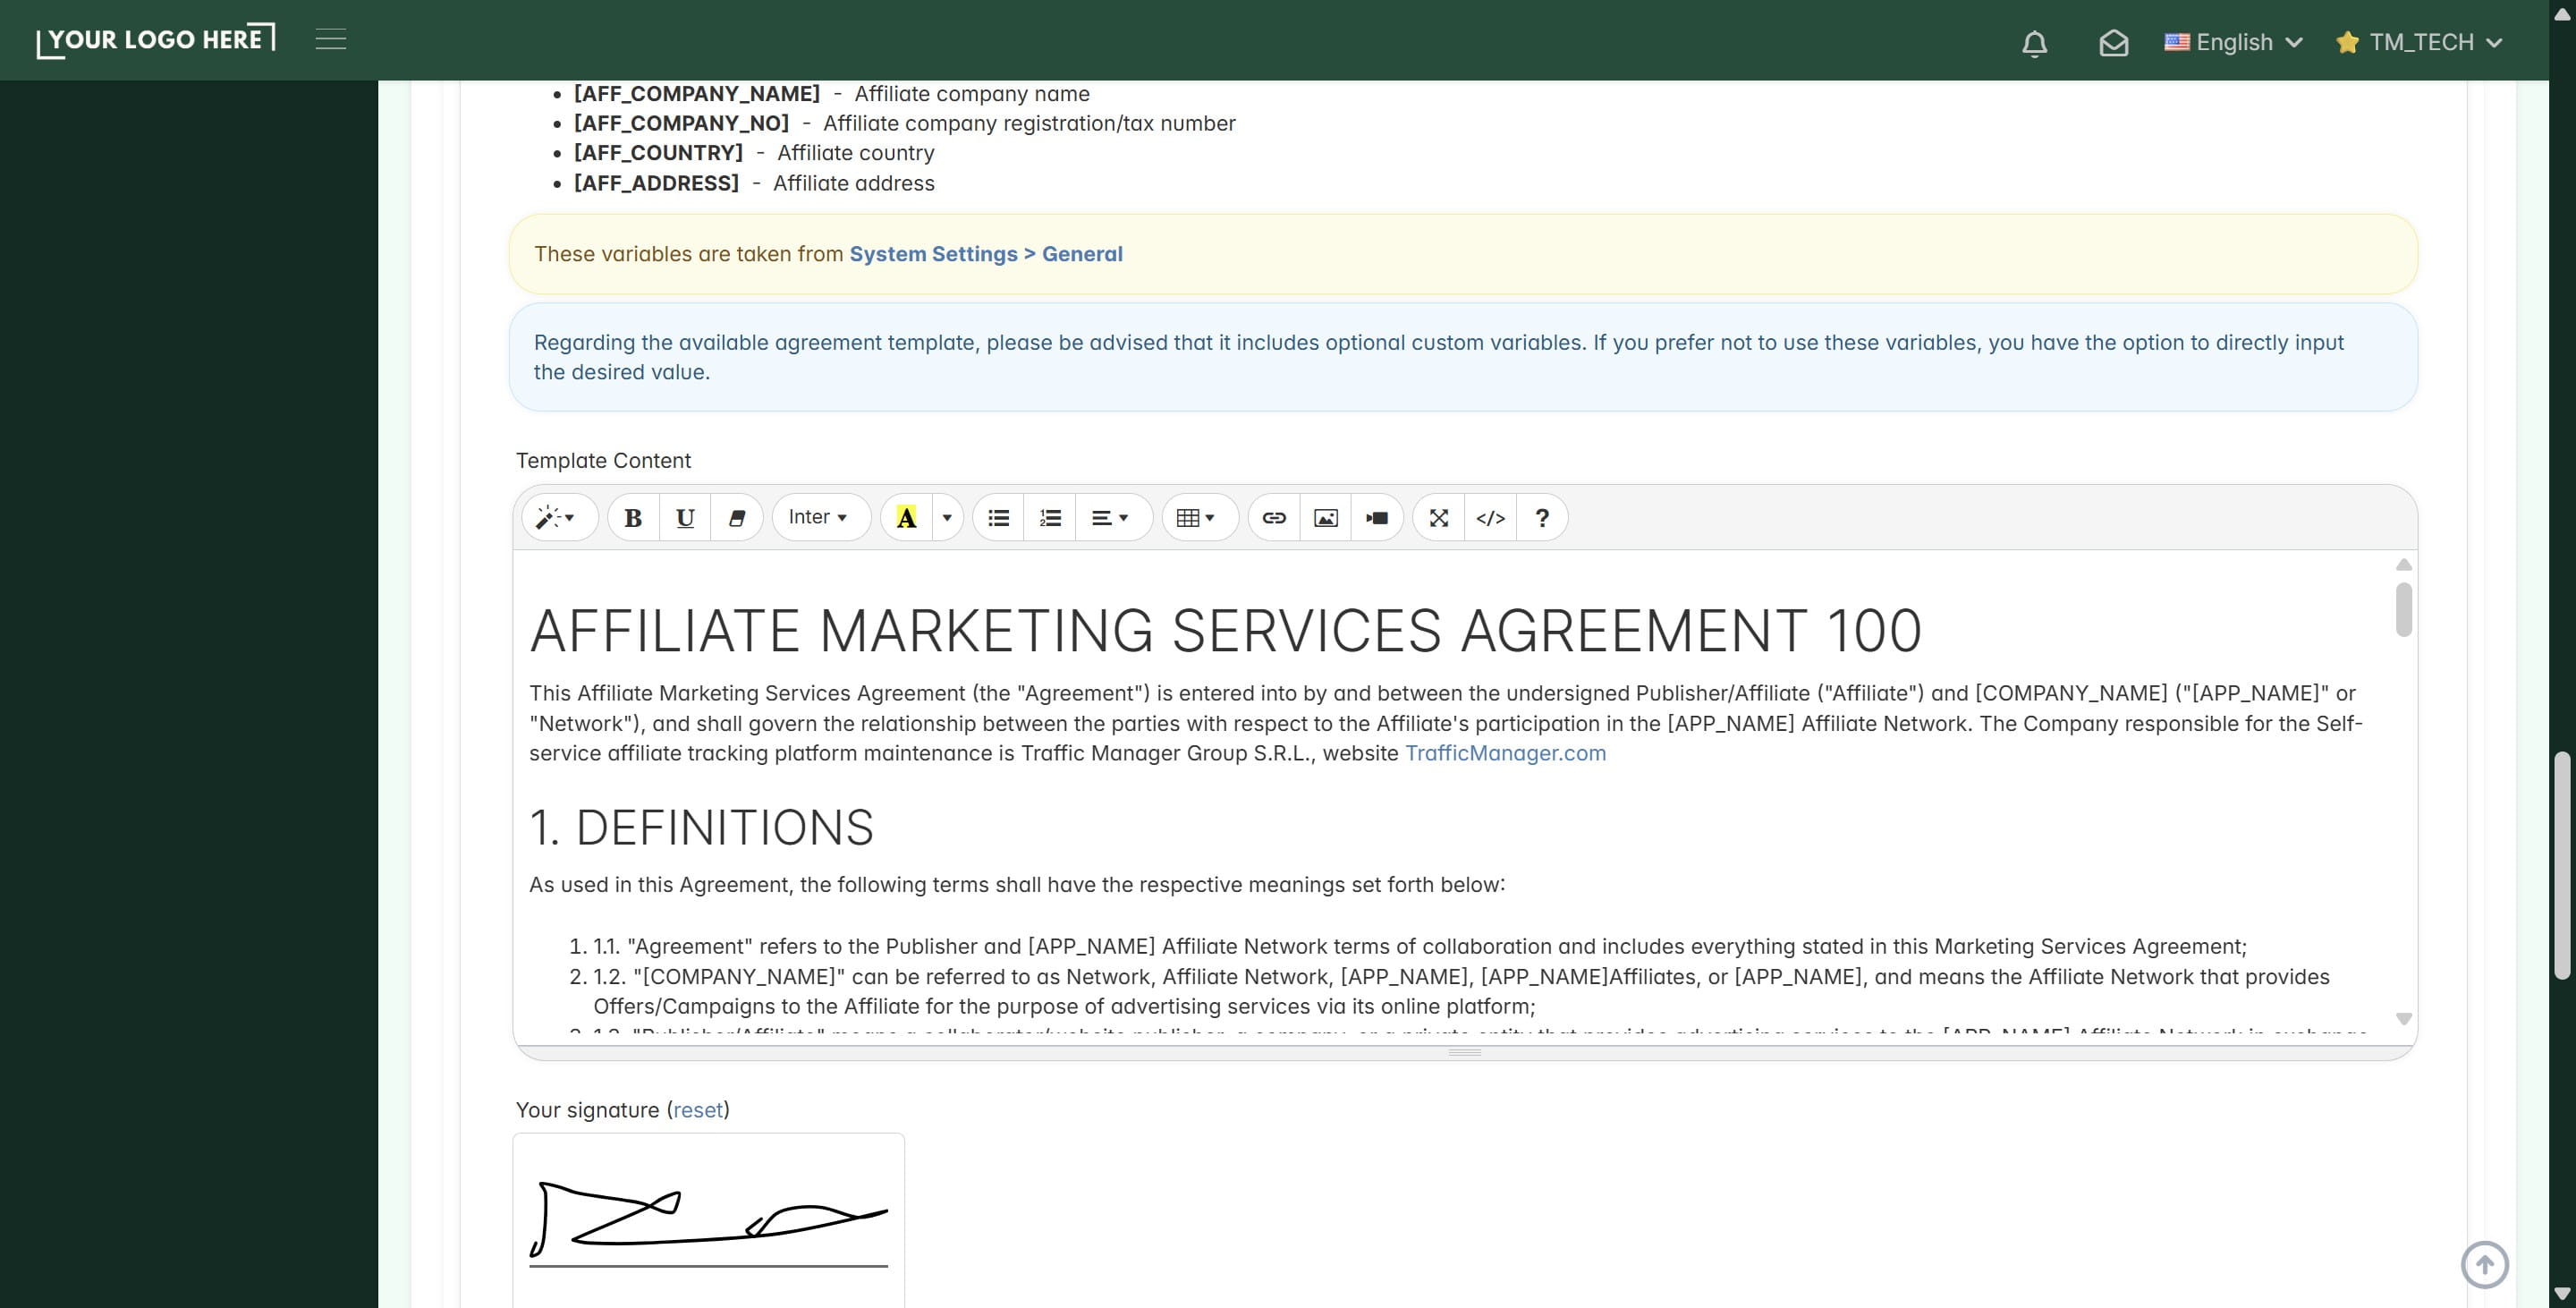
To activate the agreement template in your platform, open the Pre-Agreement section.
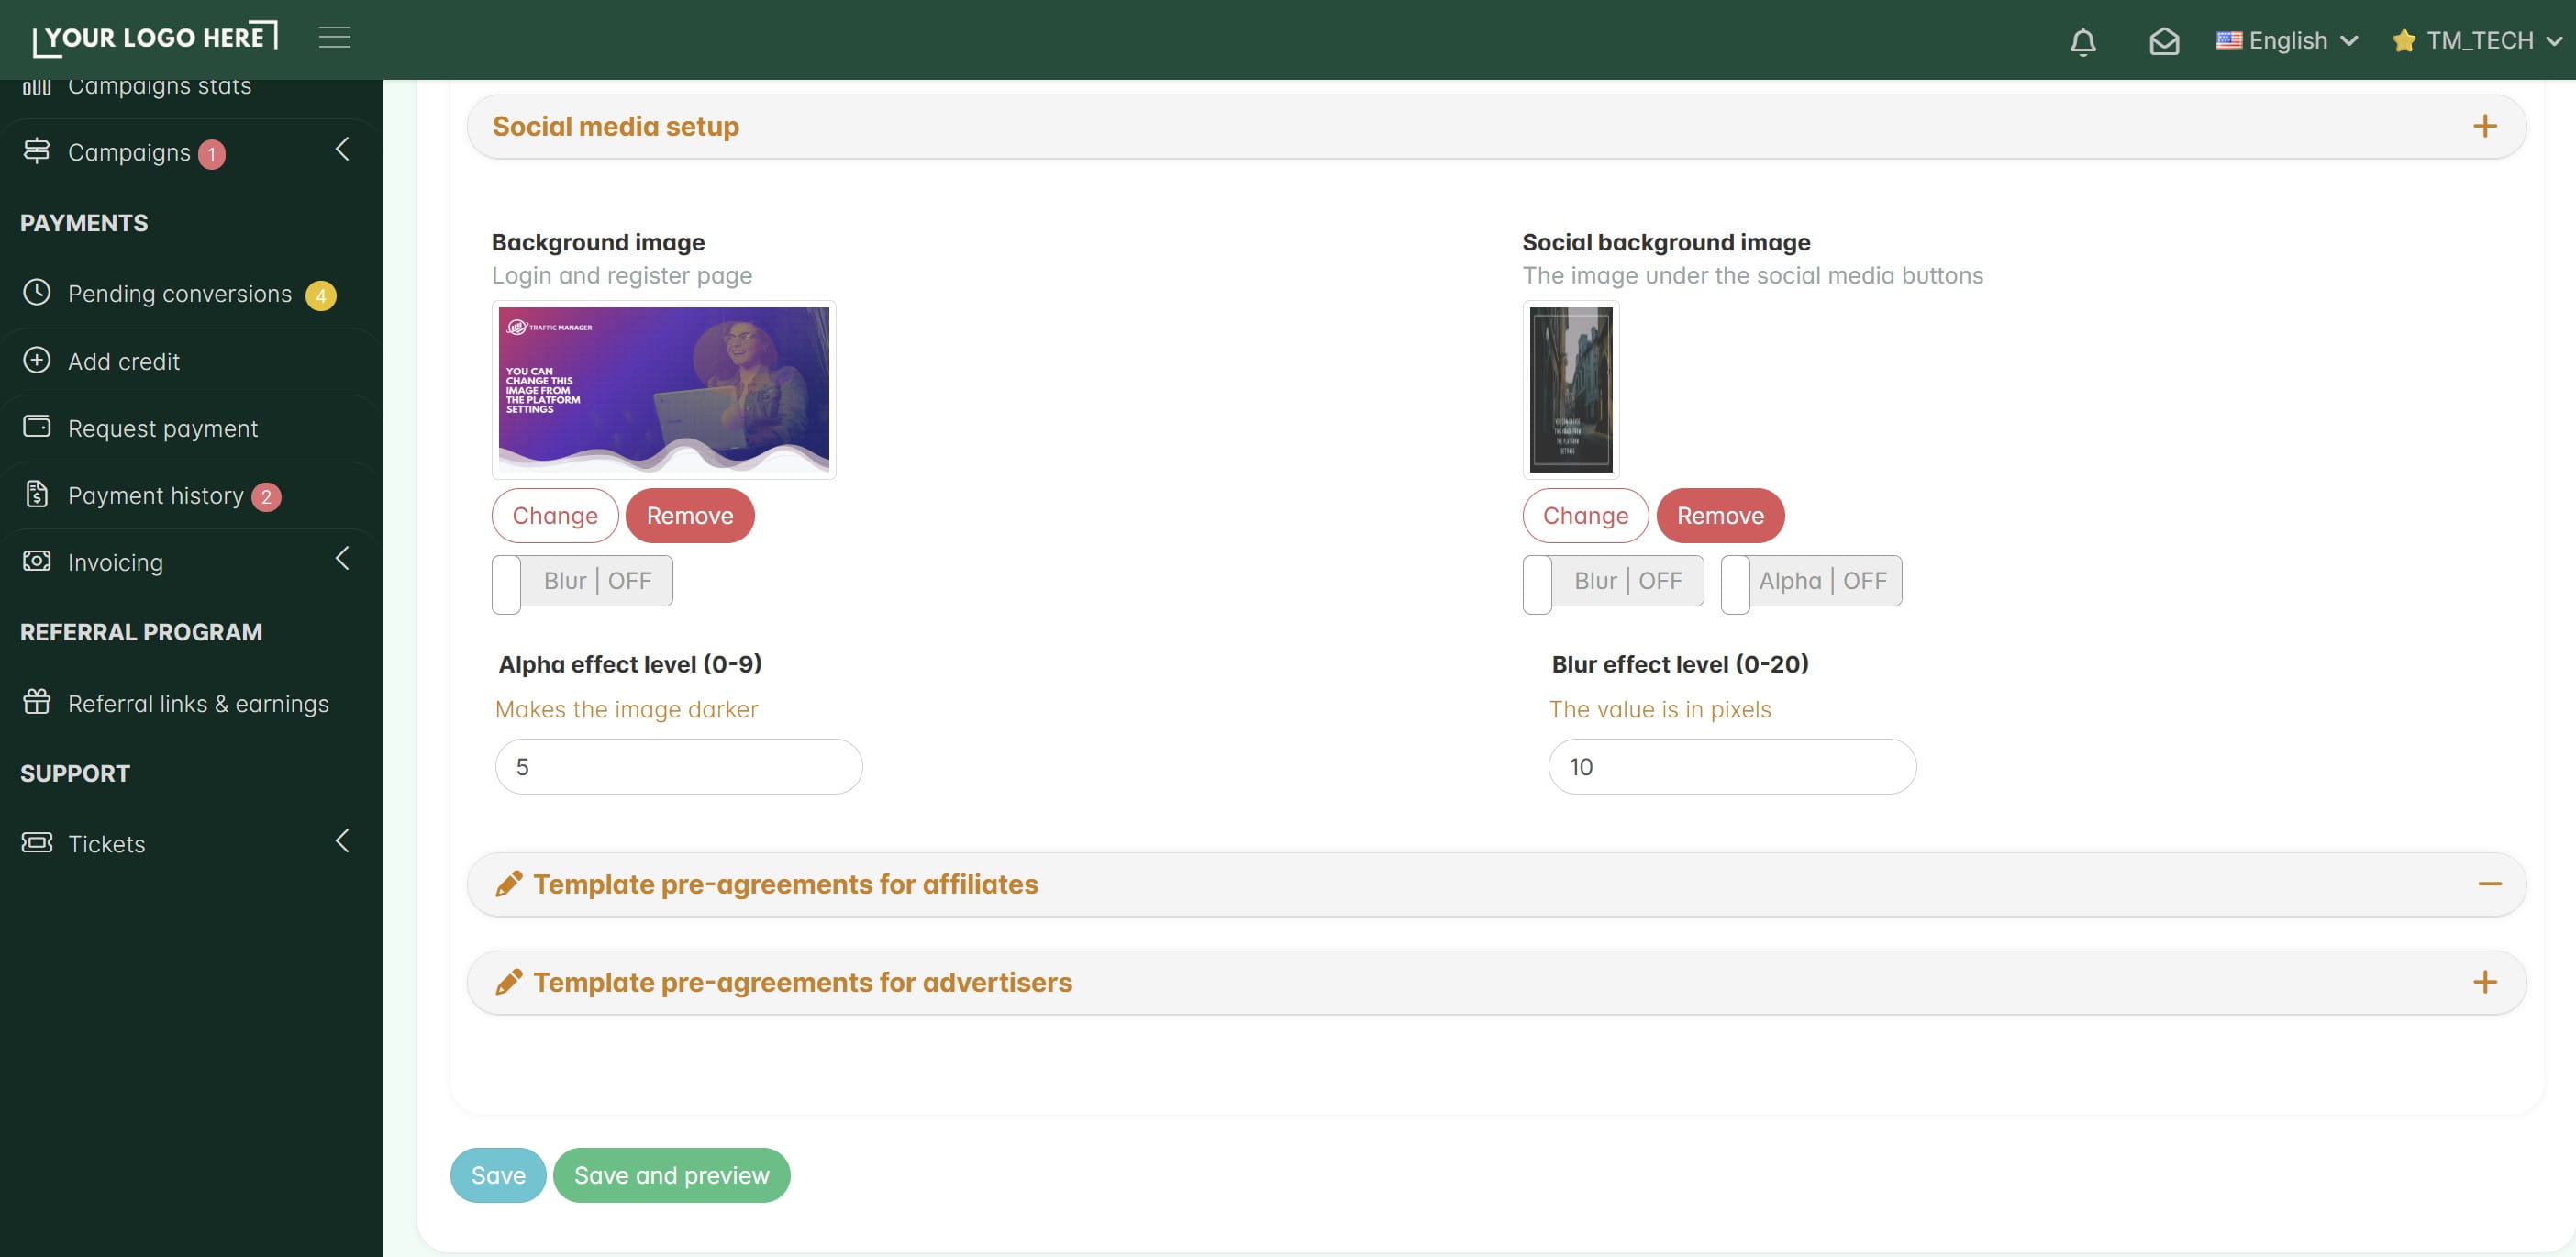
Check the Enable box,
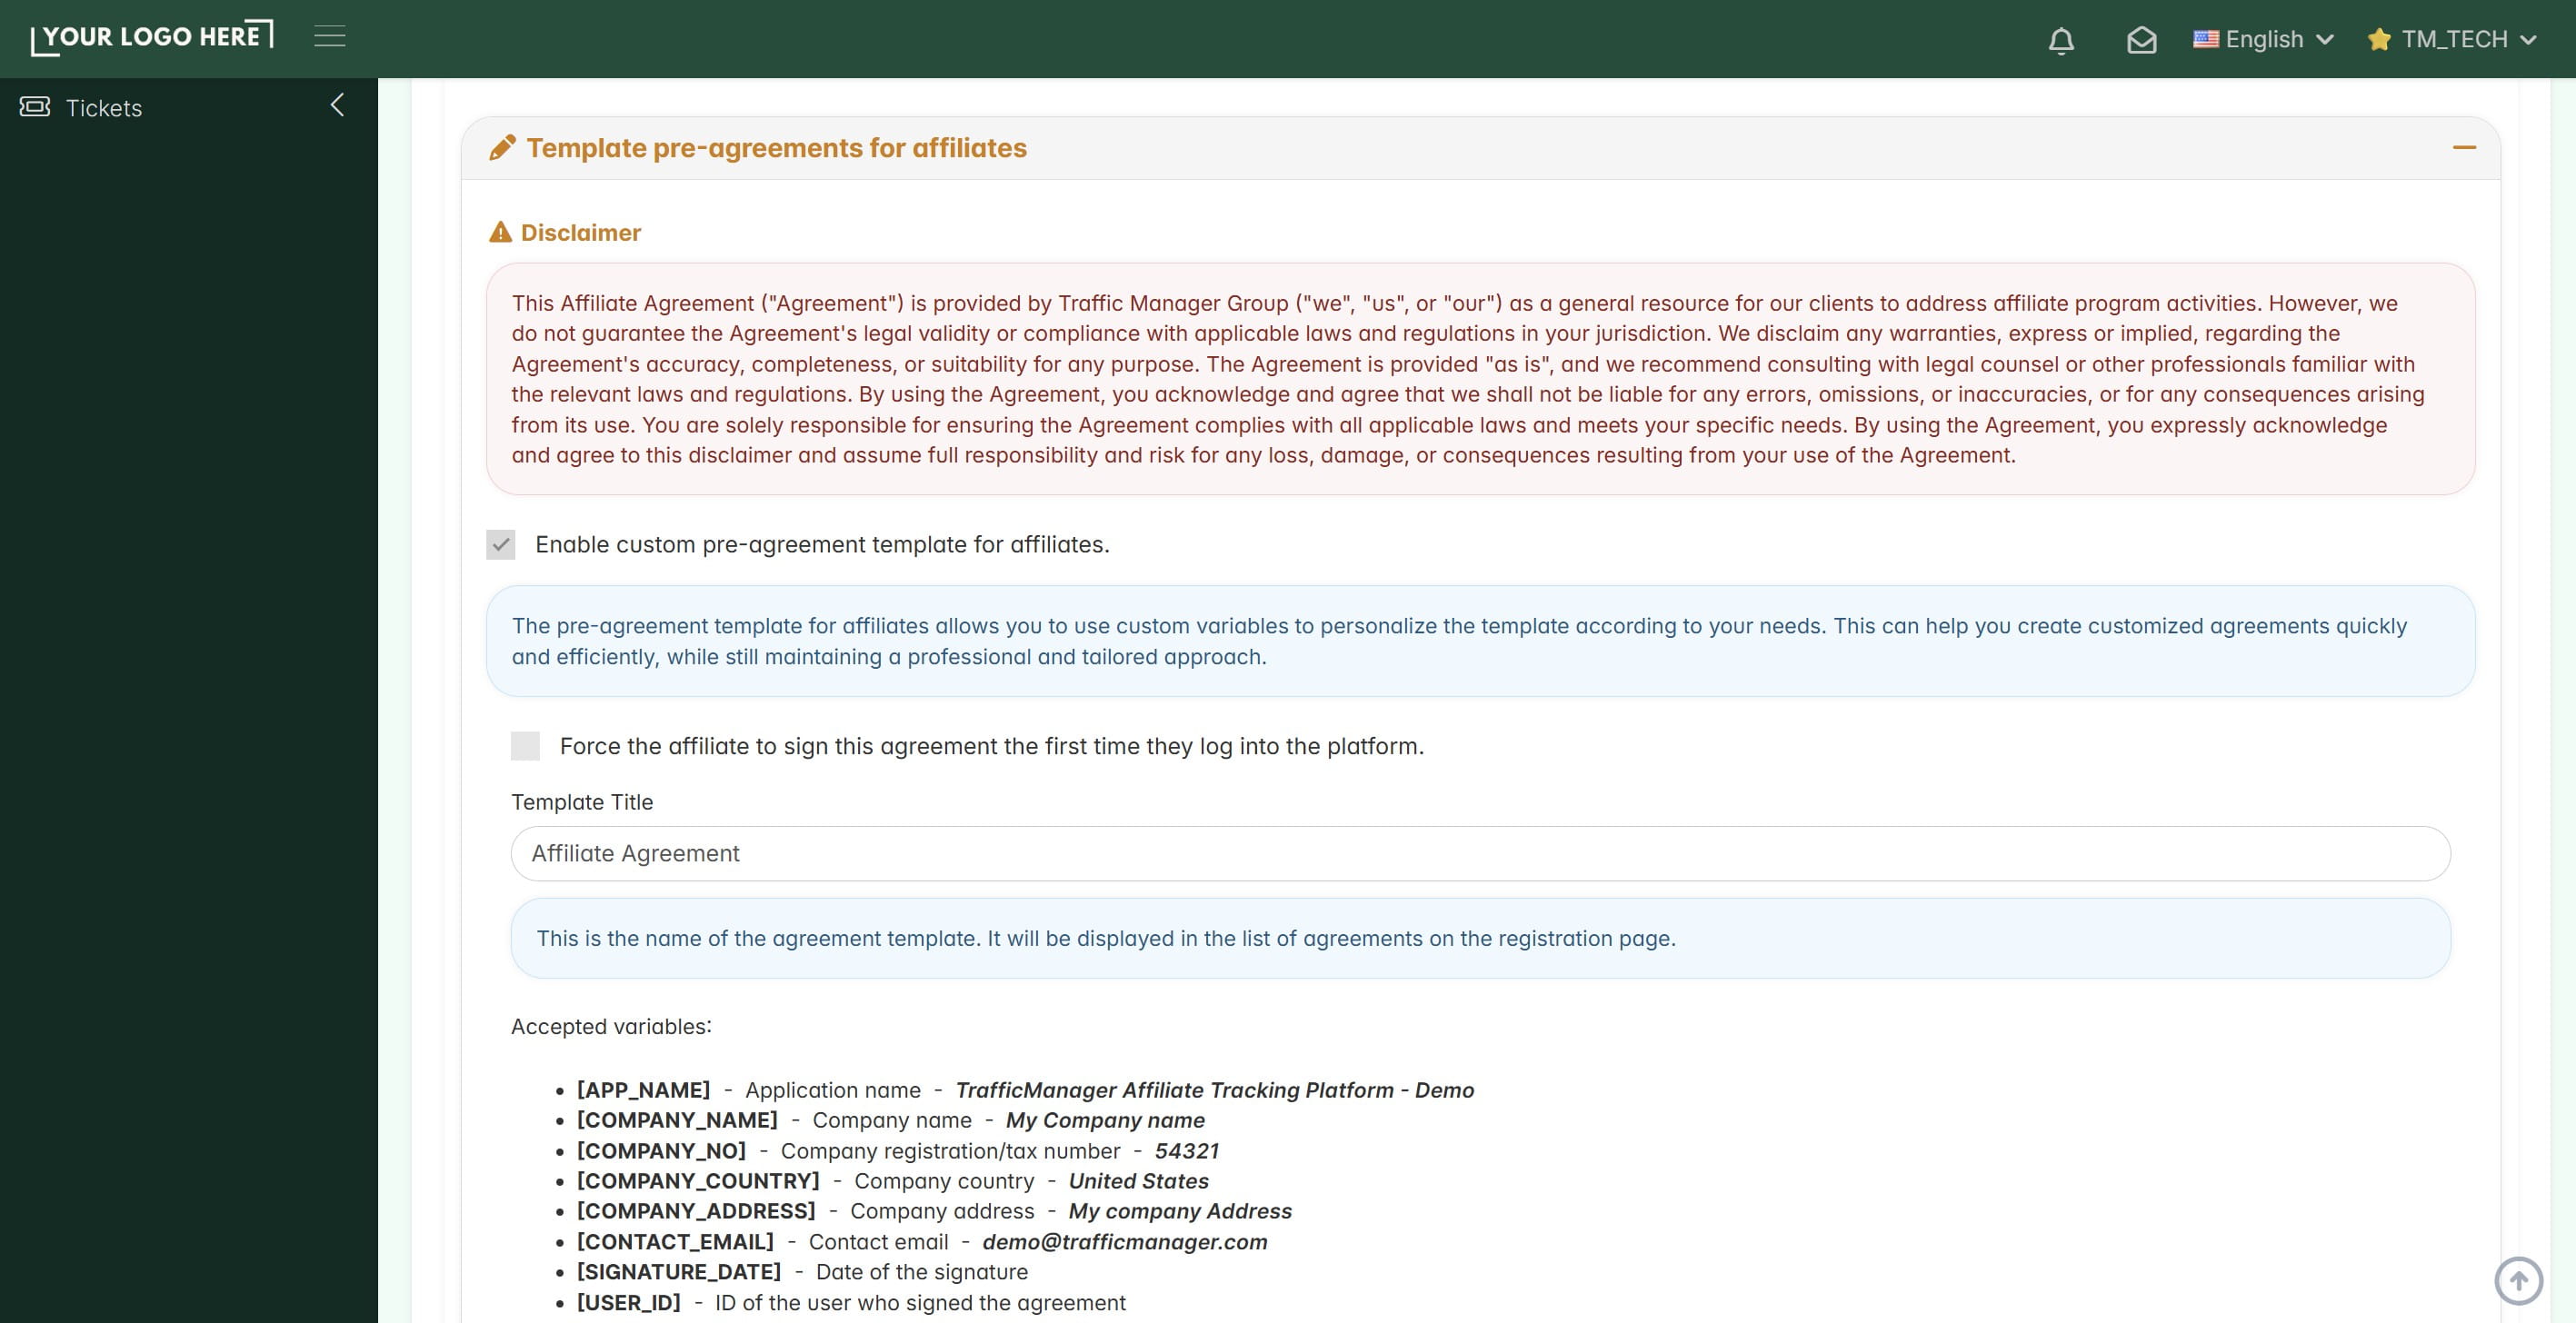
then click "Save".
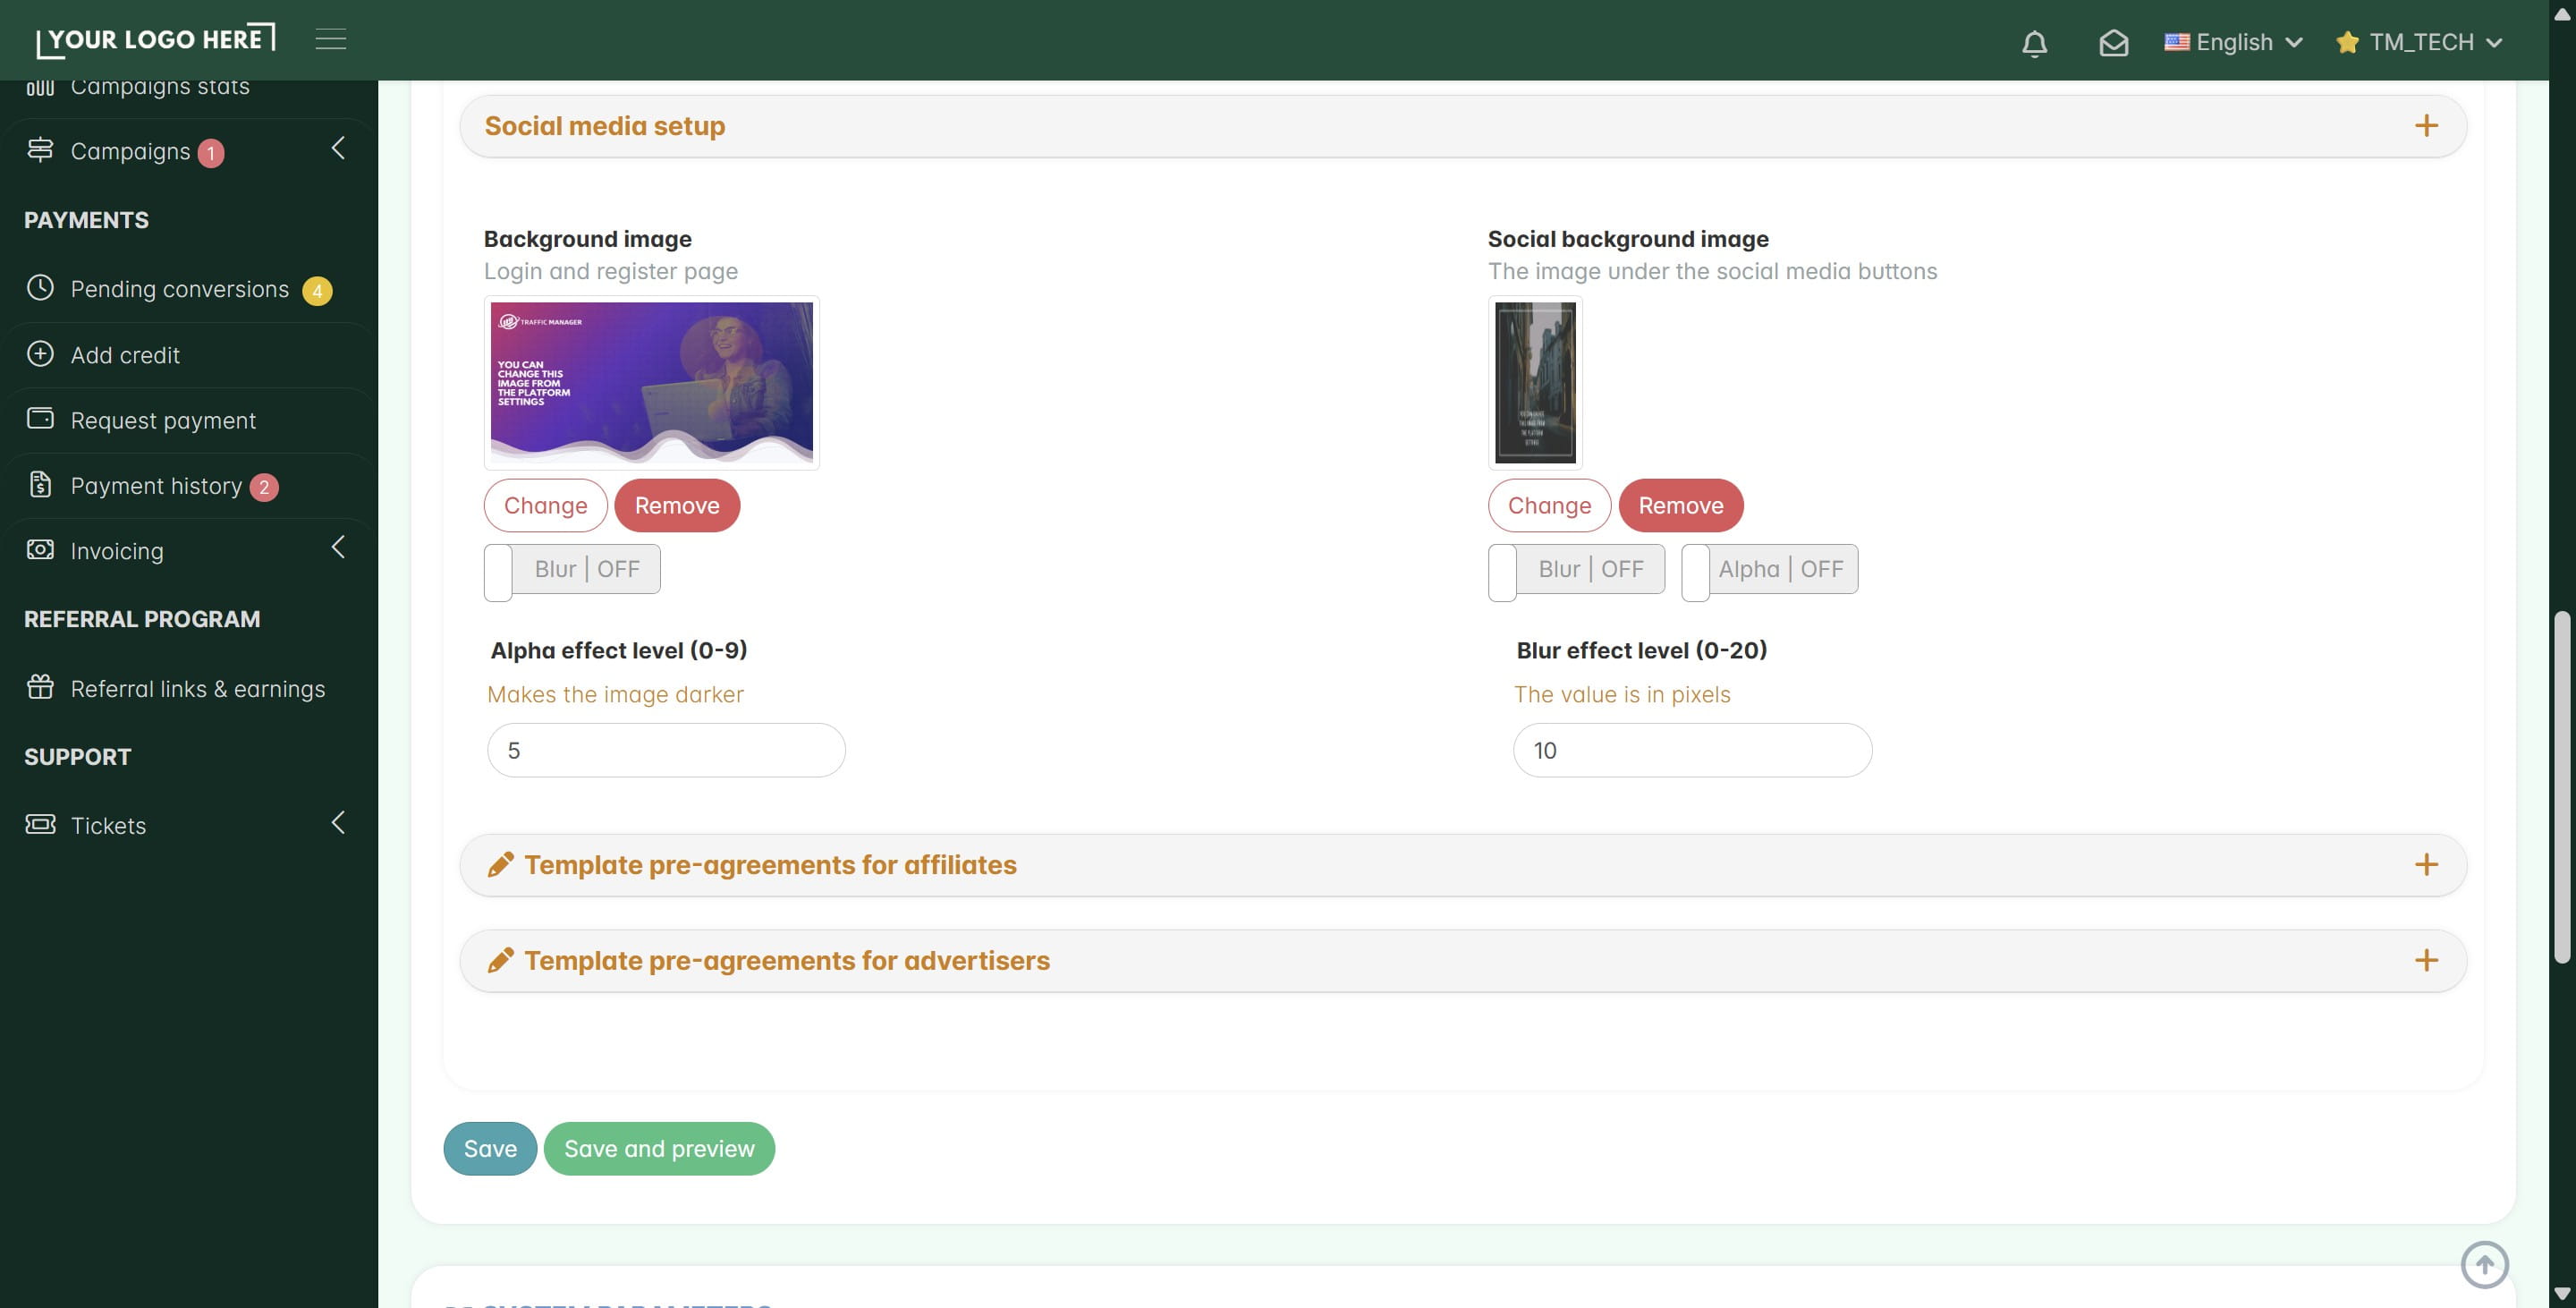
5. Application Tab (Default Settings)
The Application tab is where you set the "rules" for the affiliate accounts. These settings will apply to everyone who joins your affiliate network.
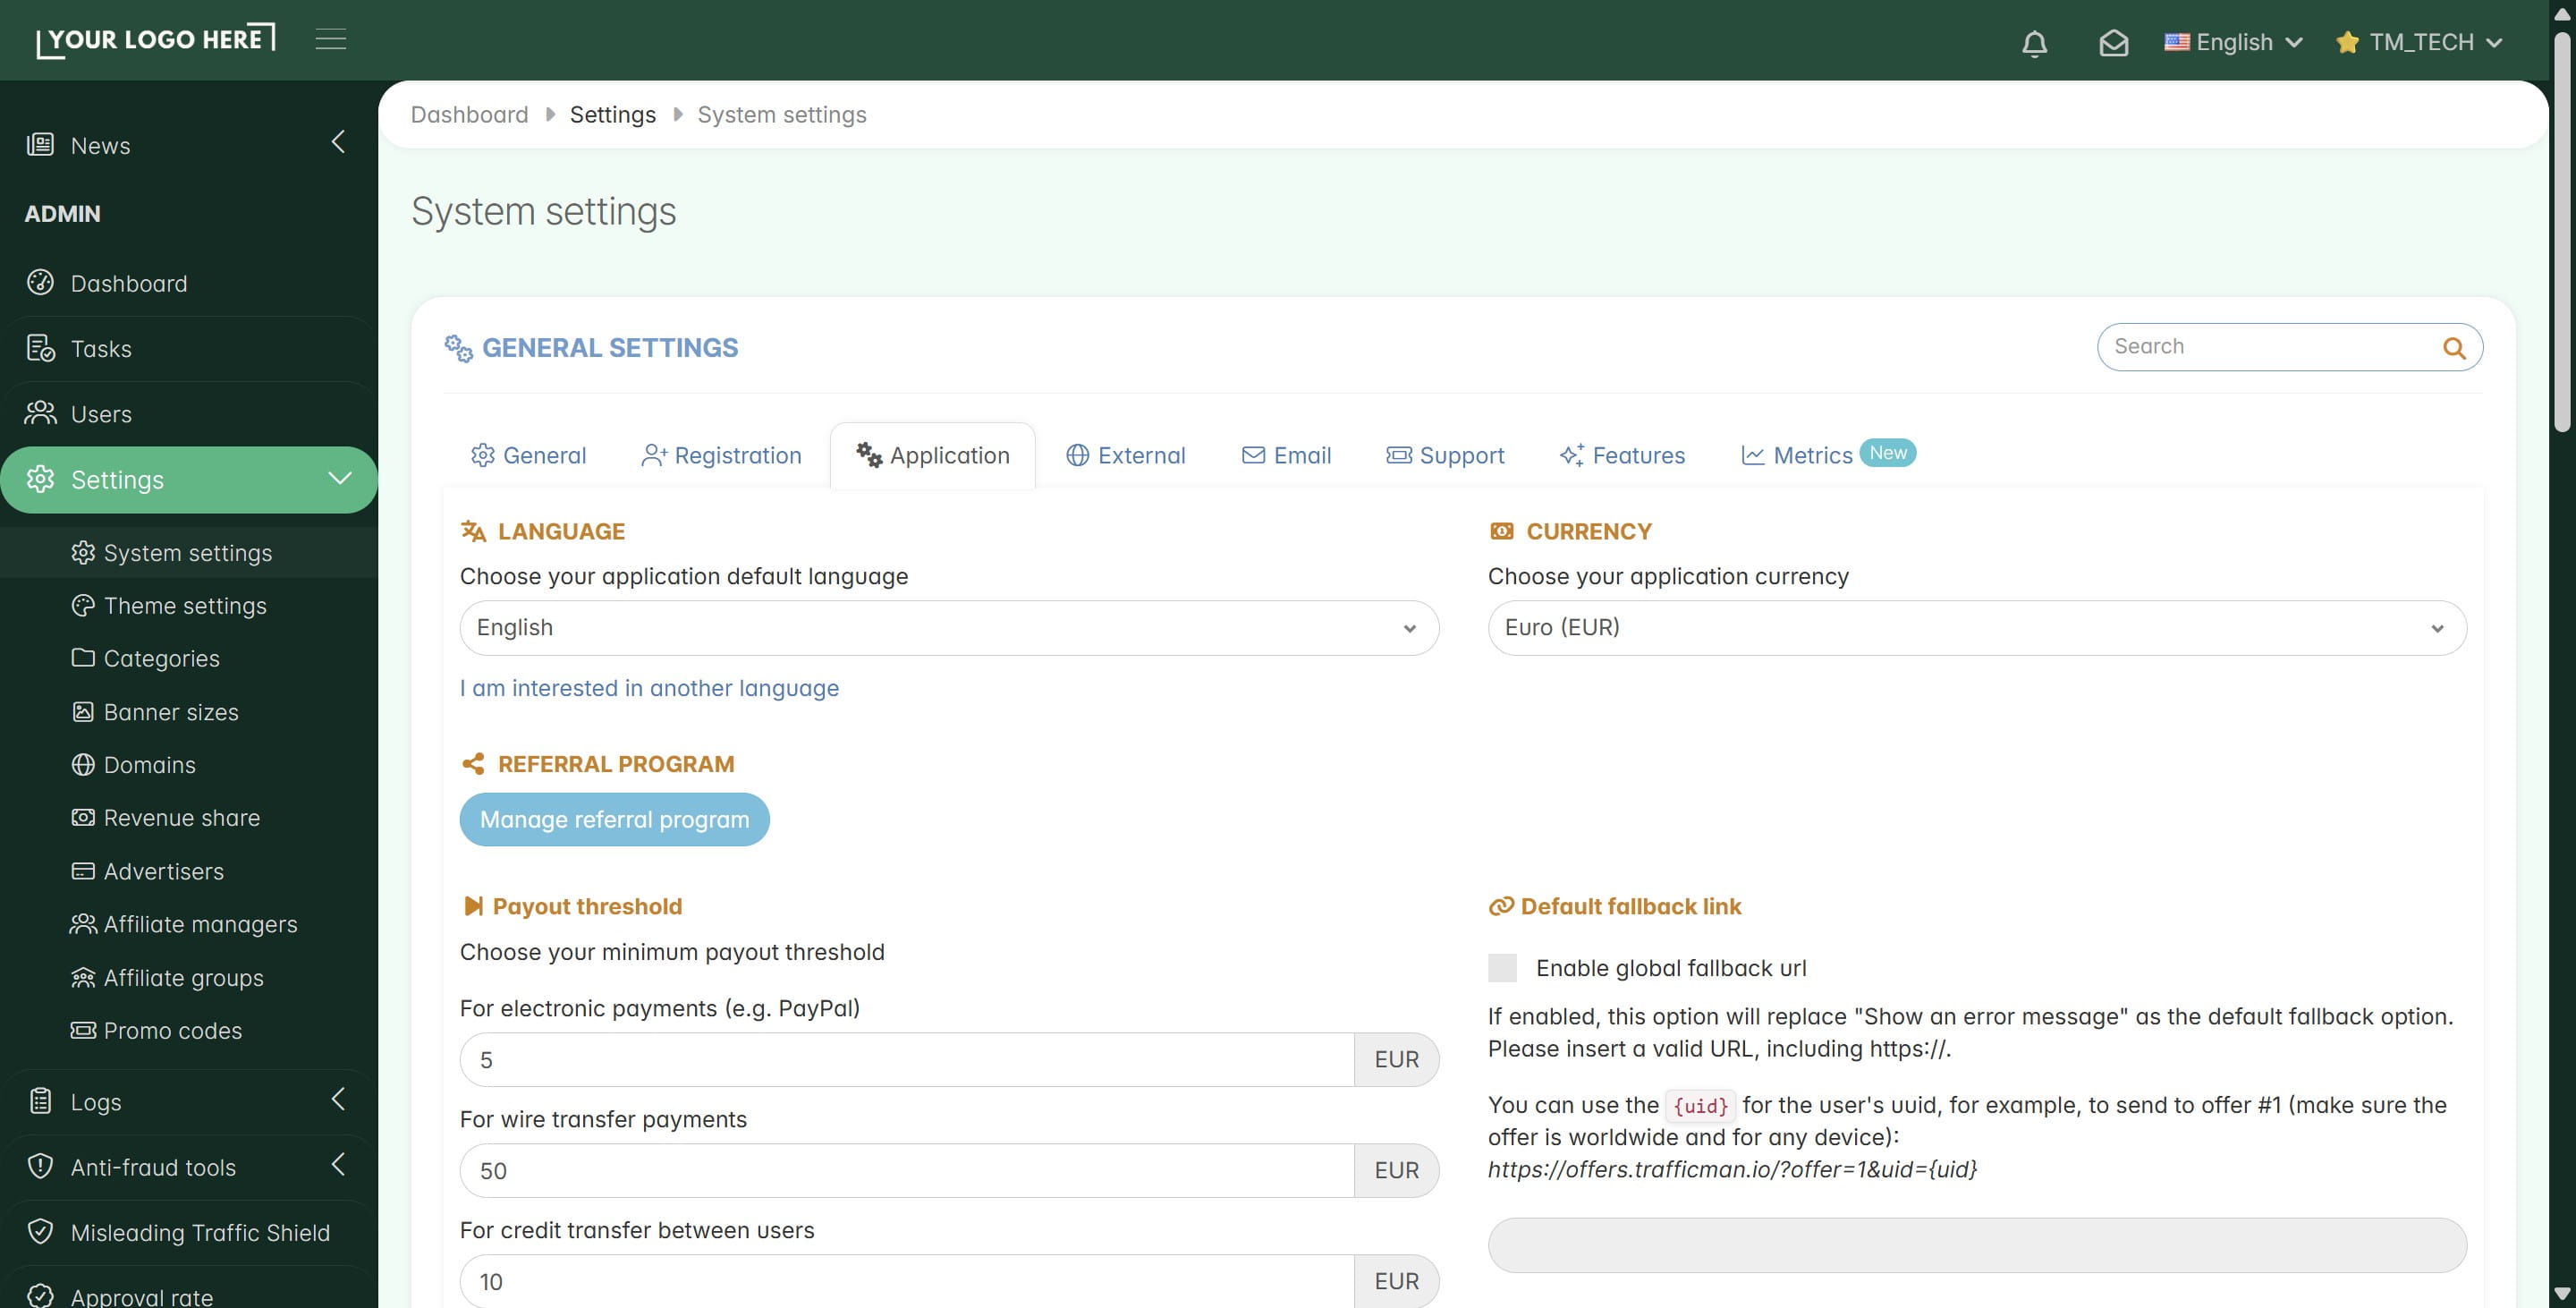
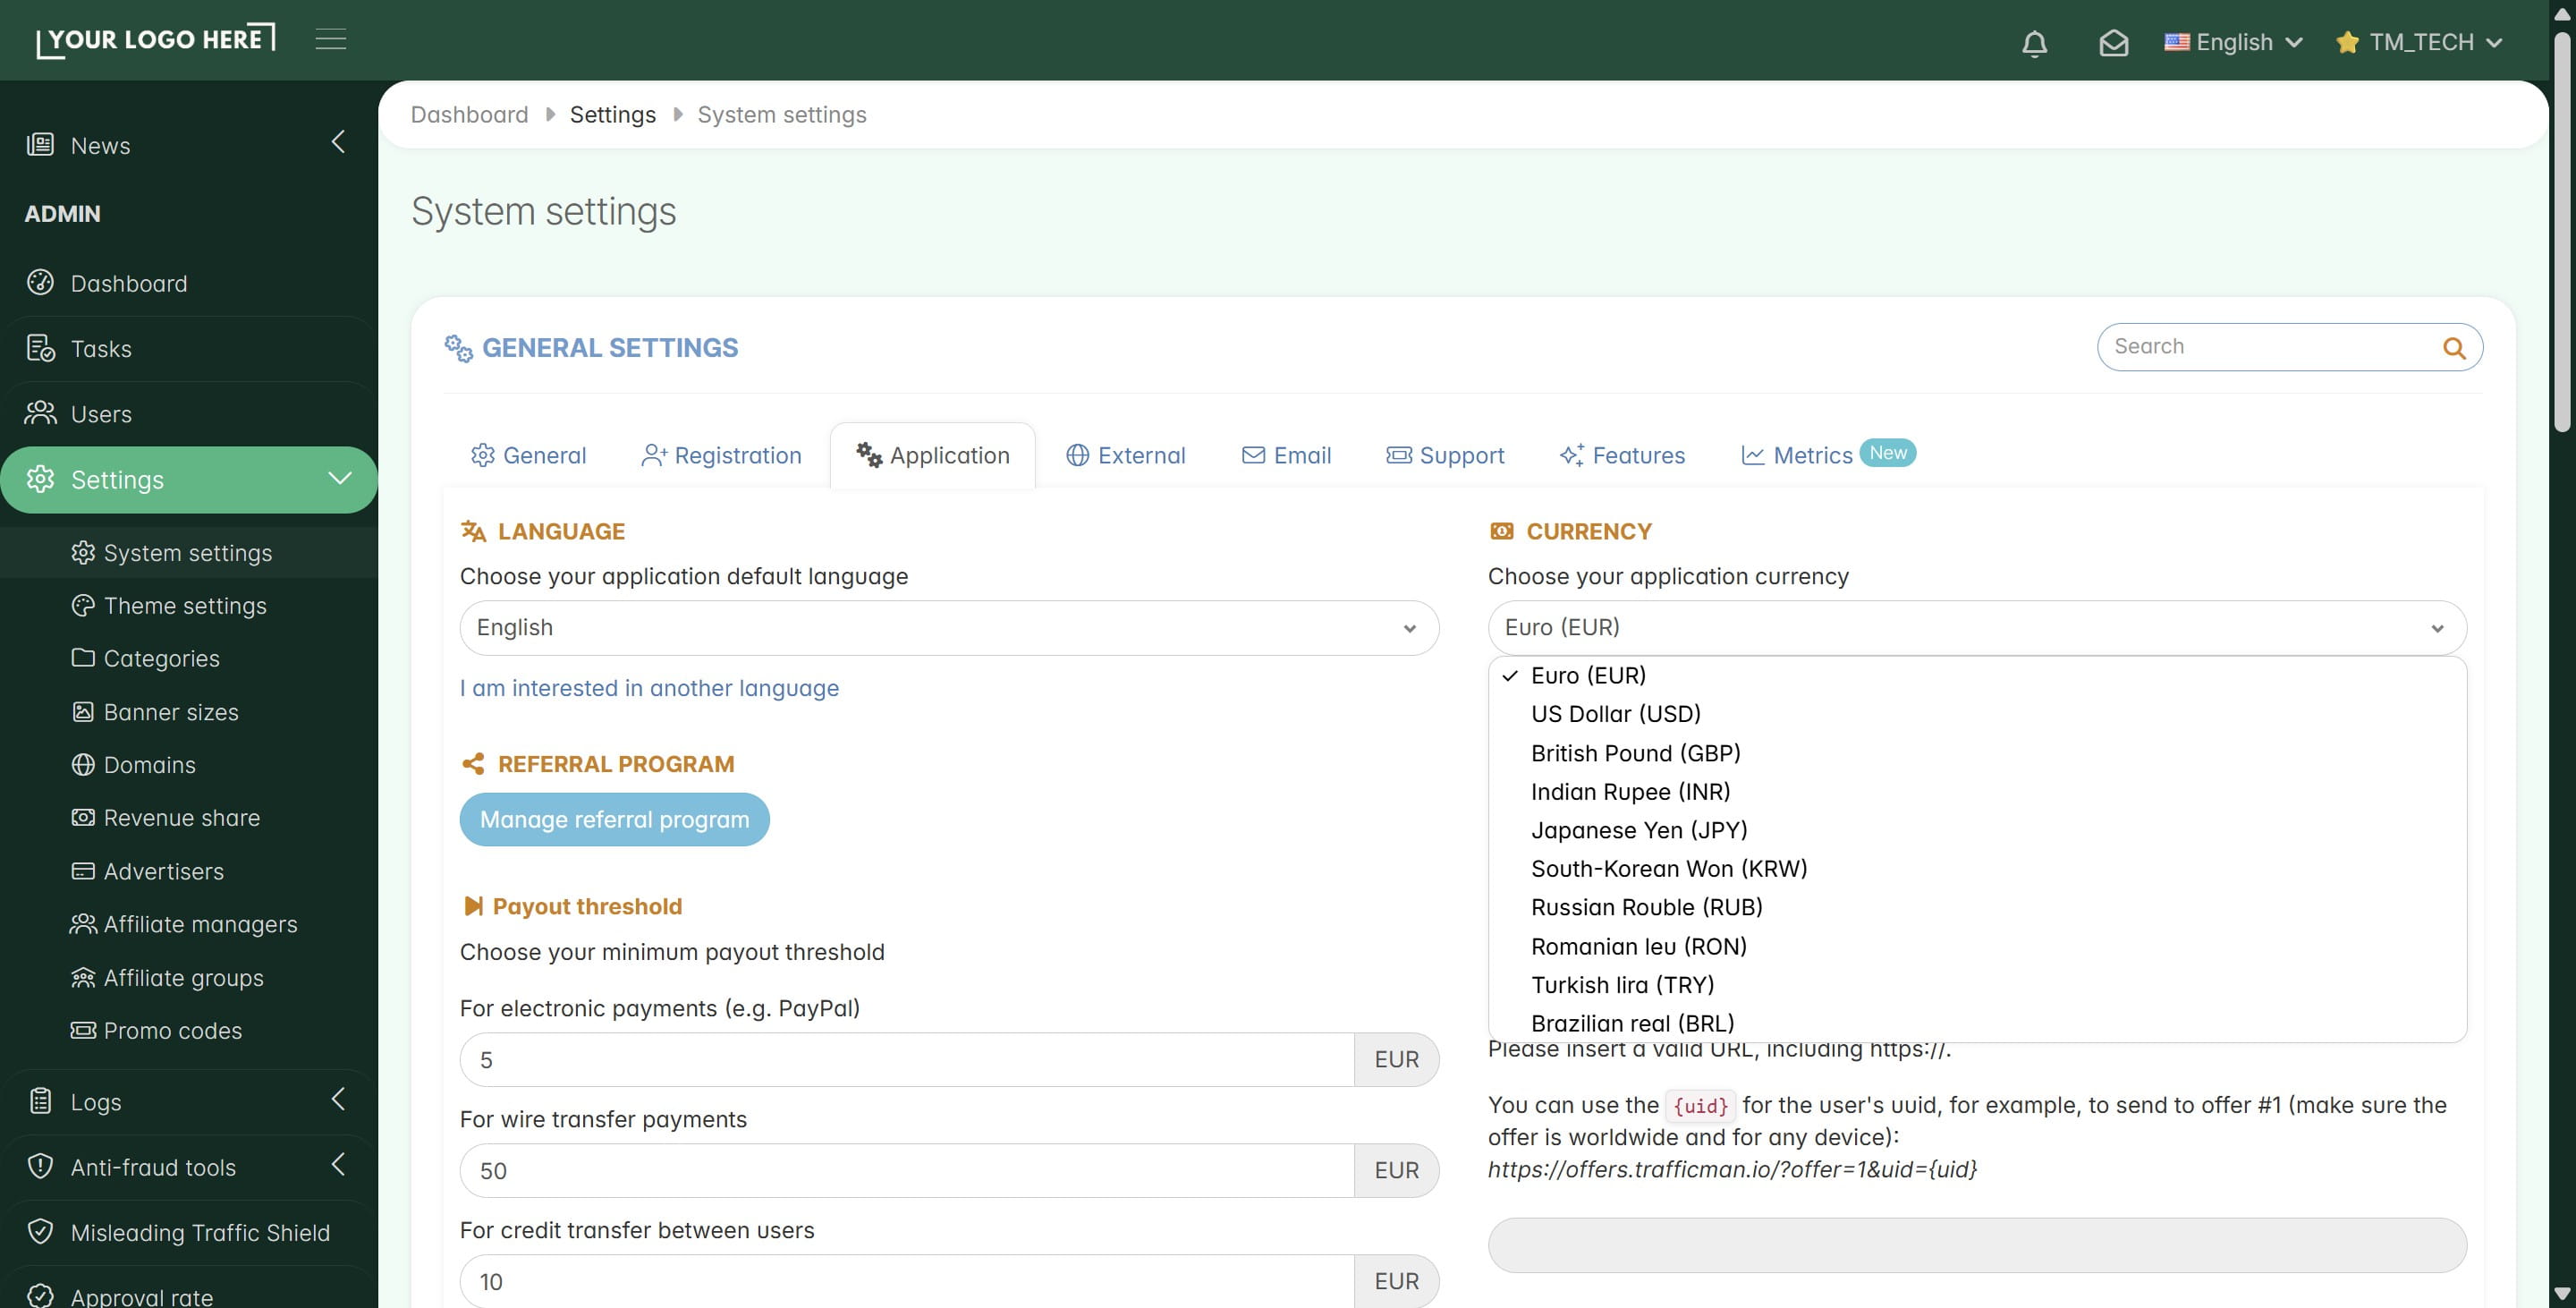
Default Language: Choose the language for the affiliate’s dashboard (for example: English, Spanish, Italian, etc).
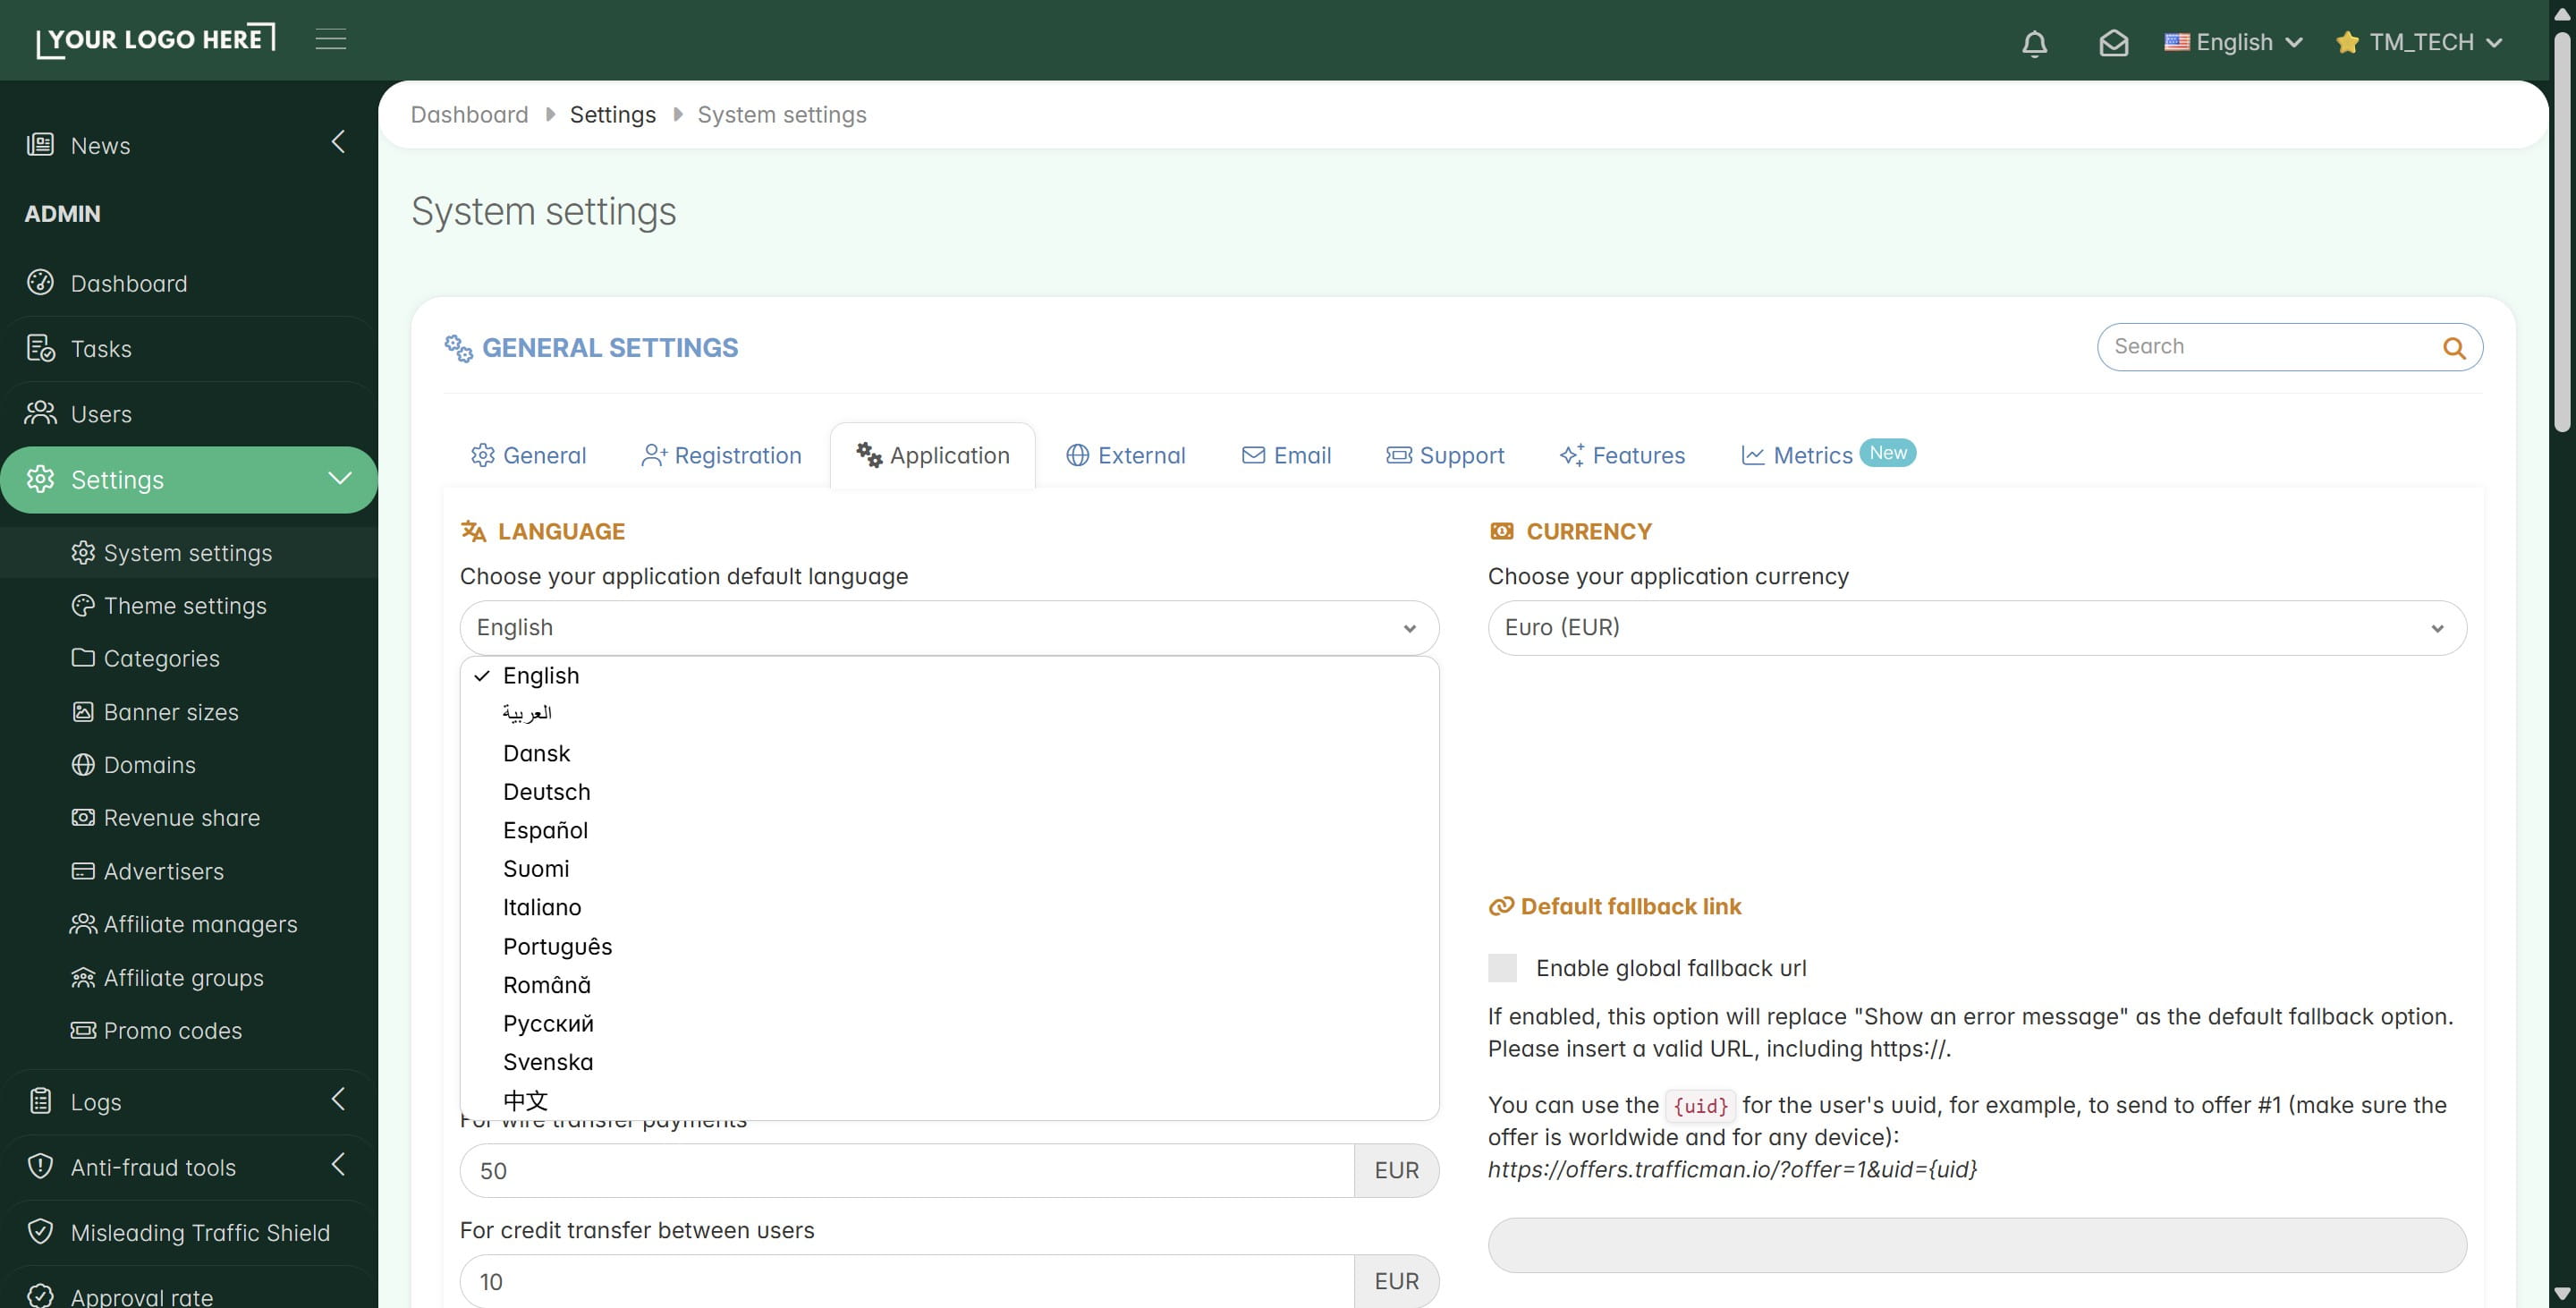
Default Currency: Pick the currency for your platform. This is used to track and show how much your affiliates earn (for example: EUR).
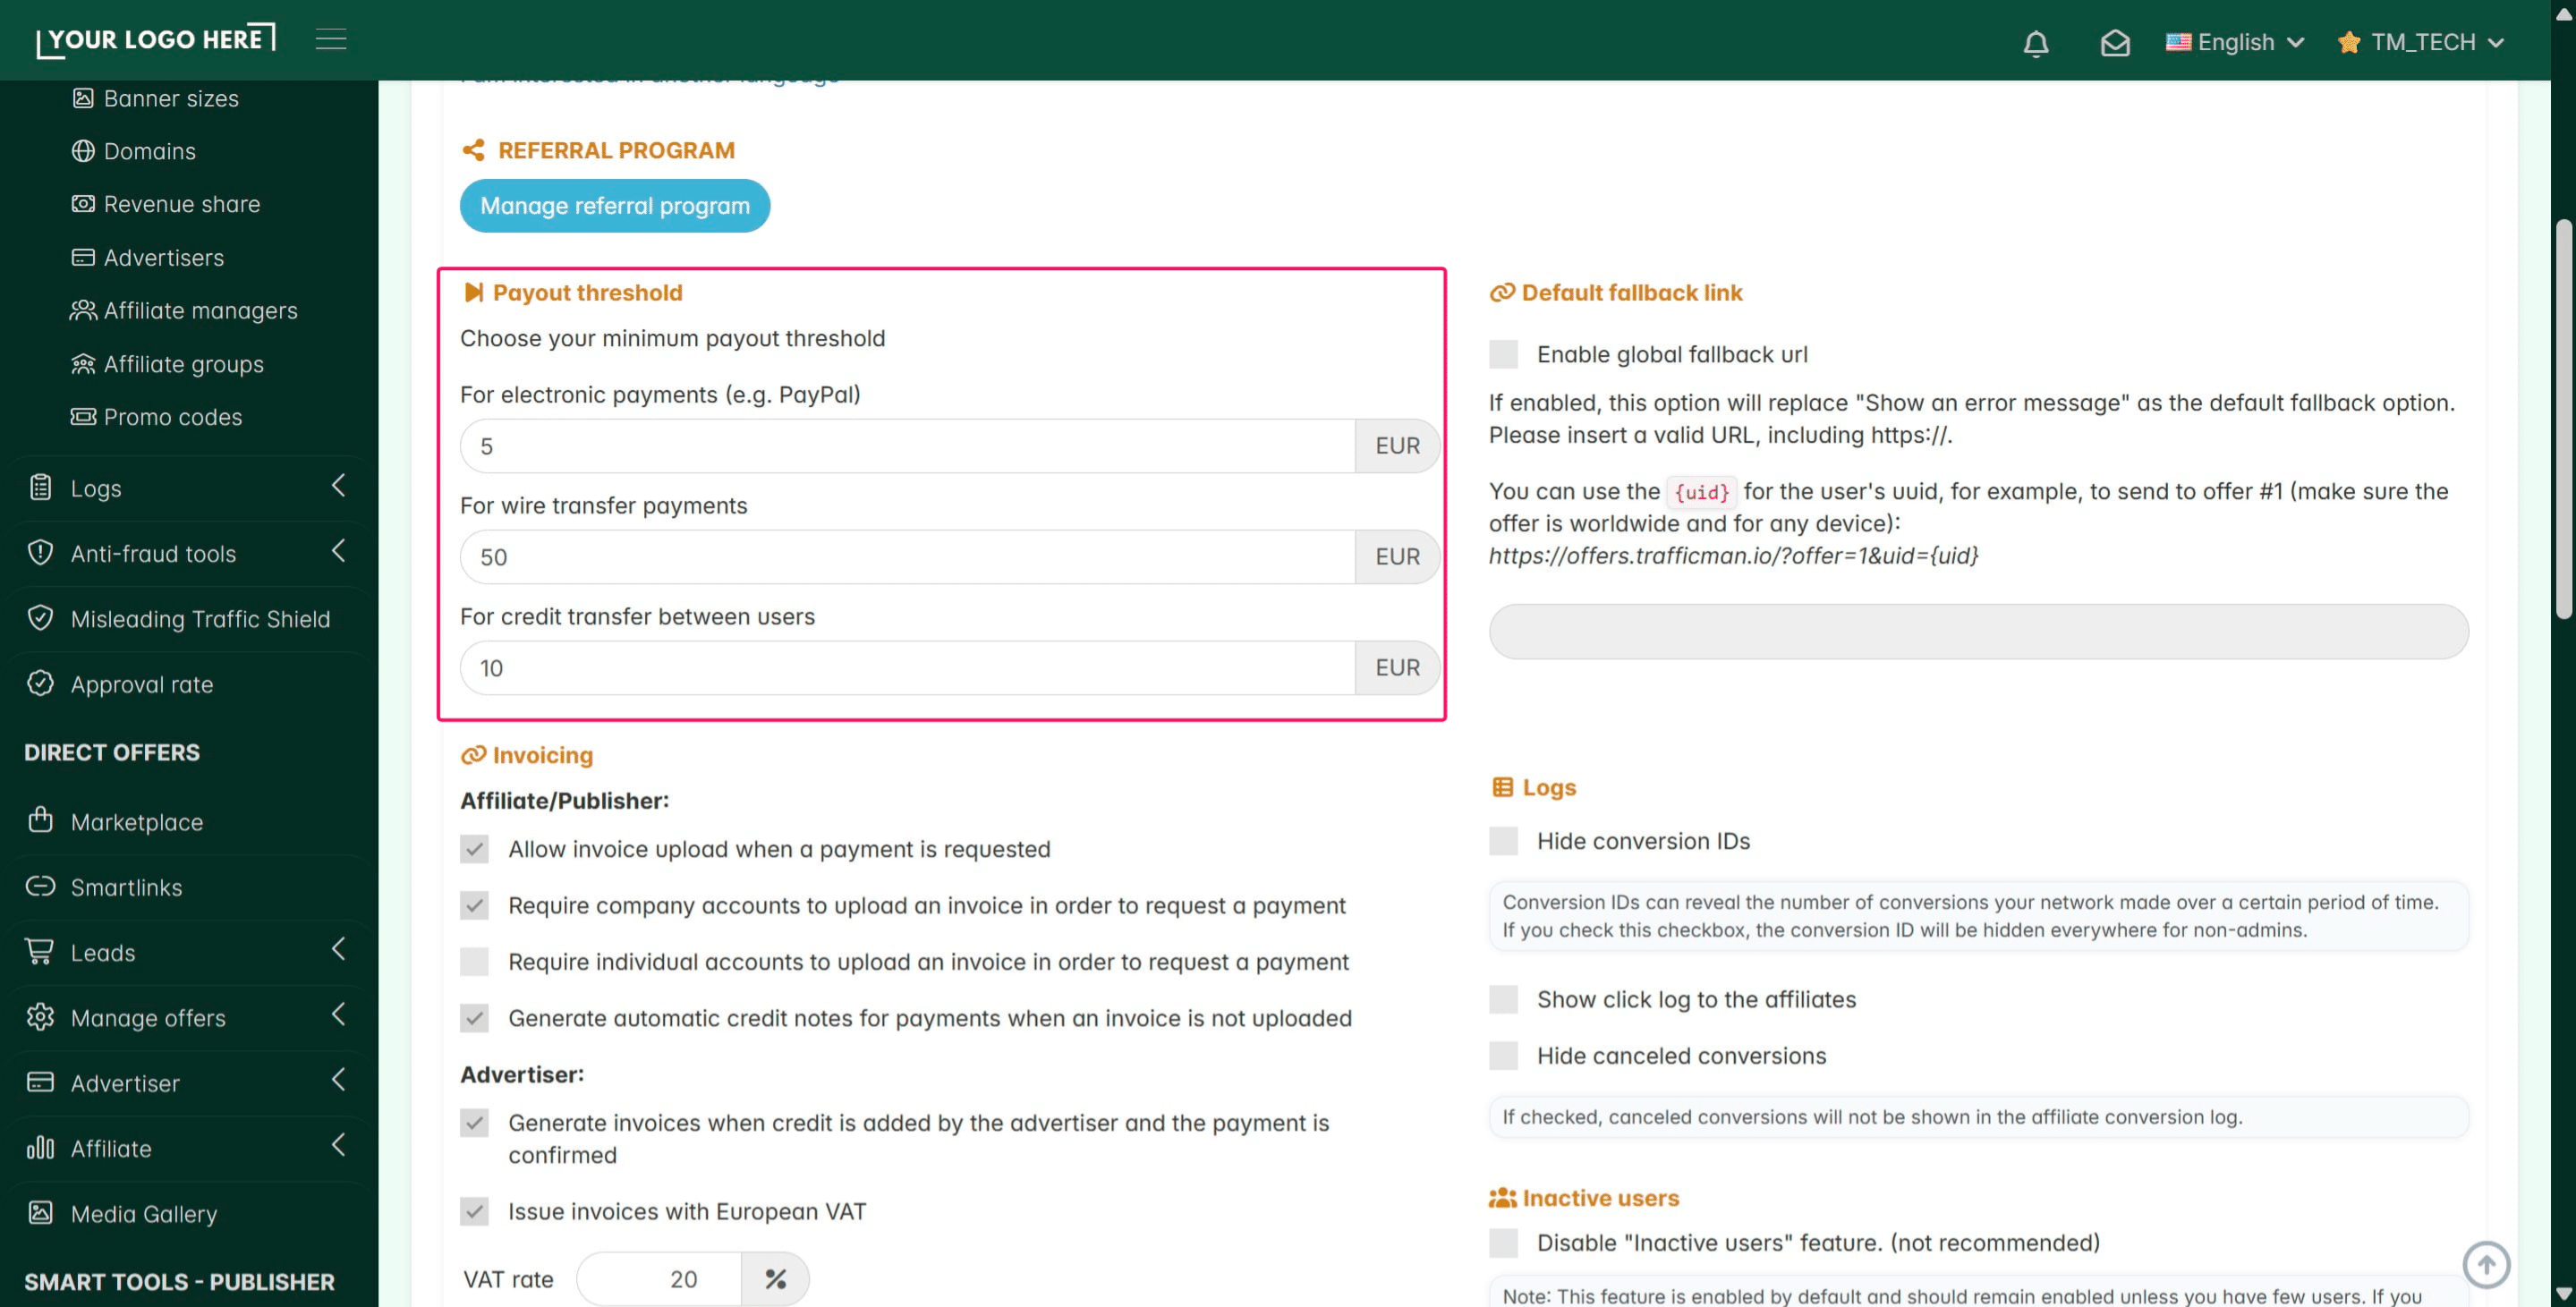
Minimum Payout: This is the smallest amount of money an affiliate must earn before they can ask for a payment.
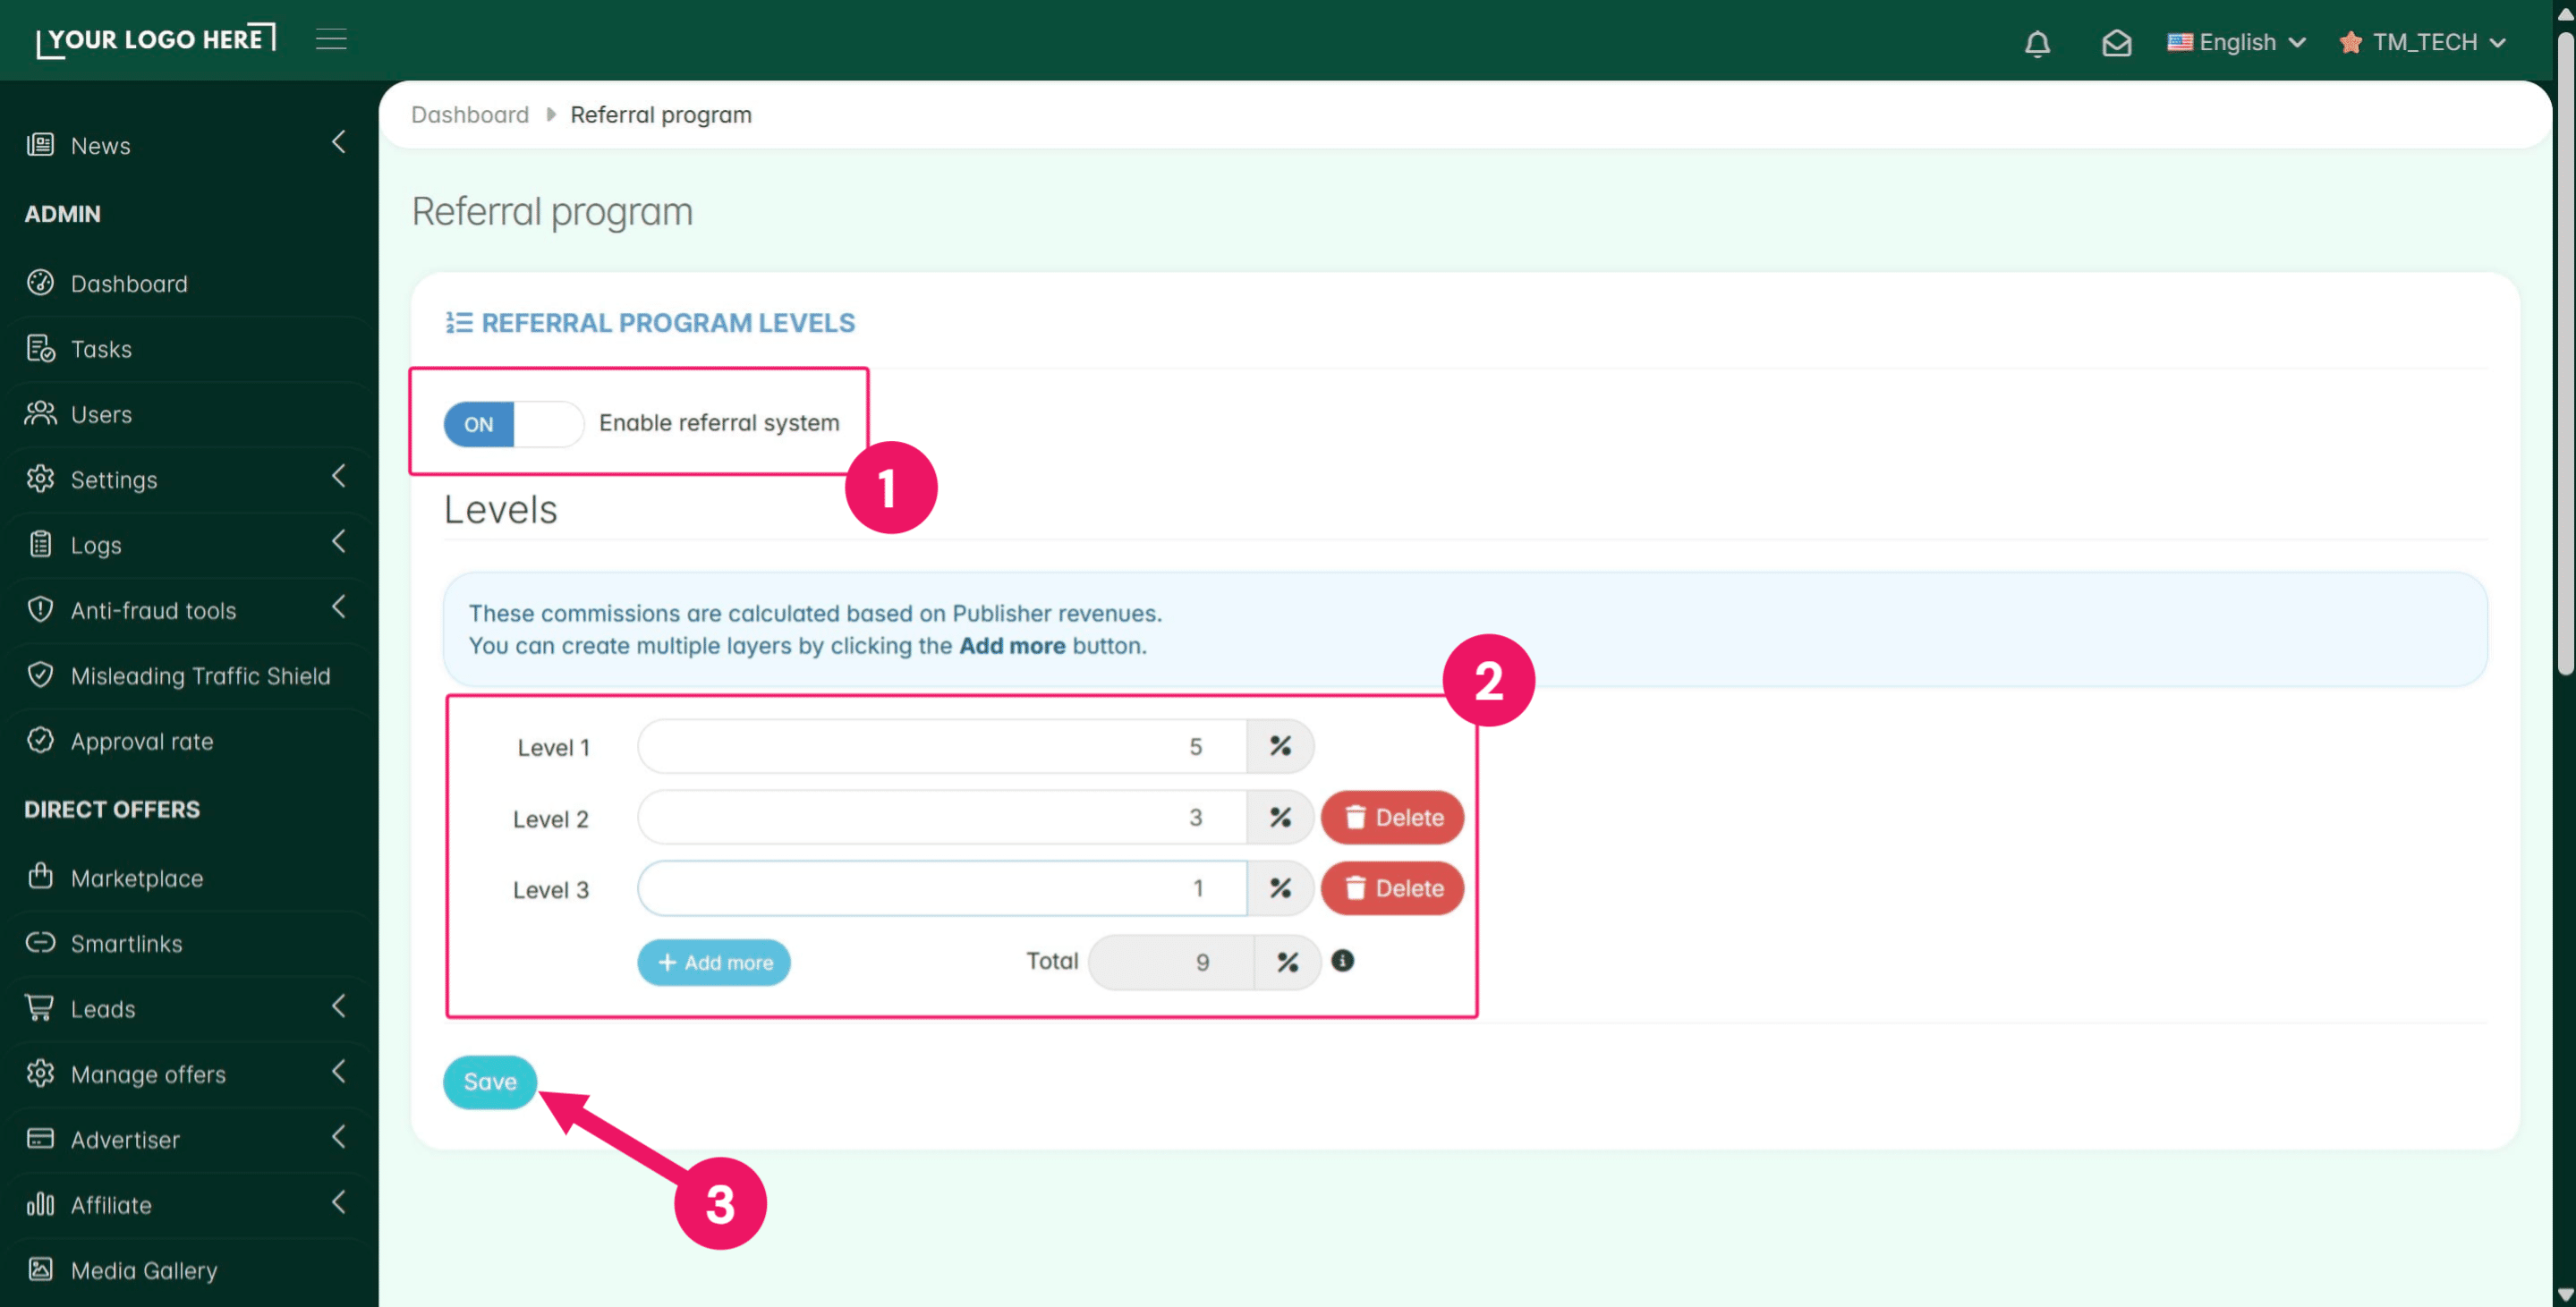
The Referral Program feature This is a great tool to encourage your current affiliates to bring new partners to your platform.
Activate it from this page and set up the bonus percentage that affiliates will earn for their referrers' activity. Note: This feature works on a single layer or multiple layers (Levels). The percentage is calculated based on the payout of the invited affiliate.
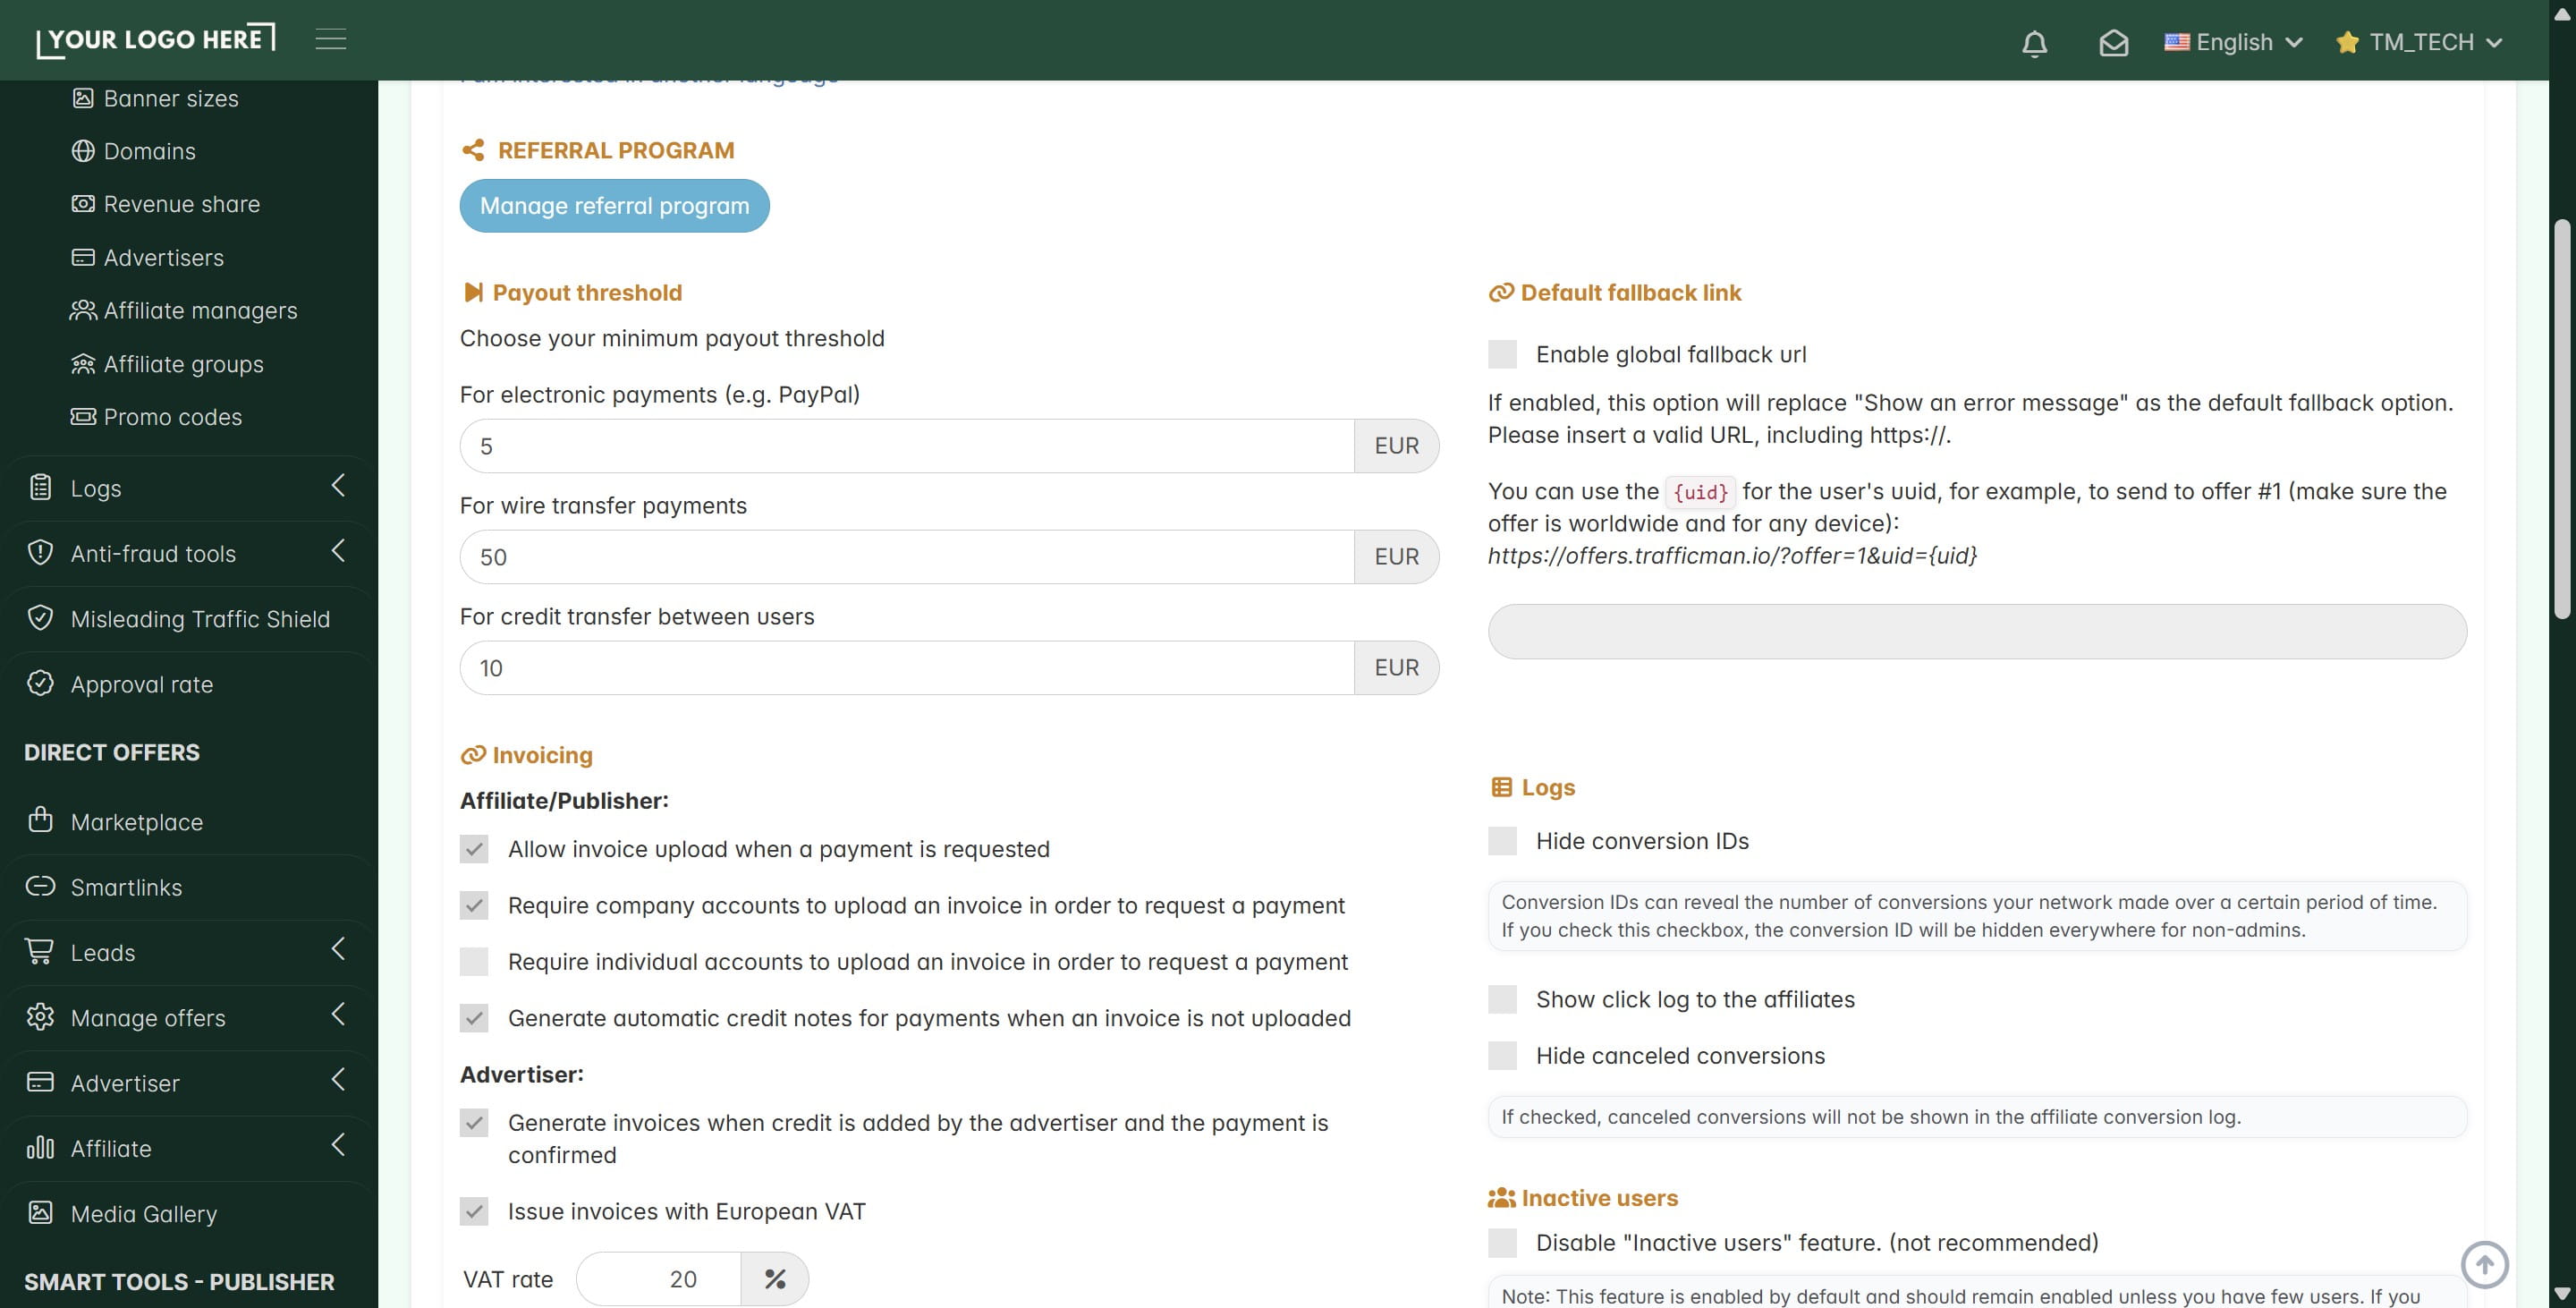
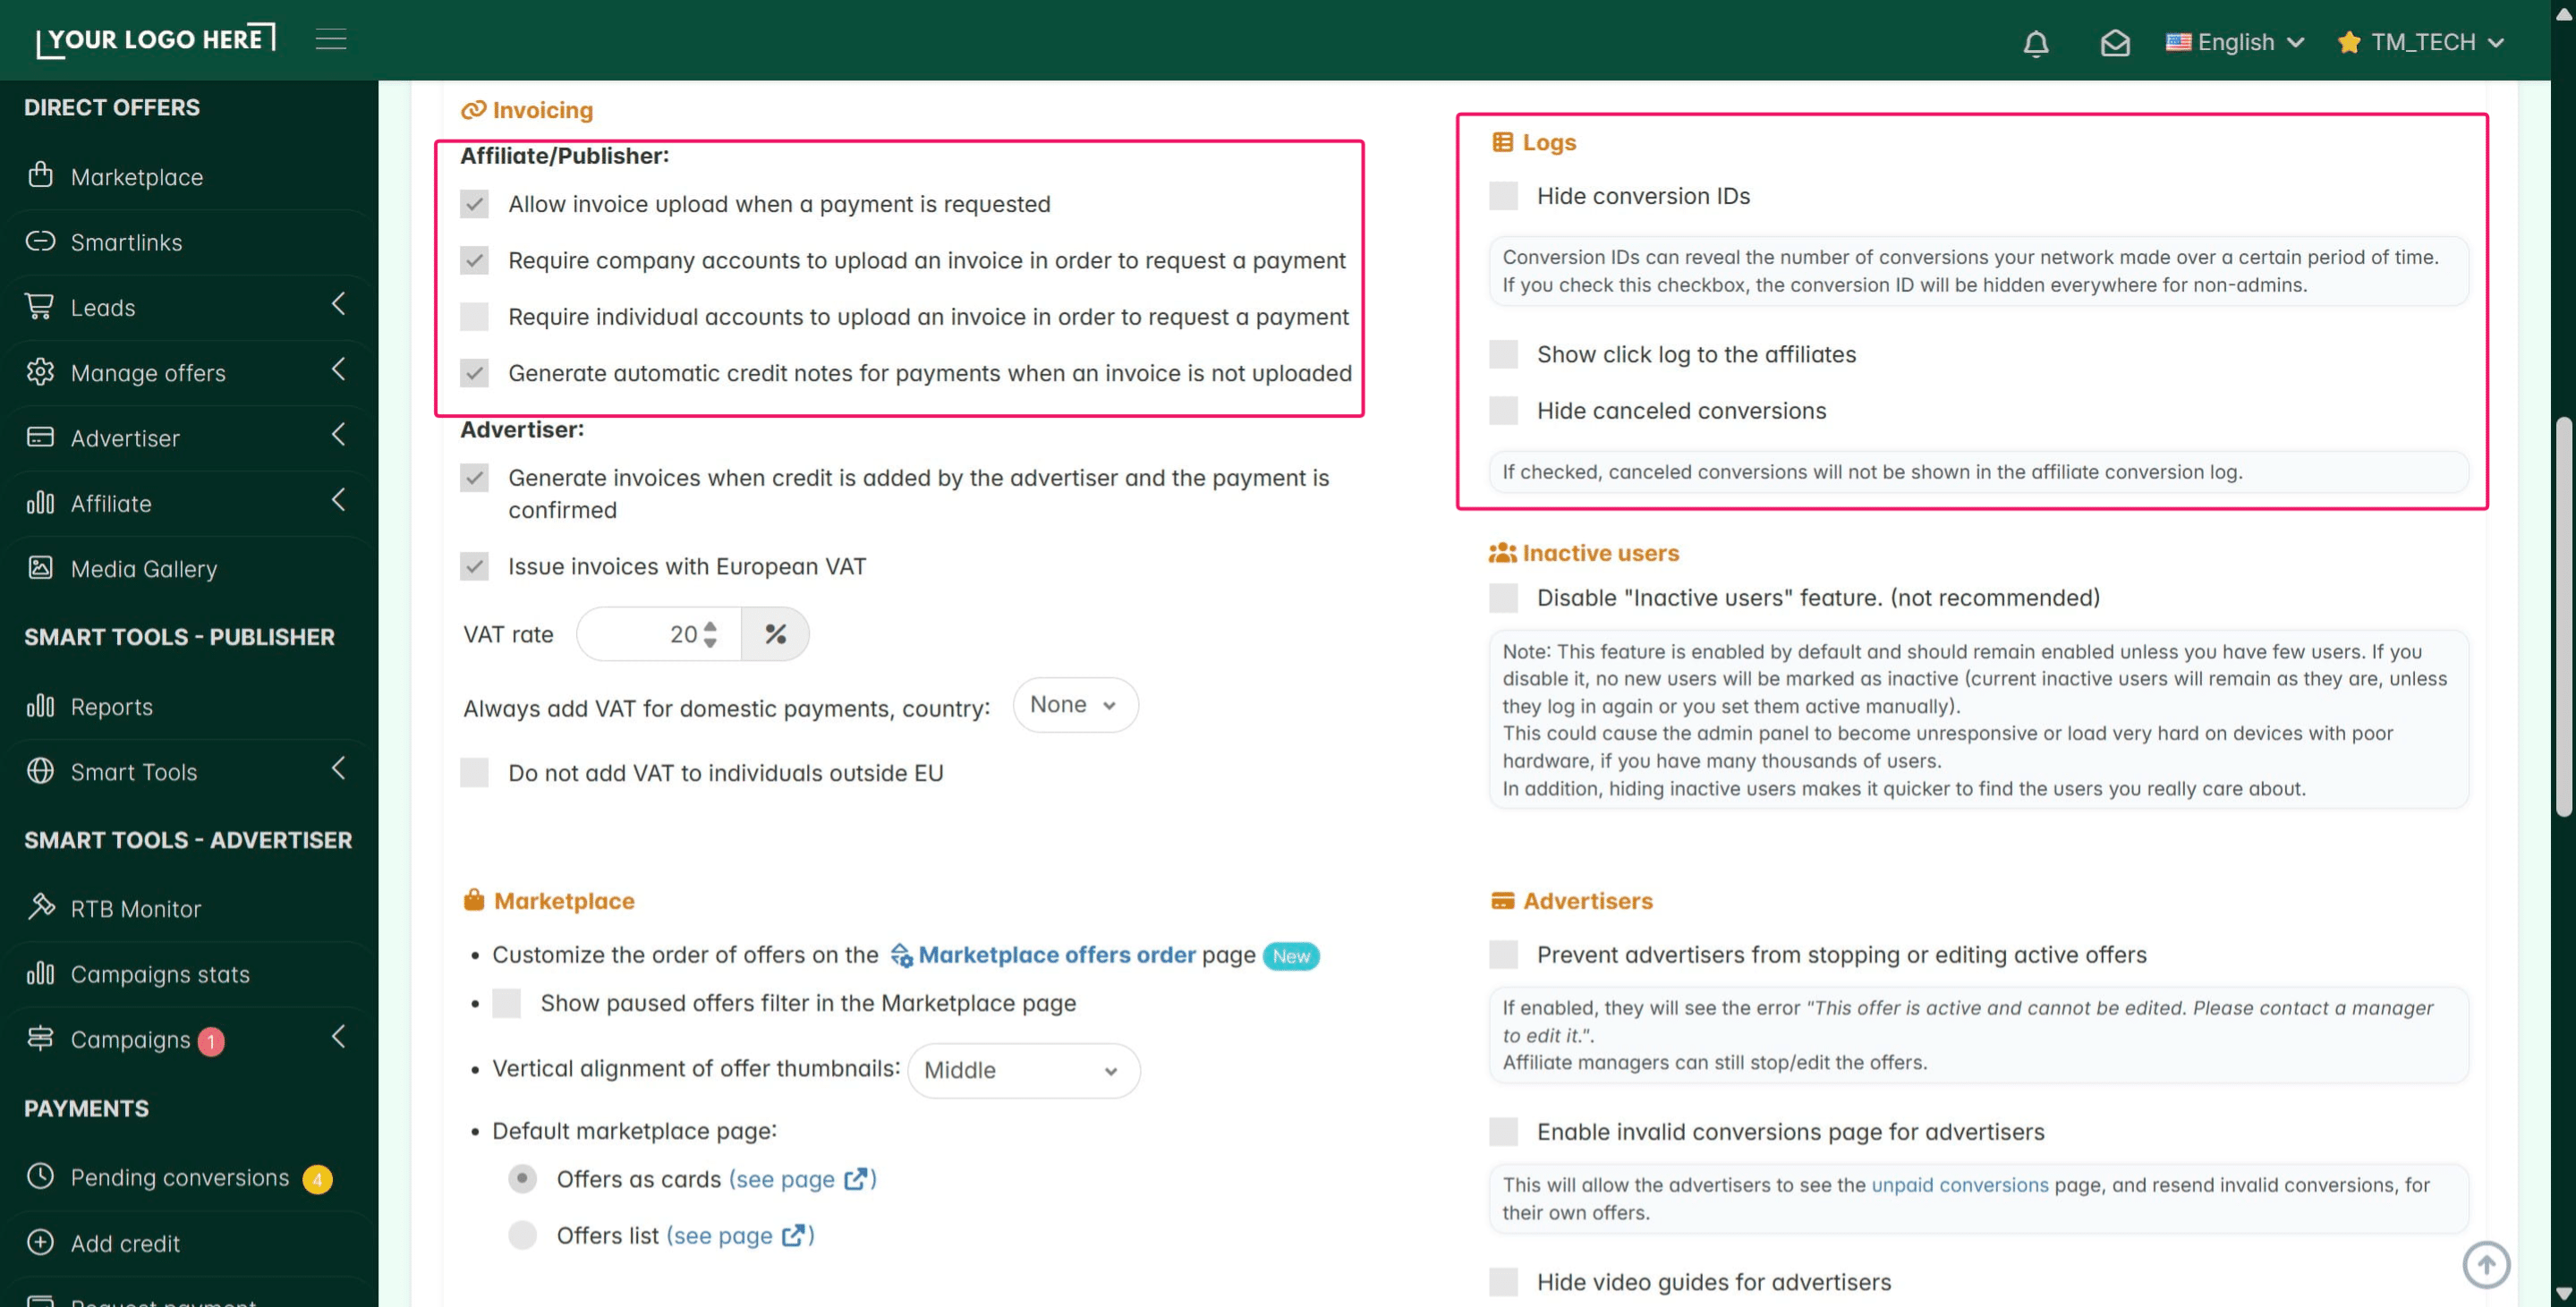
Before moving to the next section, you will find other useful tools on this page. These include settings for Affiliate Invoicing, Advertiser Invoicing, and other functions to help manage your network. Take a moment to look through these extra options to see which ones fit your needs.
Important:
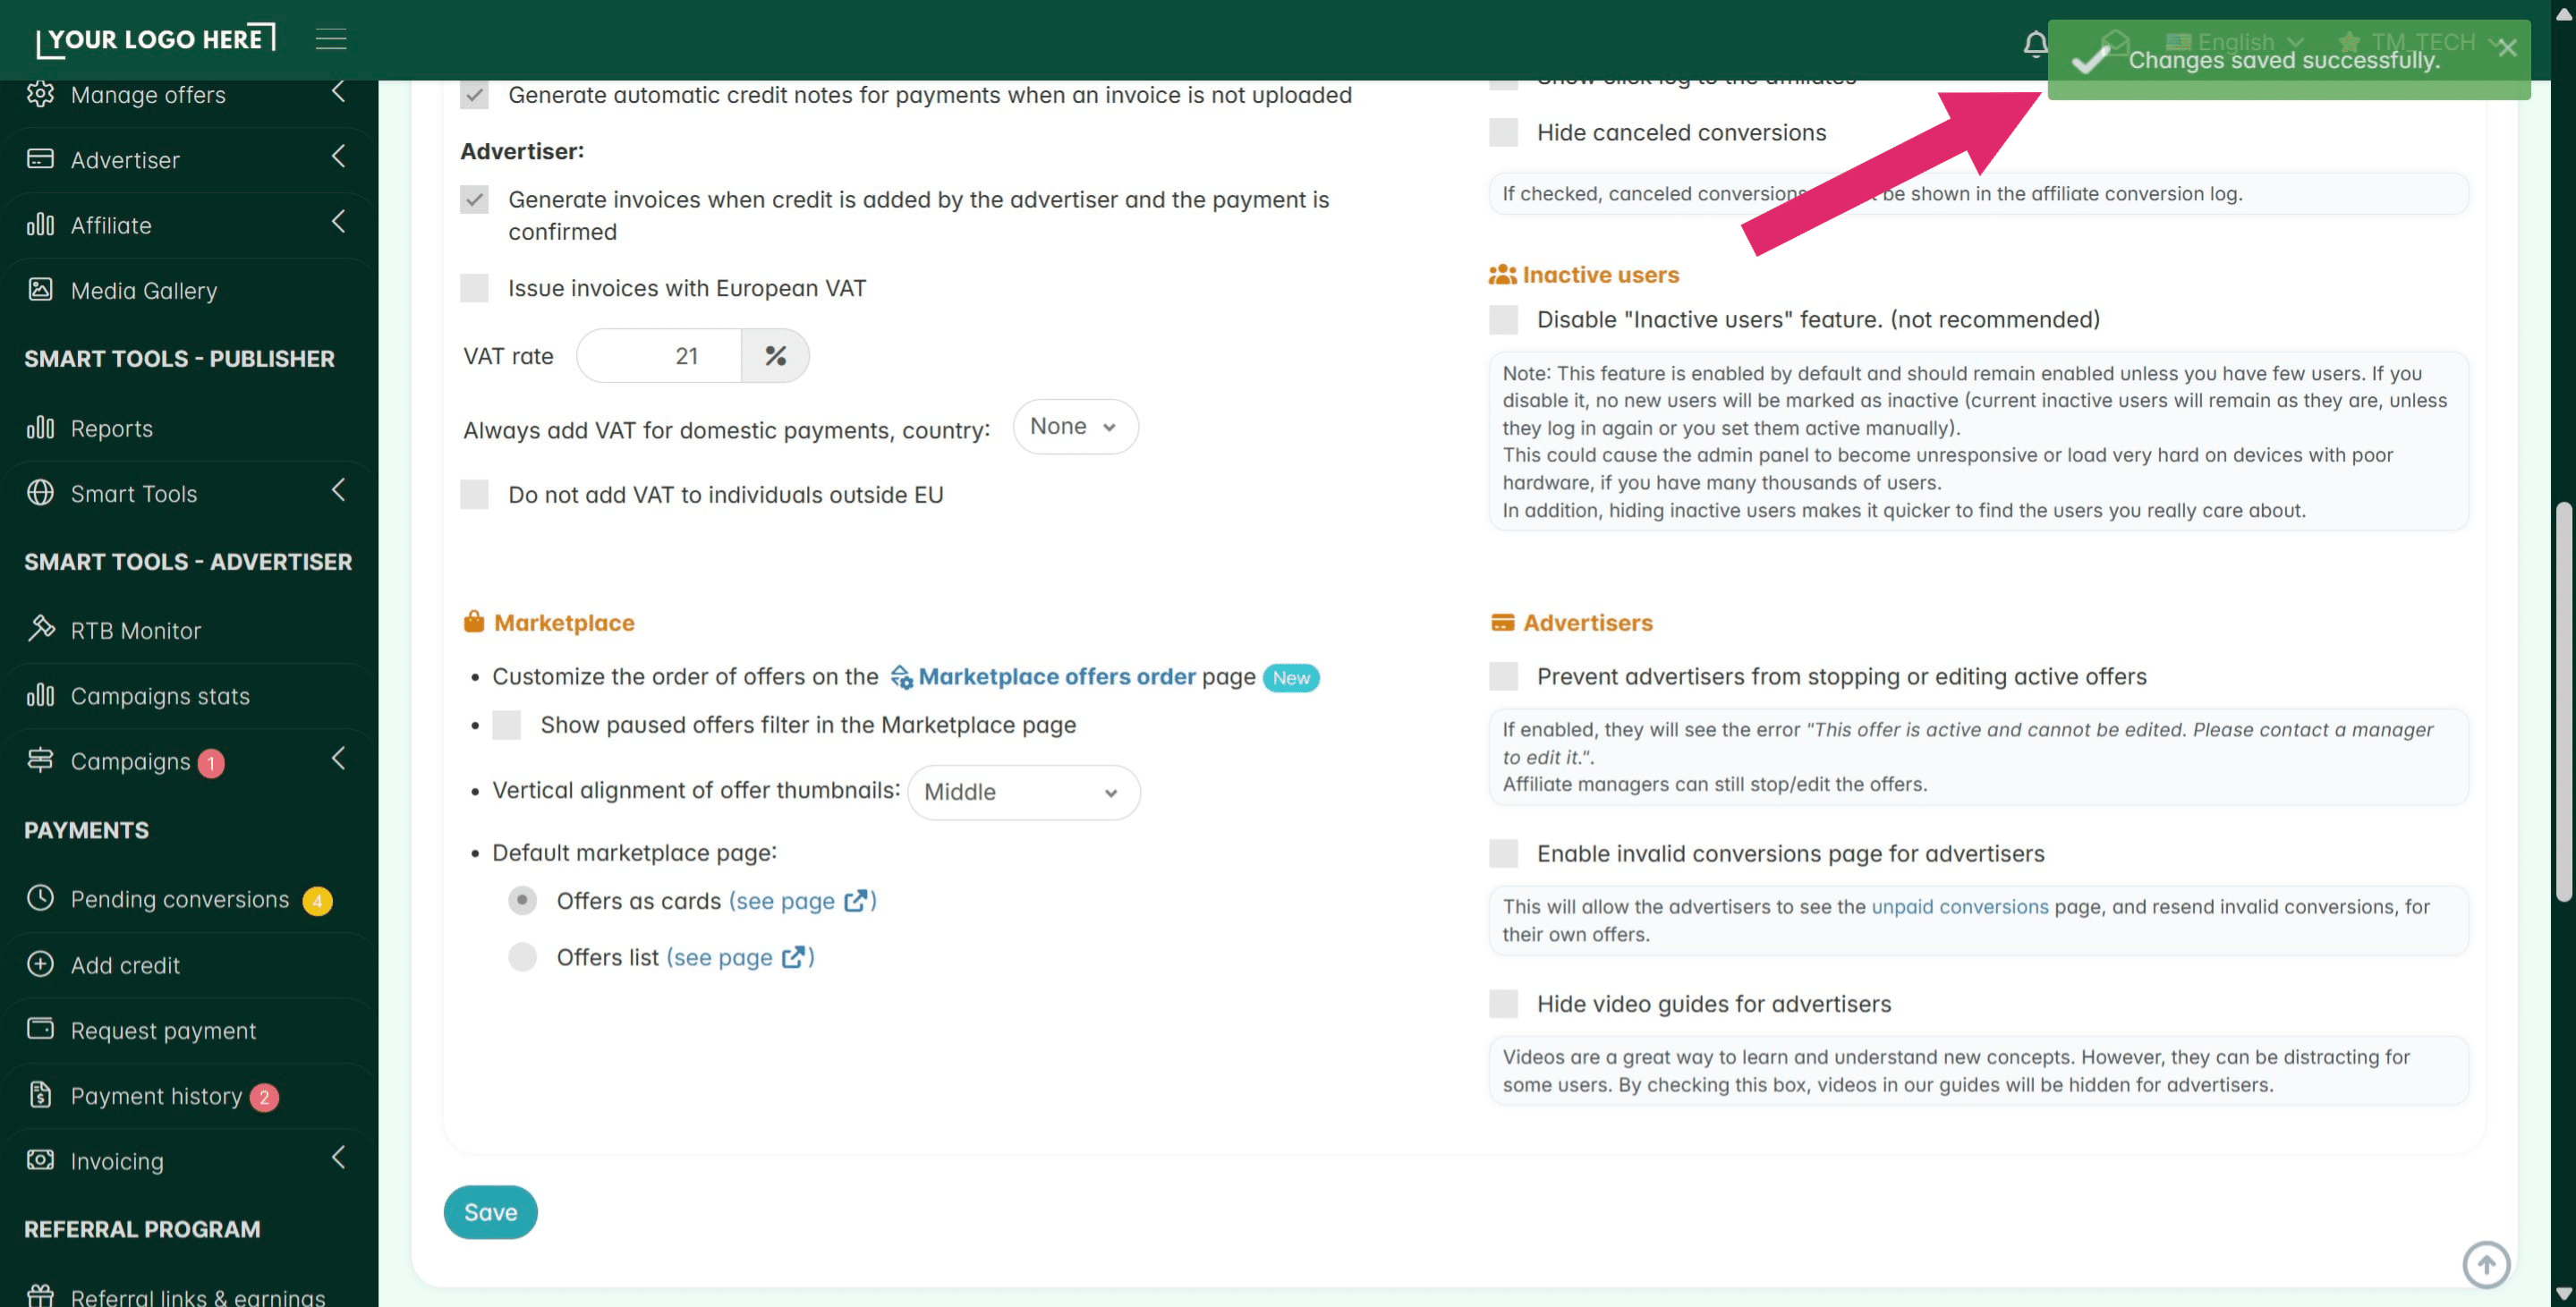
Always remember to click the Save button at the bottom of the page to apply your changes!
6. External Tab (Optional Integrations)
The External tab is where you connect your platform to other popular tools. This helps you automate your work and communicate better with your partners.
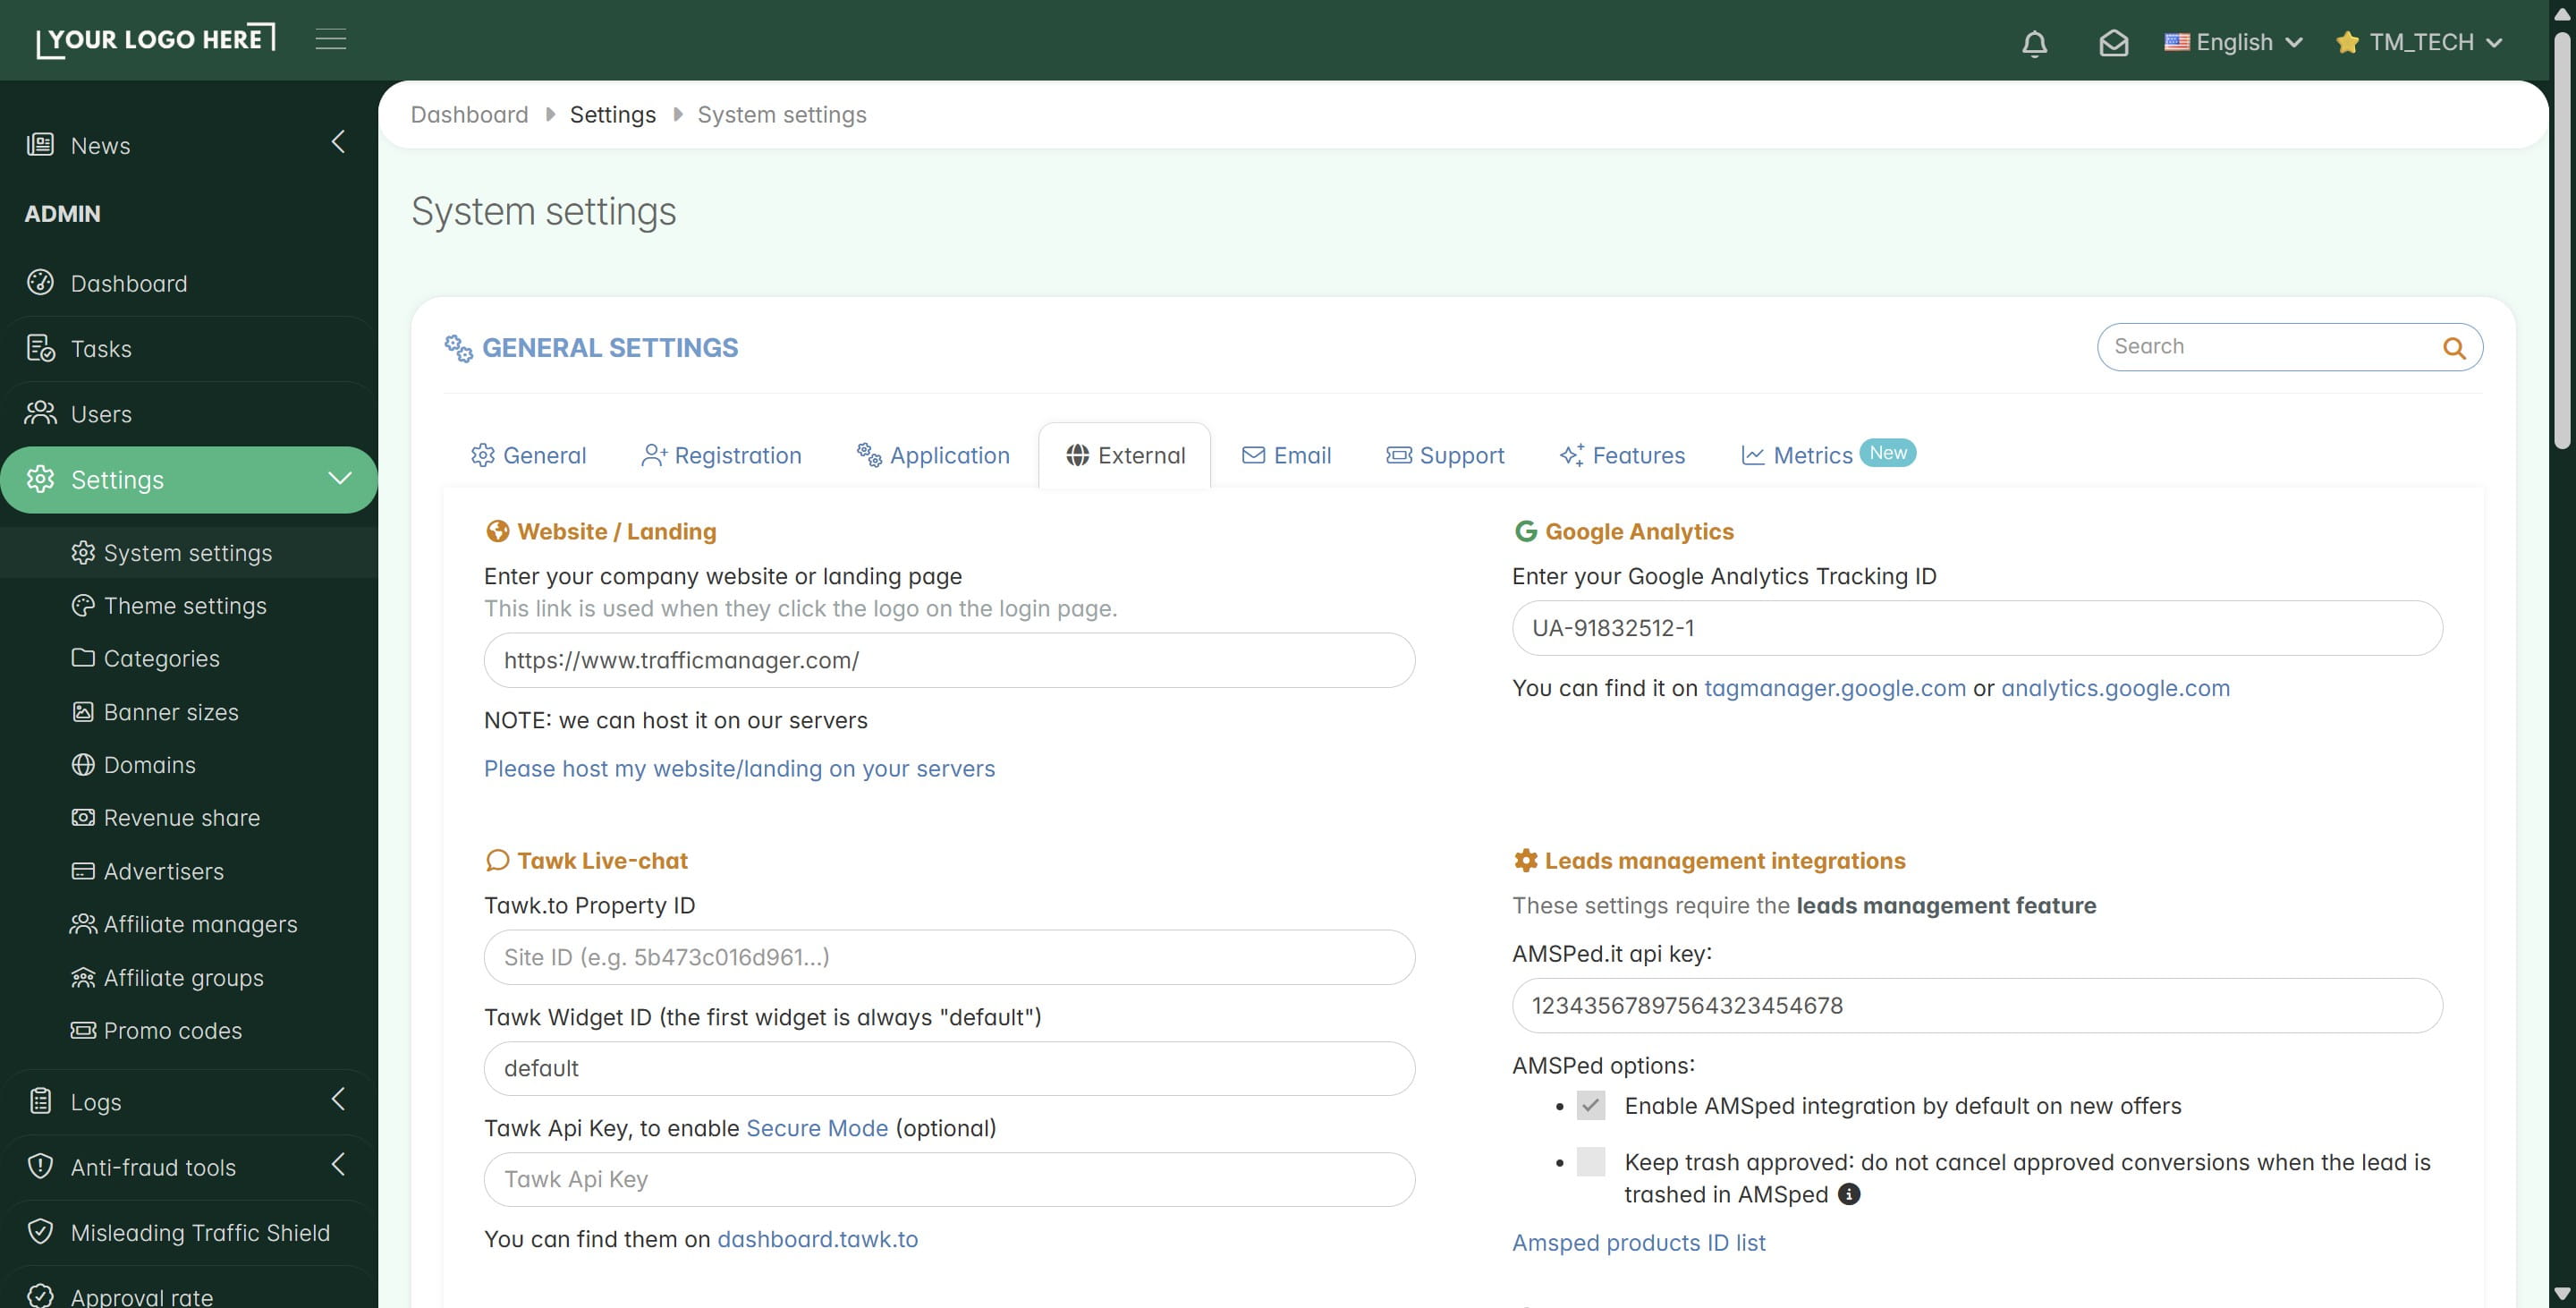
Website / Landing Page: Enter your main company website link here. When users click on your logo on the login page, they will be sent to this URL.
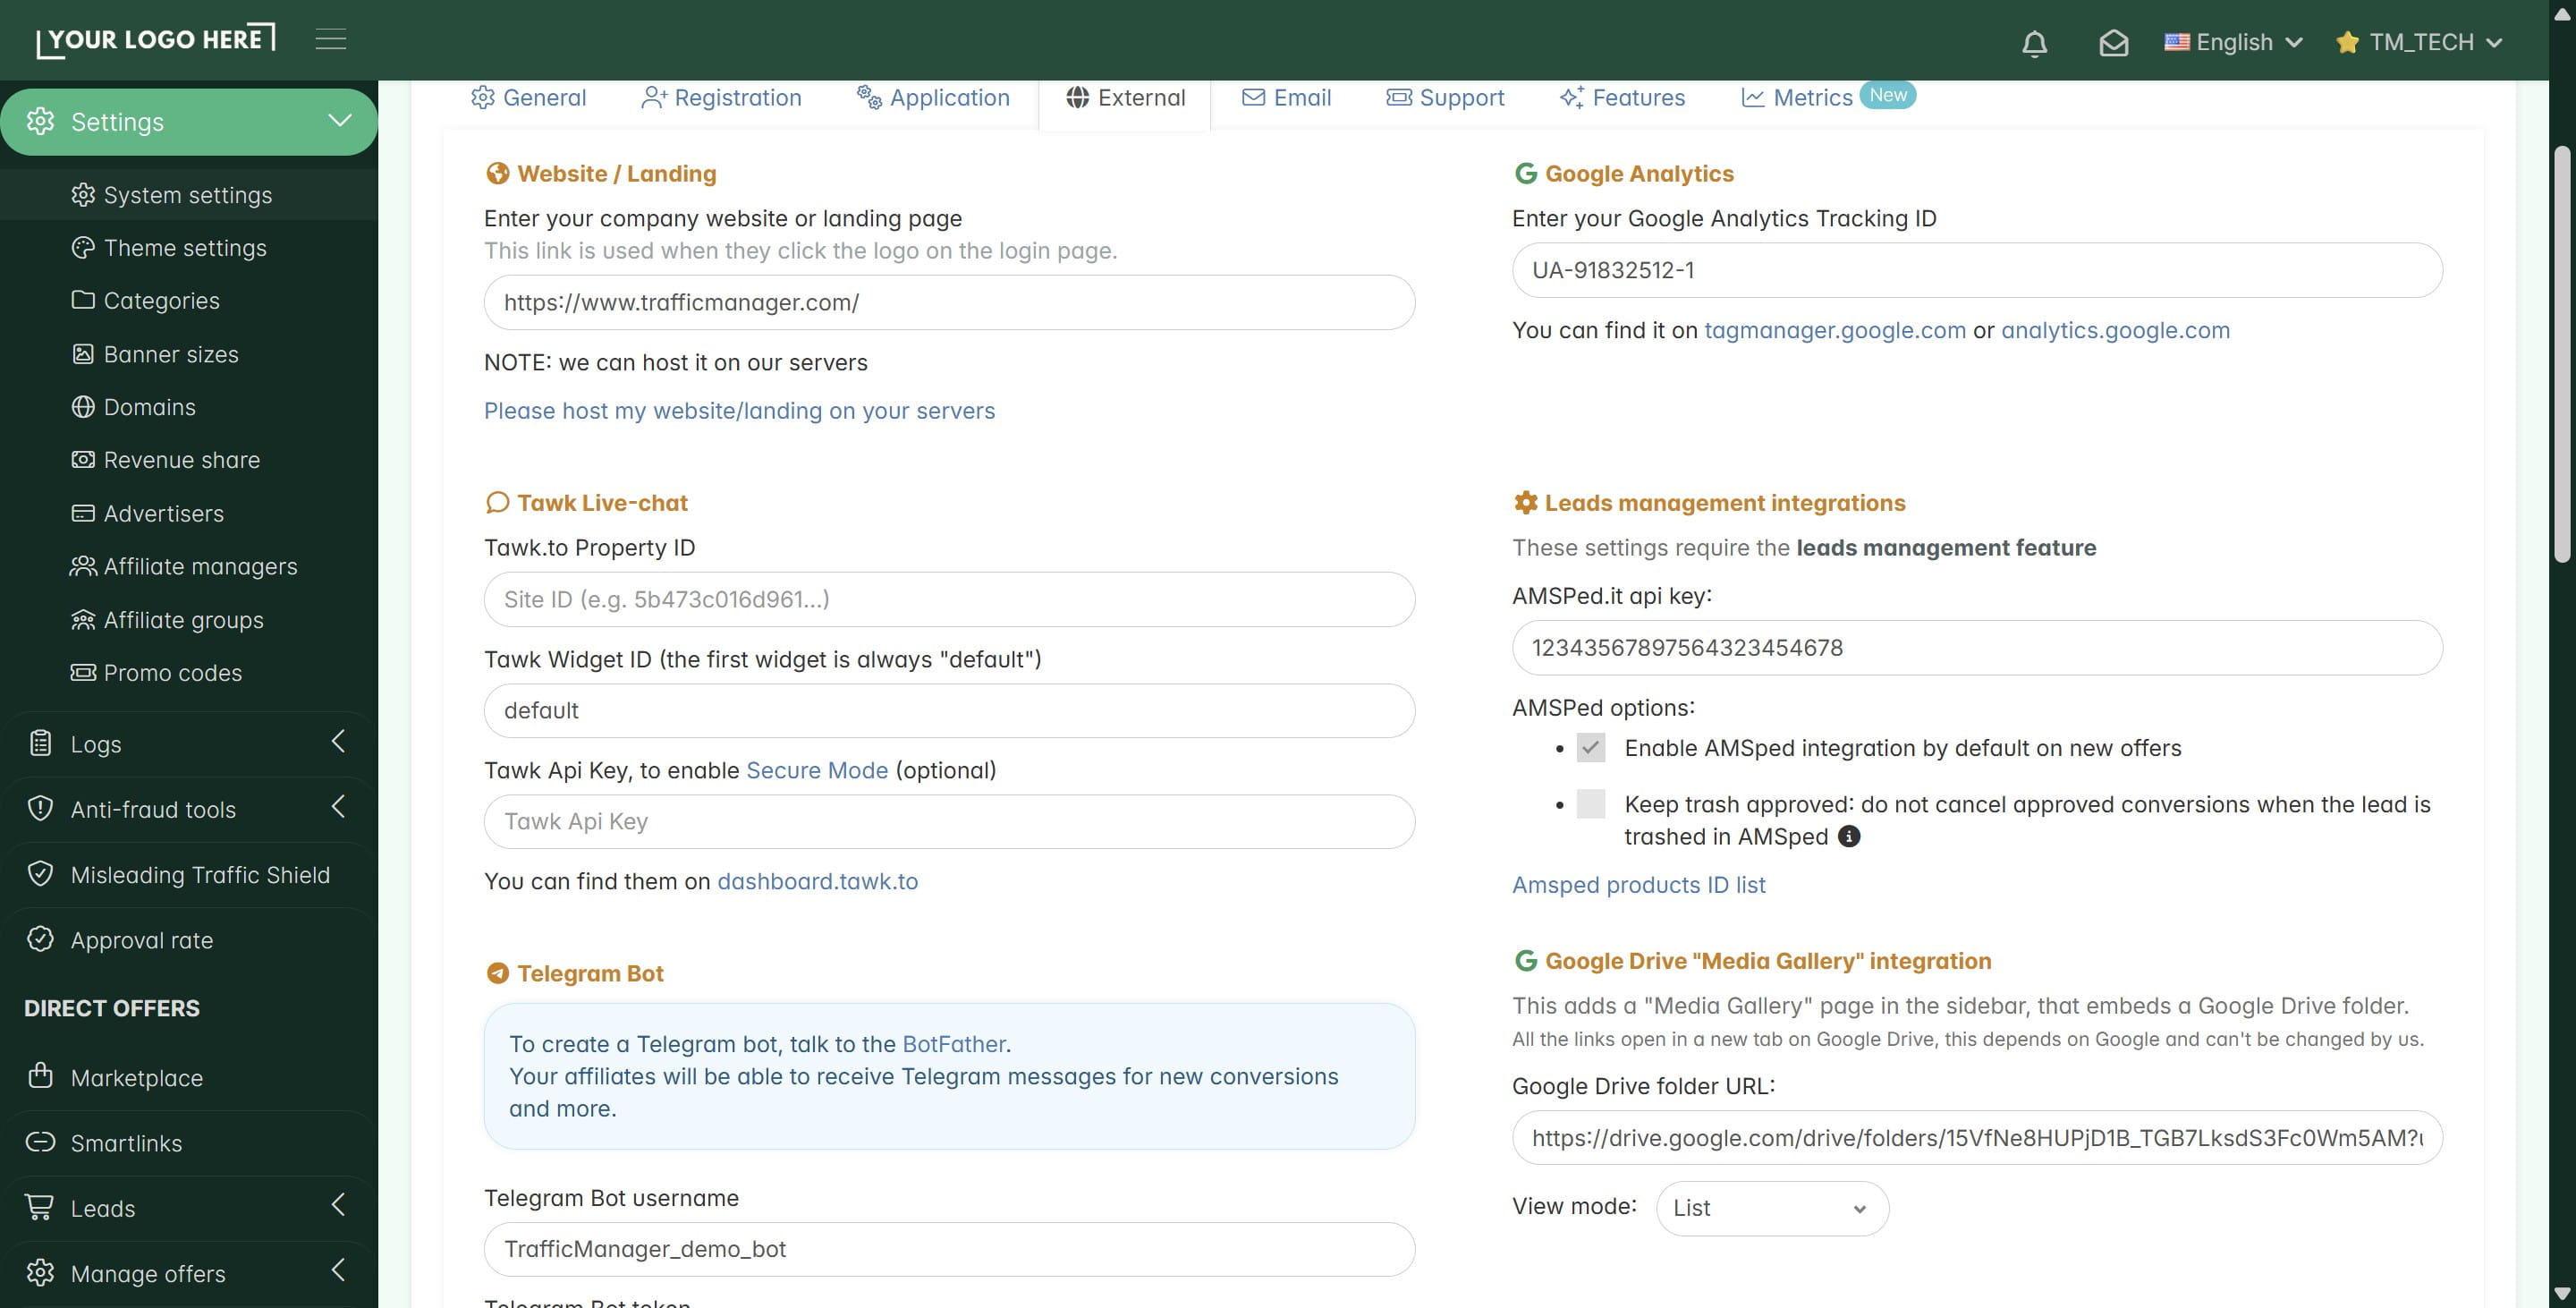
Google Analytics: Enter your Tracking ID to see how many people visit your platform and which pages they use most.
Tawk Live-chat: Connect your Tawk.to account to show a chat bubble on your platform. This allows you to give instant support to your affiliates.
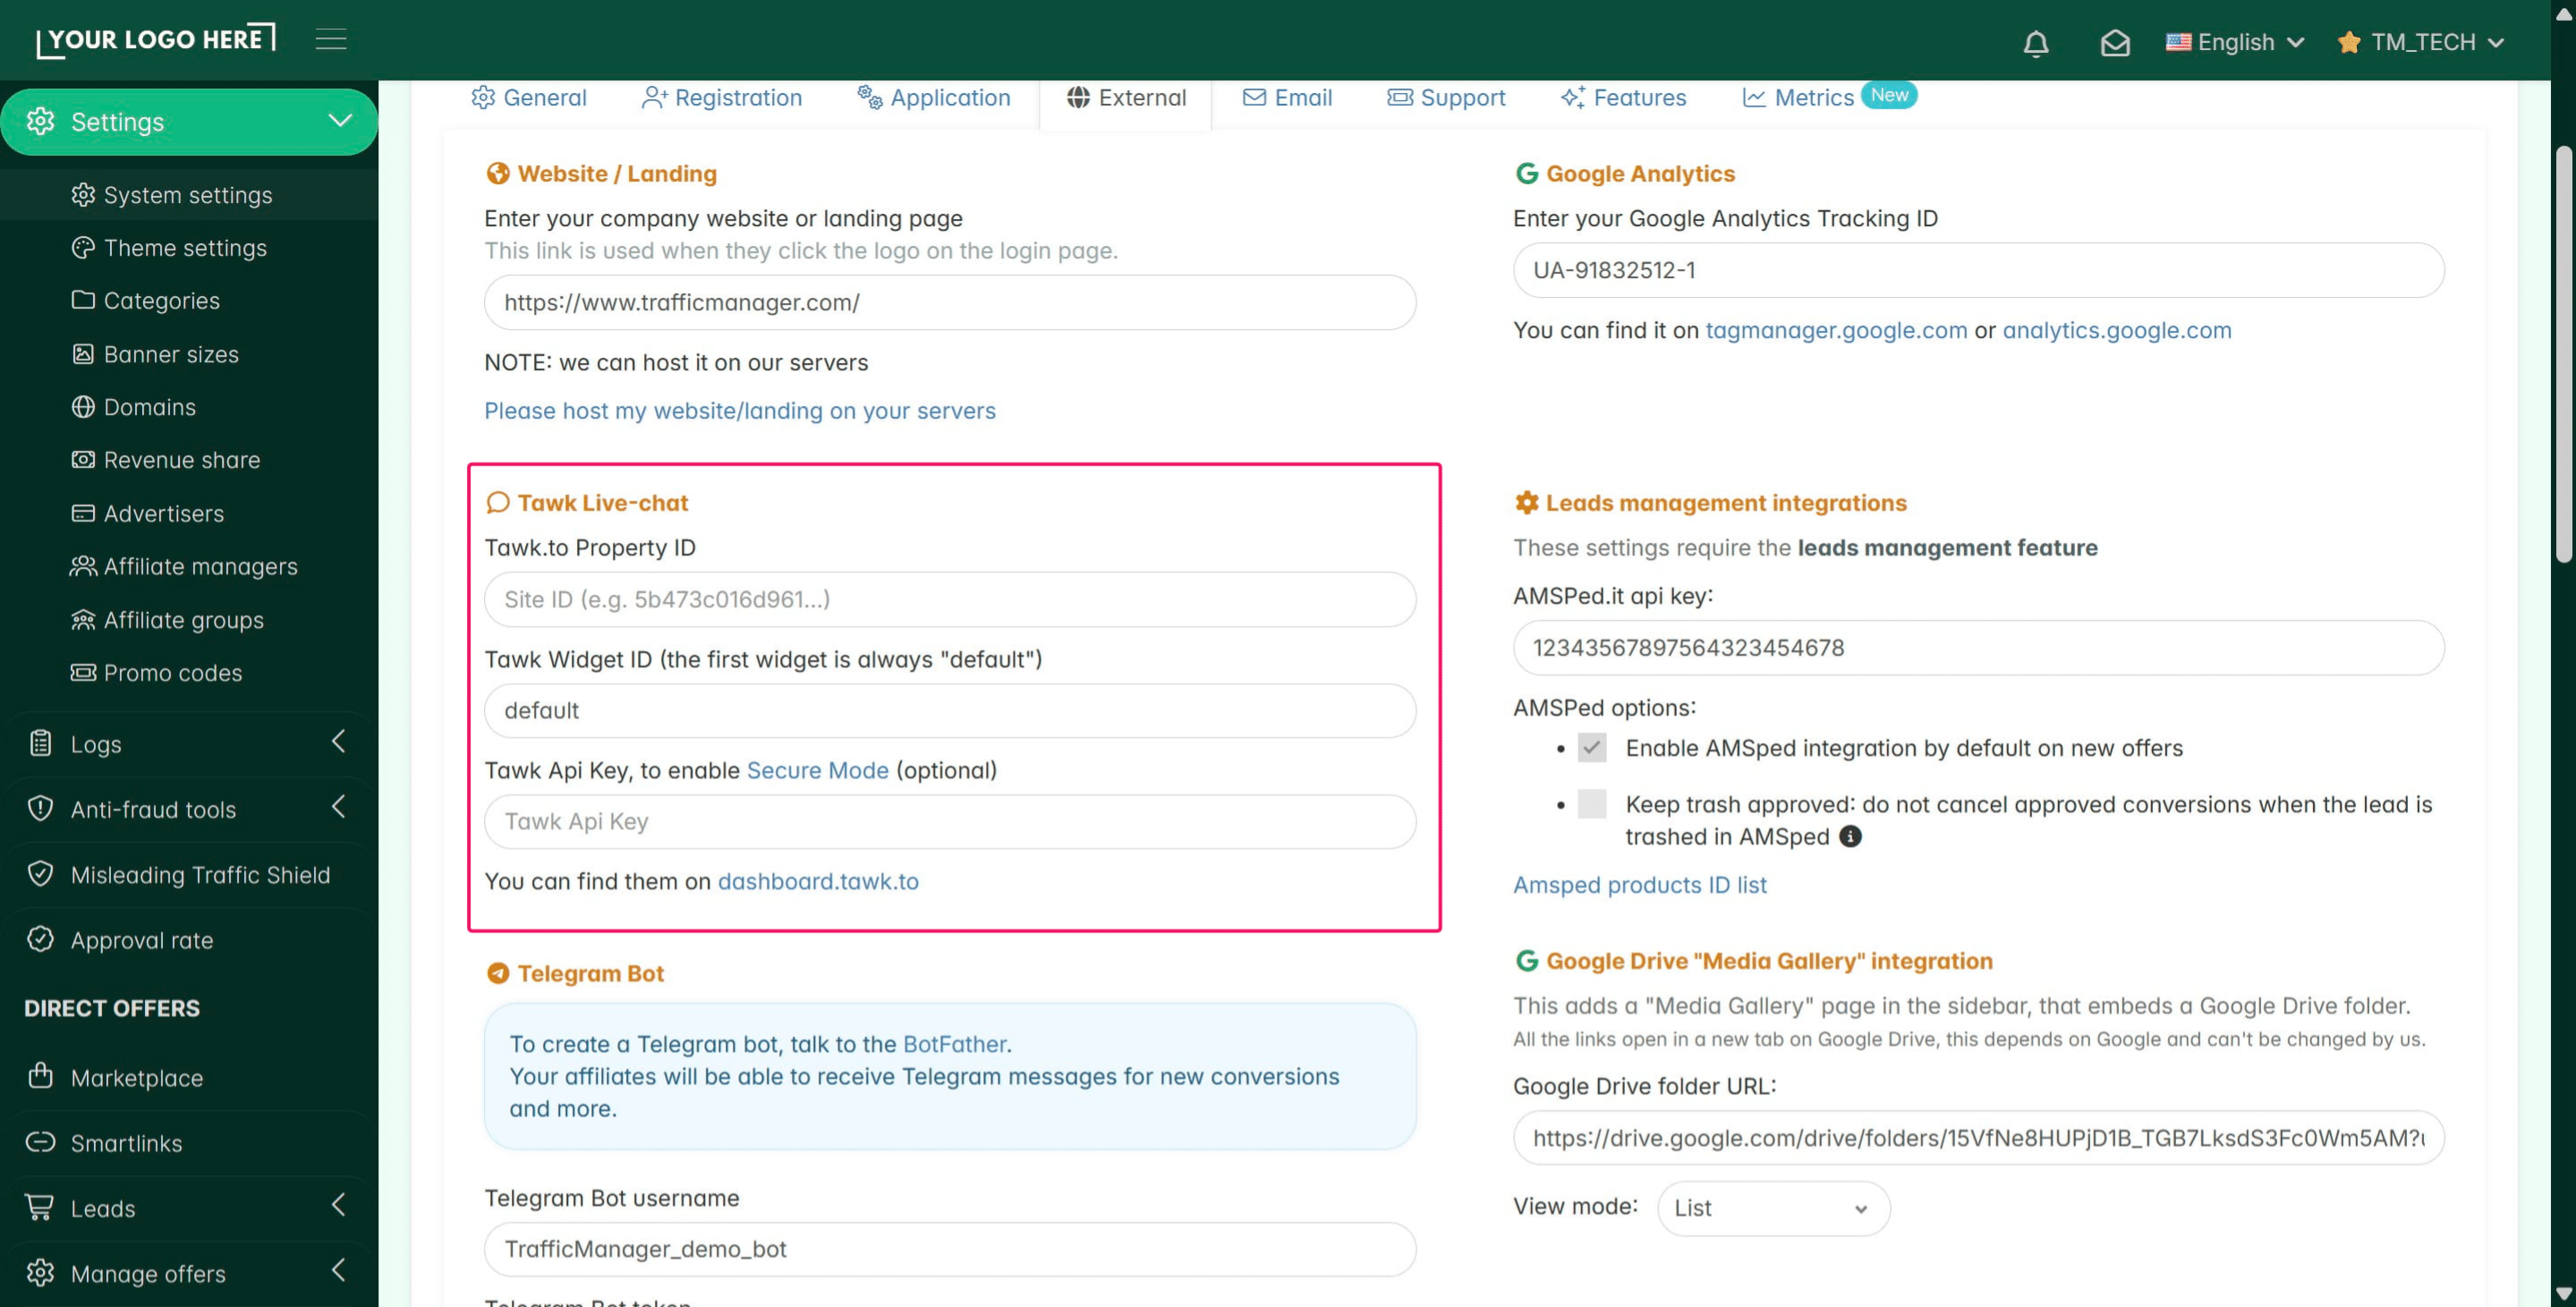
AMSped: If you use their lead management platform, you can connect it here to sync your data.
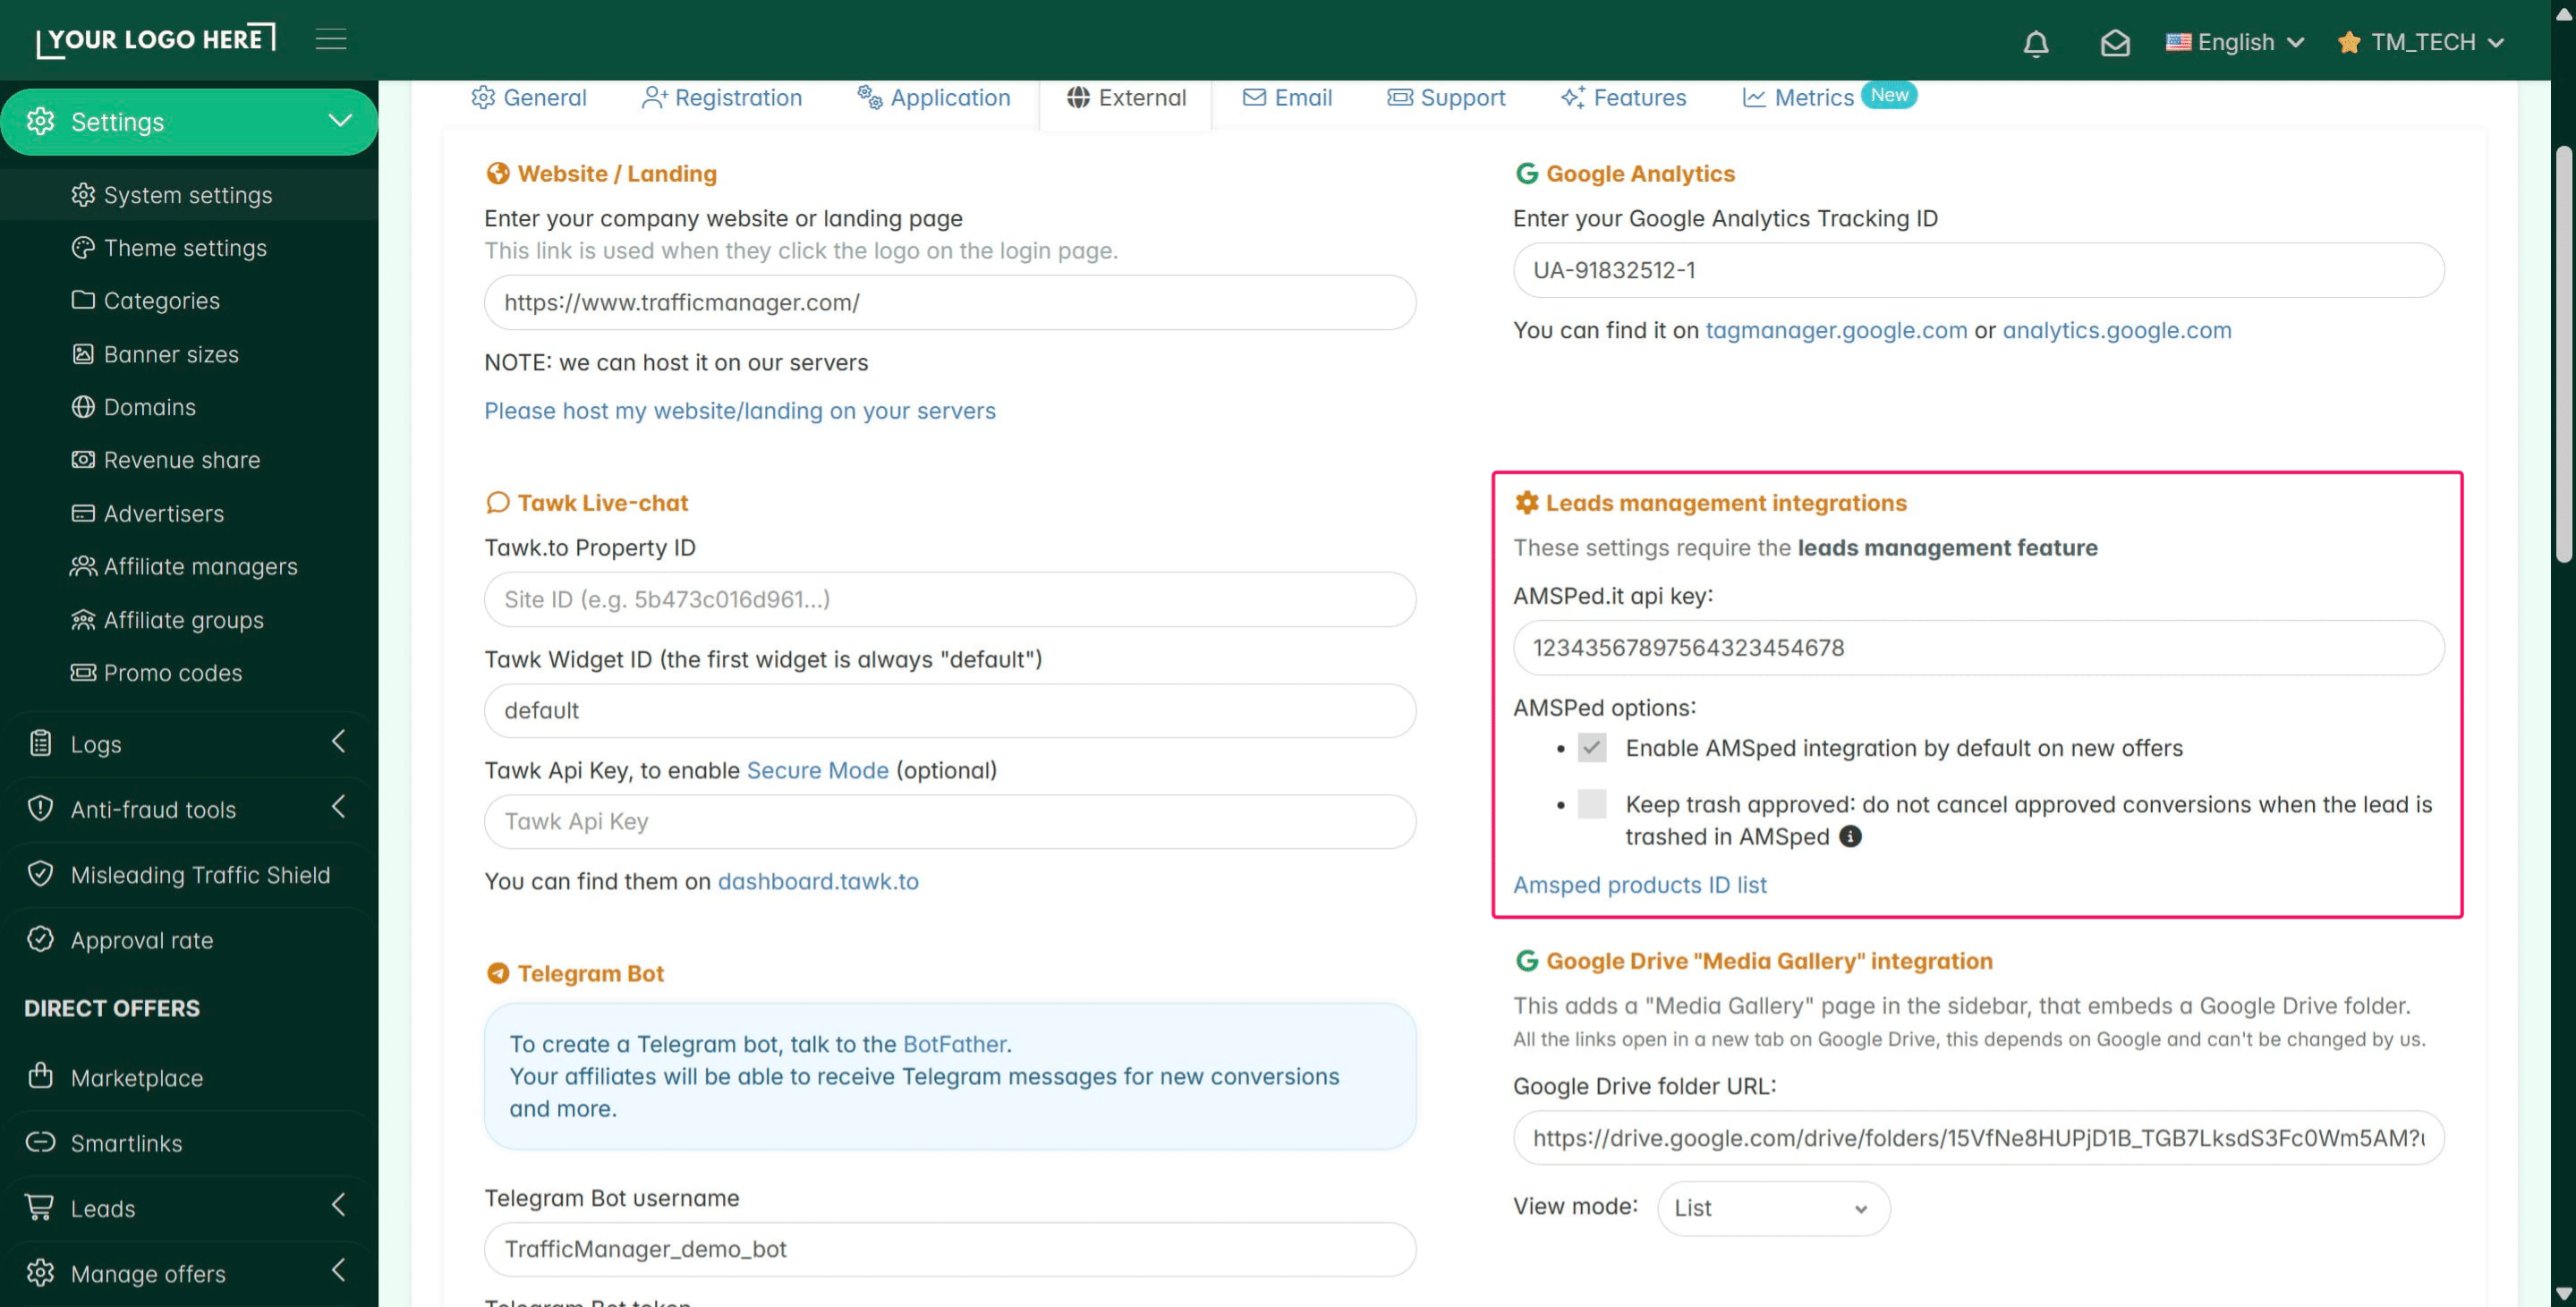
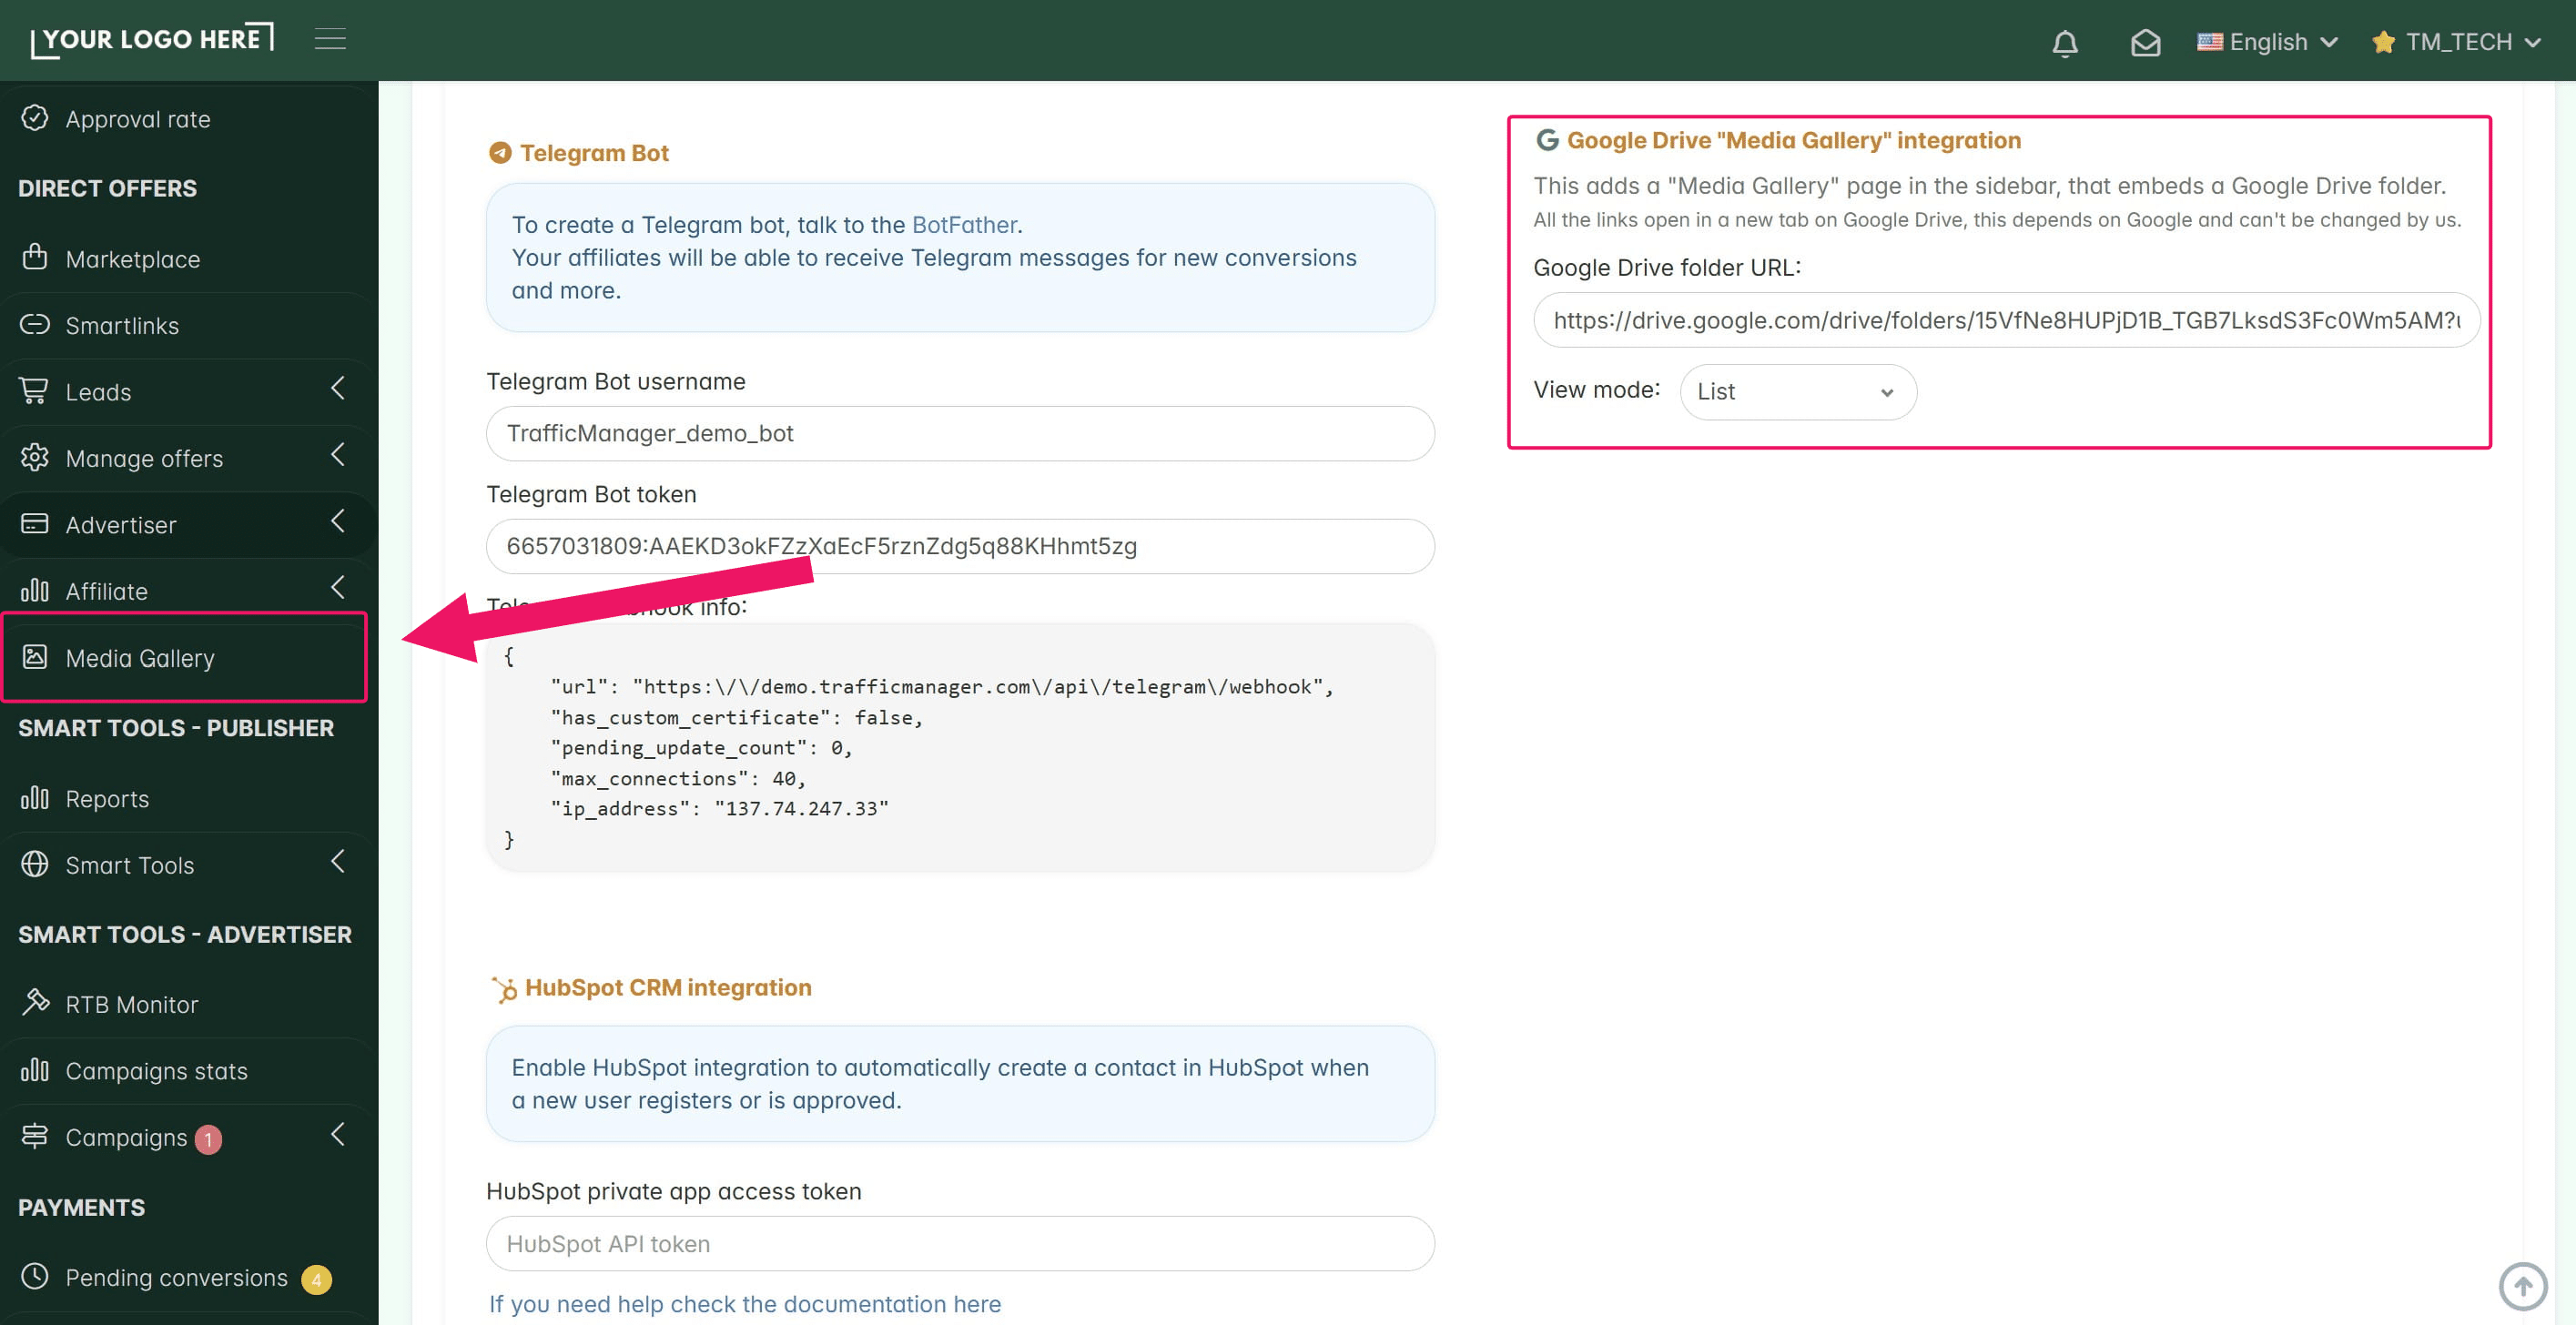
Google Drive "Media Gallery": You can link a Google Drive folder here. This creates a "Media Gallery" in the sidebar where affiliates can find and download your banners, images, and videos.
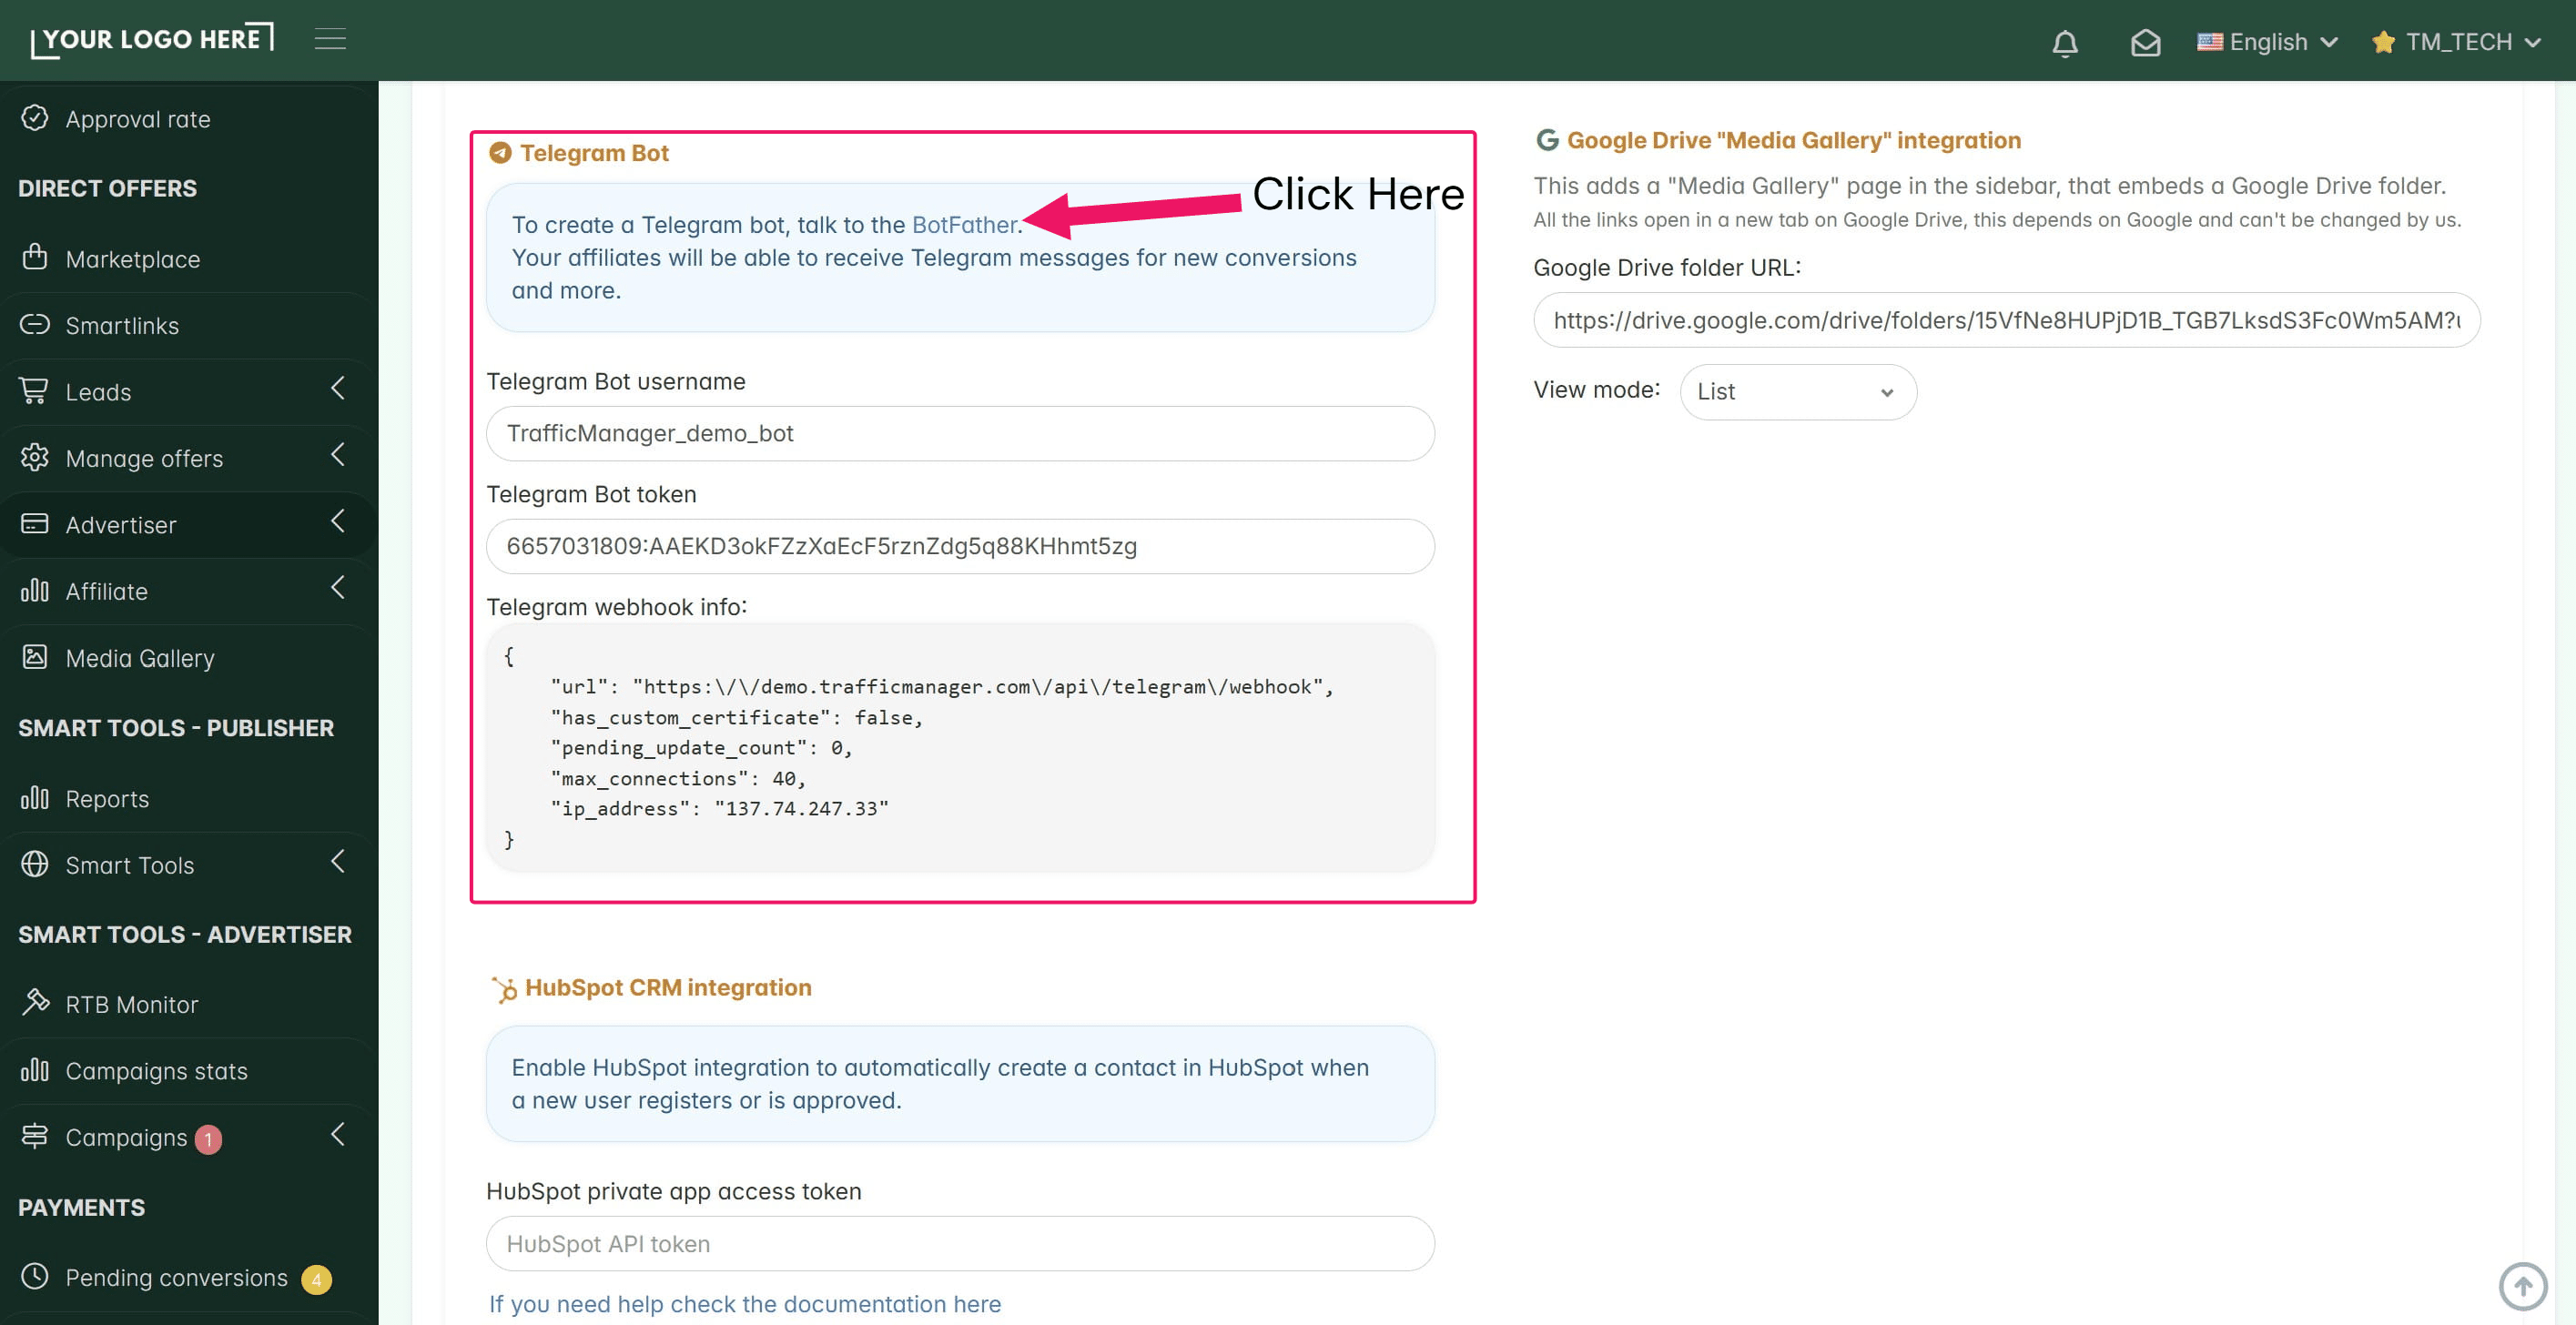
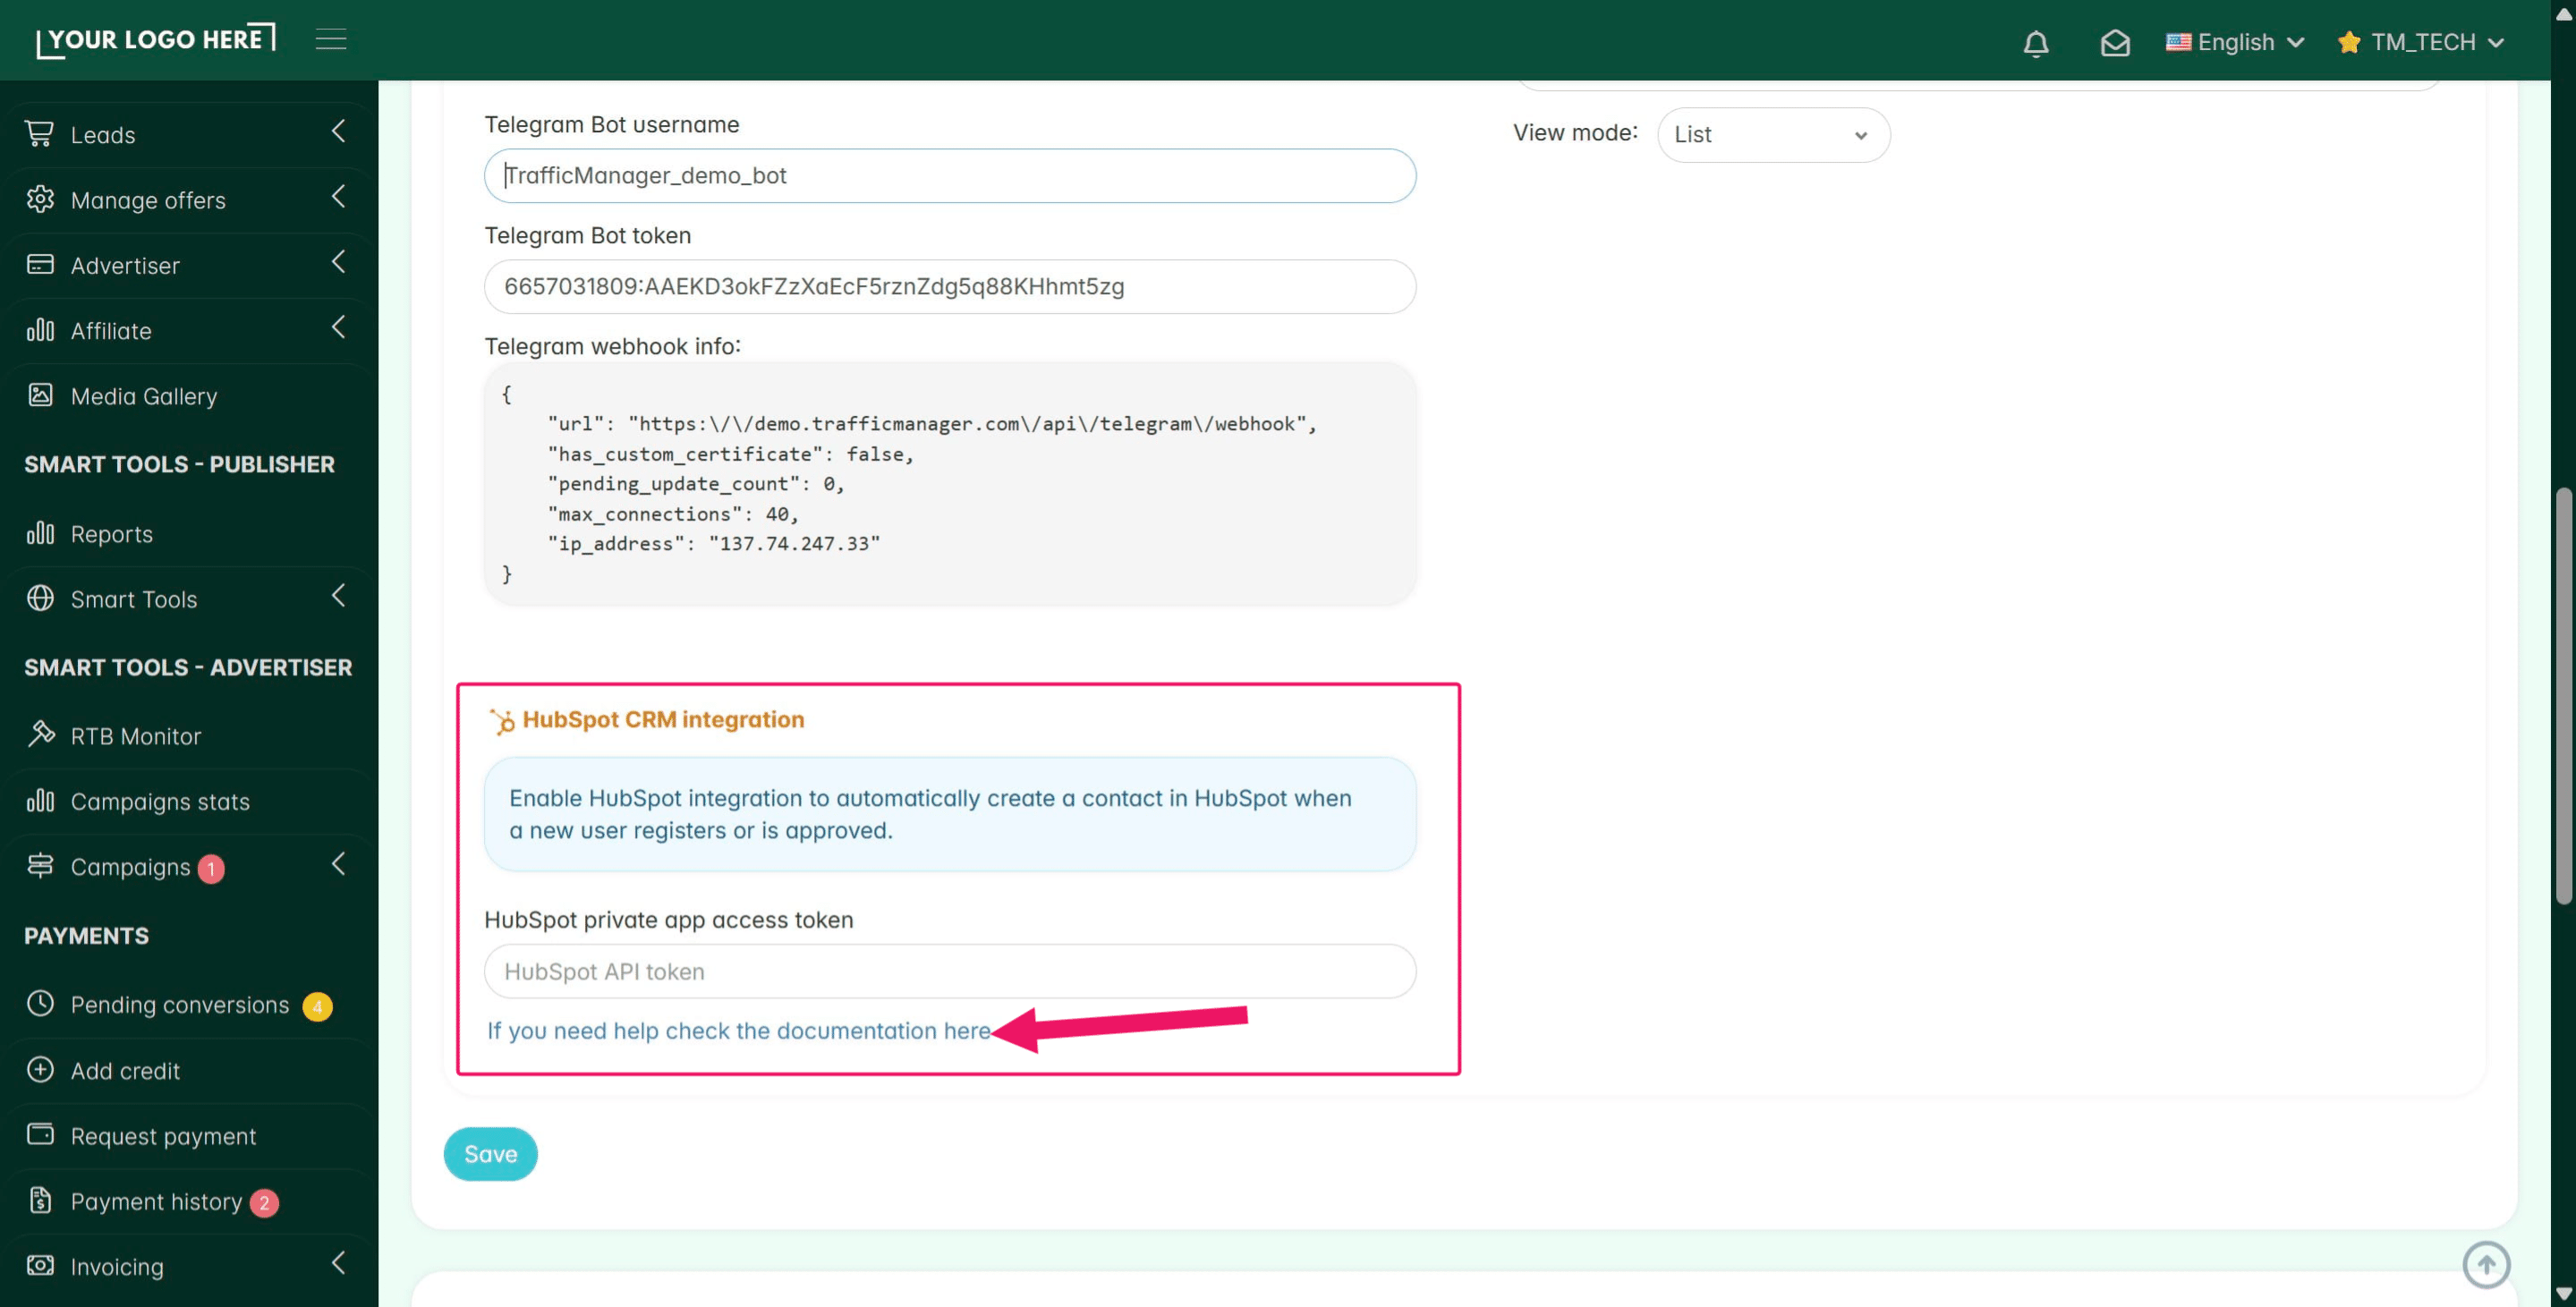
Telegram Bot: You can create a Telegram bot to send automatic alerts to your affiliates. They can receive messages about new conversions and other important updates directly on their phones.
HubSpot Integration: When a new user registers on your platform, their details can be sent automatically to HubSpot if you prefer to use their tool to manage your prospect affiliates' leads.
7. Miscellaneous Settings: Features
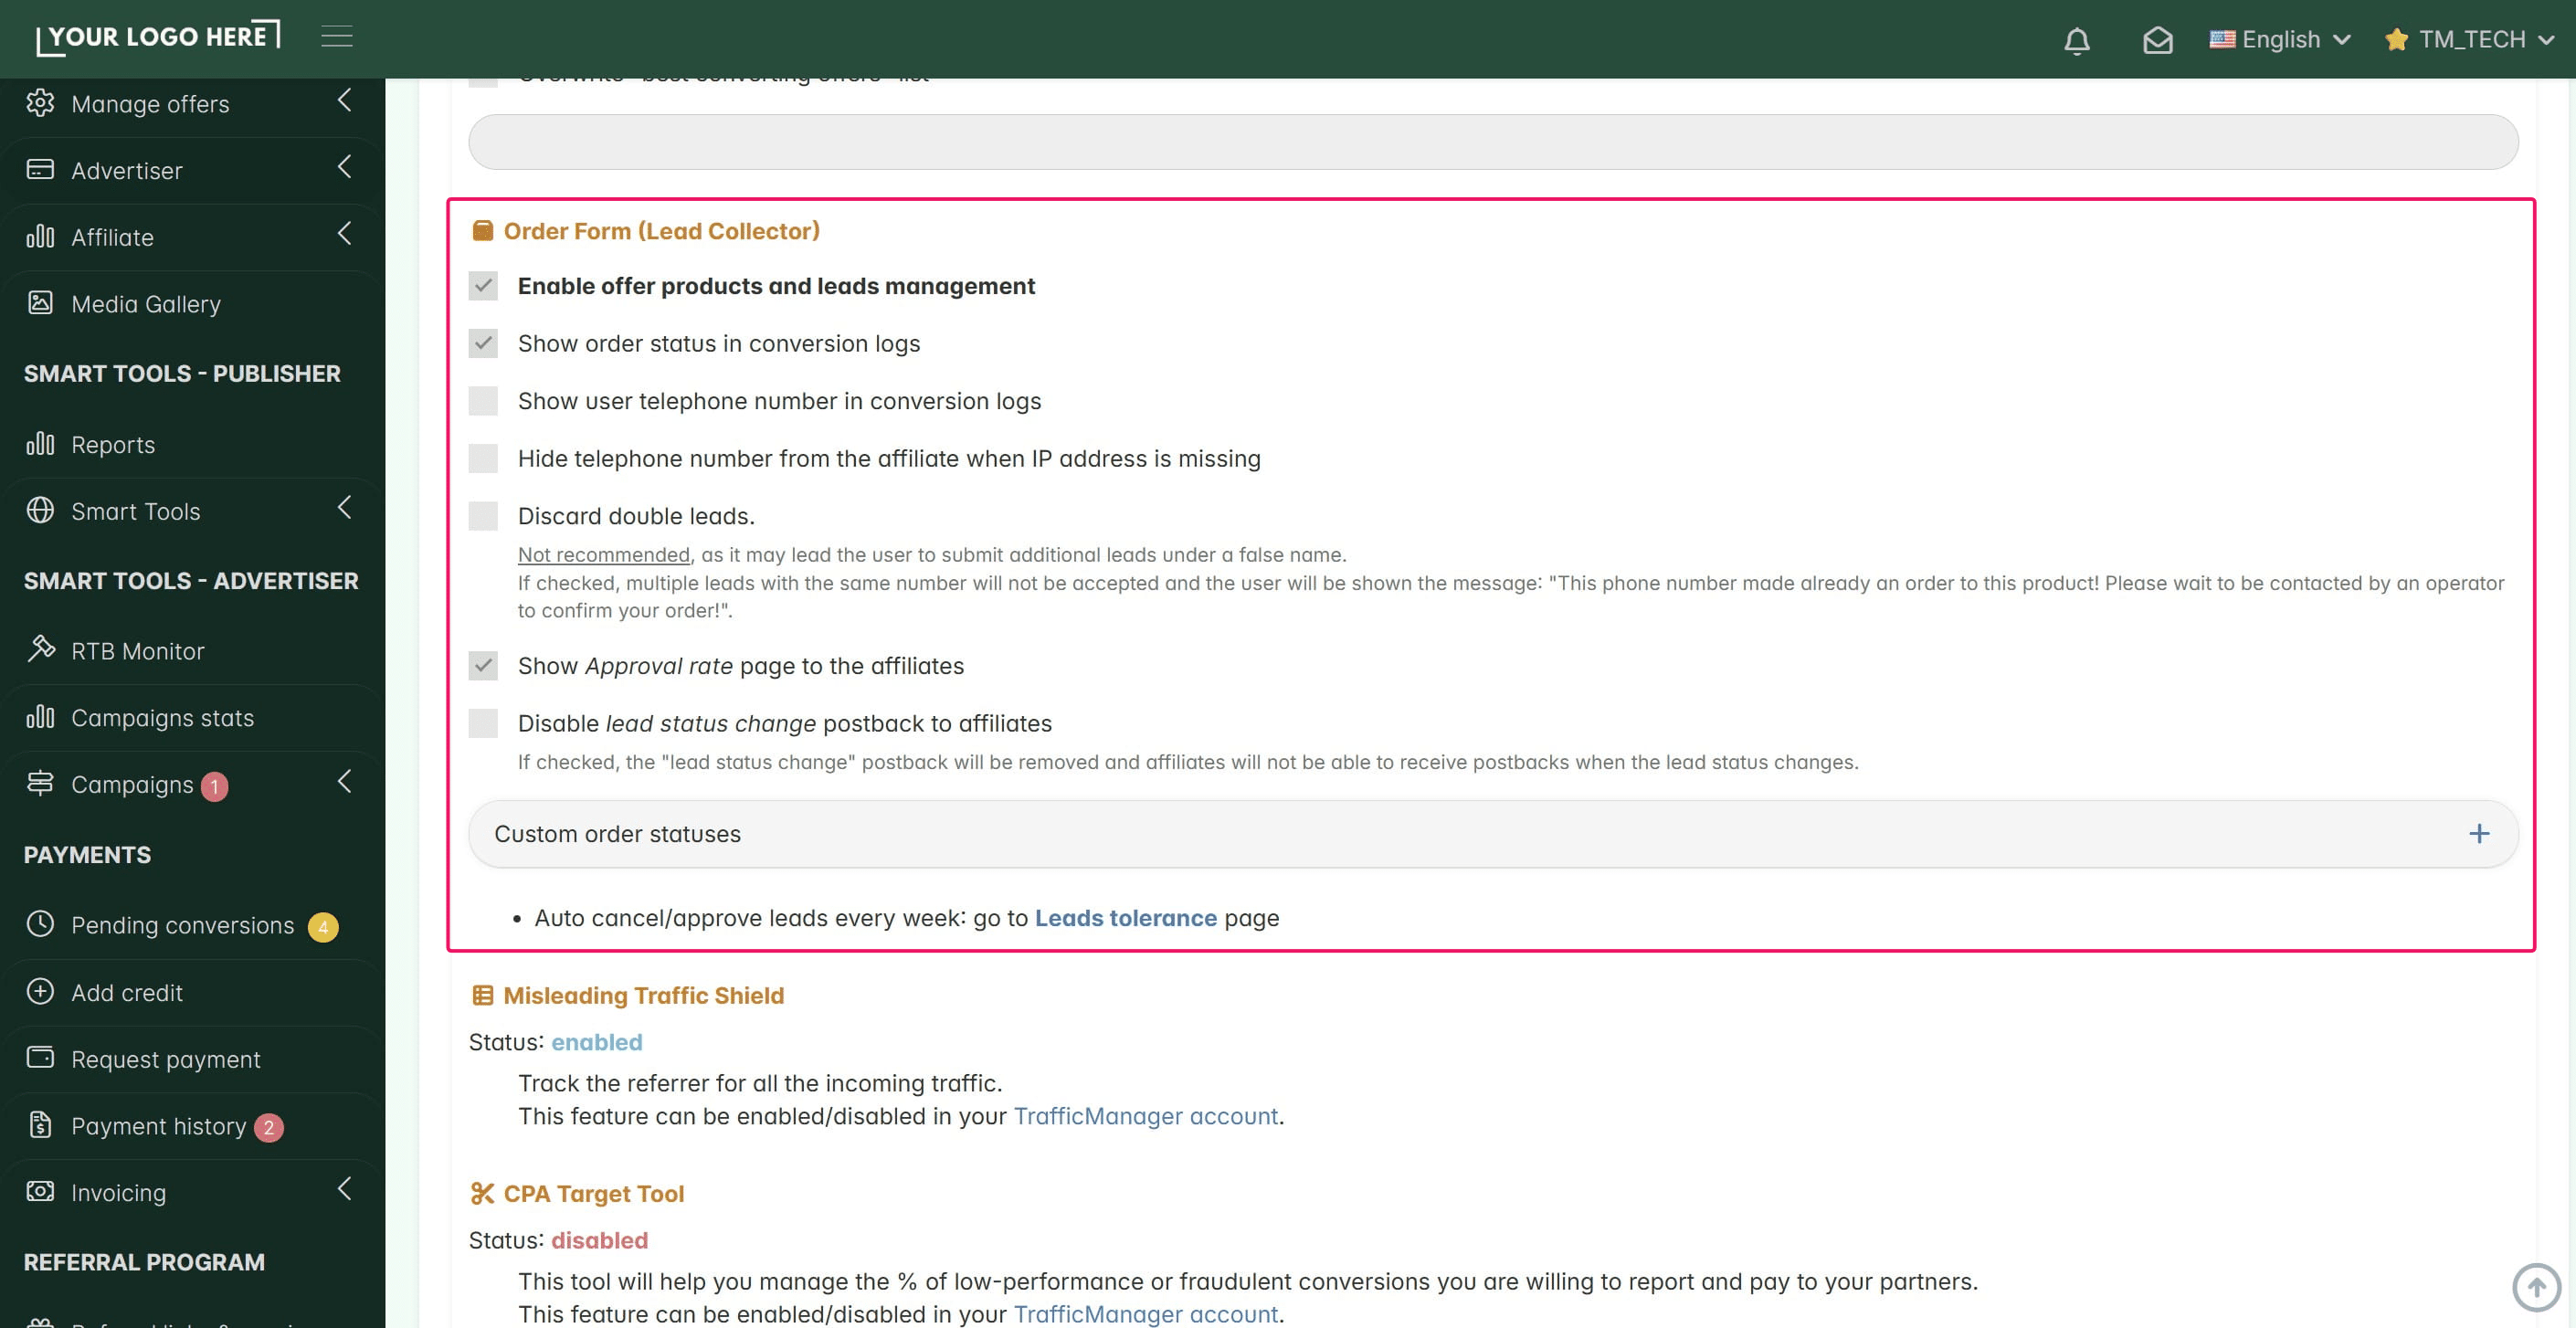
In this page, you can customize how your platform looks and works. You can turn specific tools on or off and activate special features for you or your affiliates.
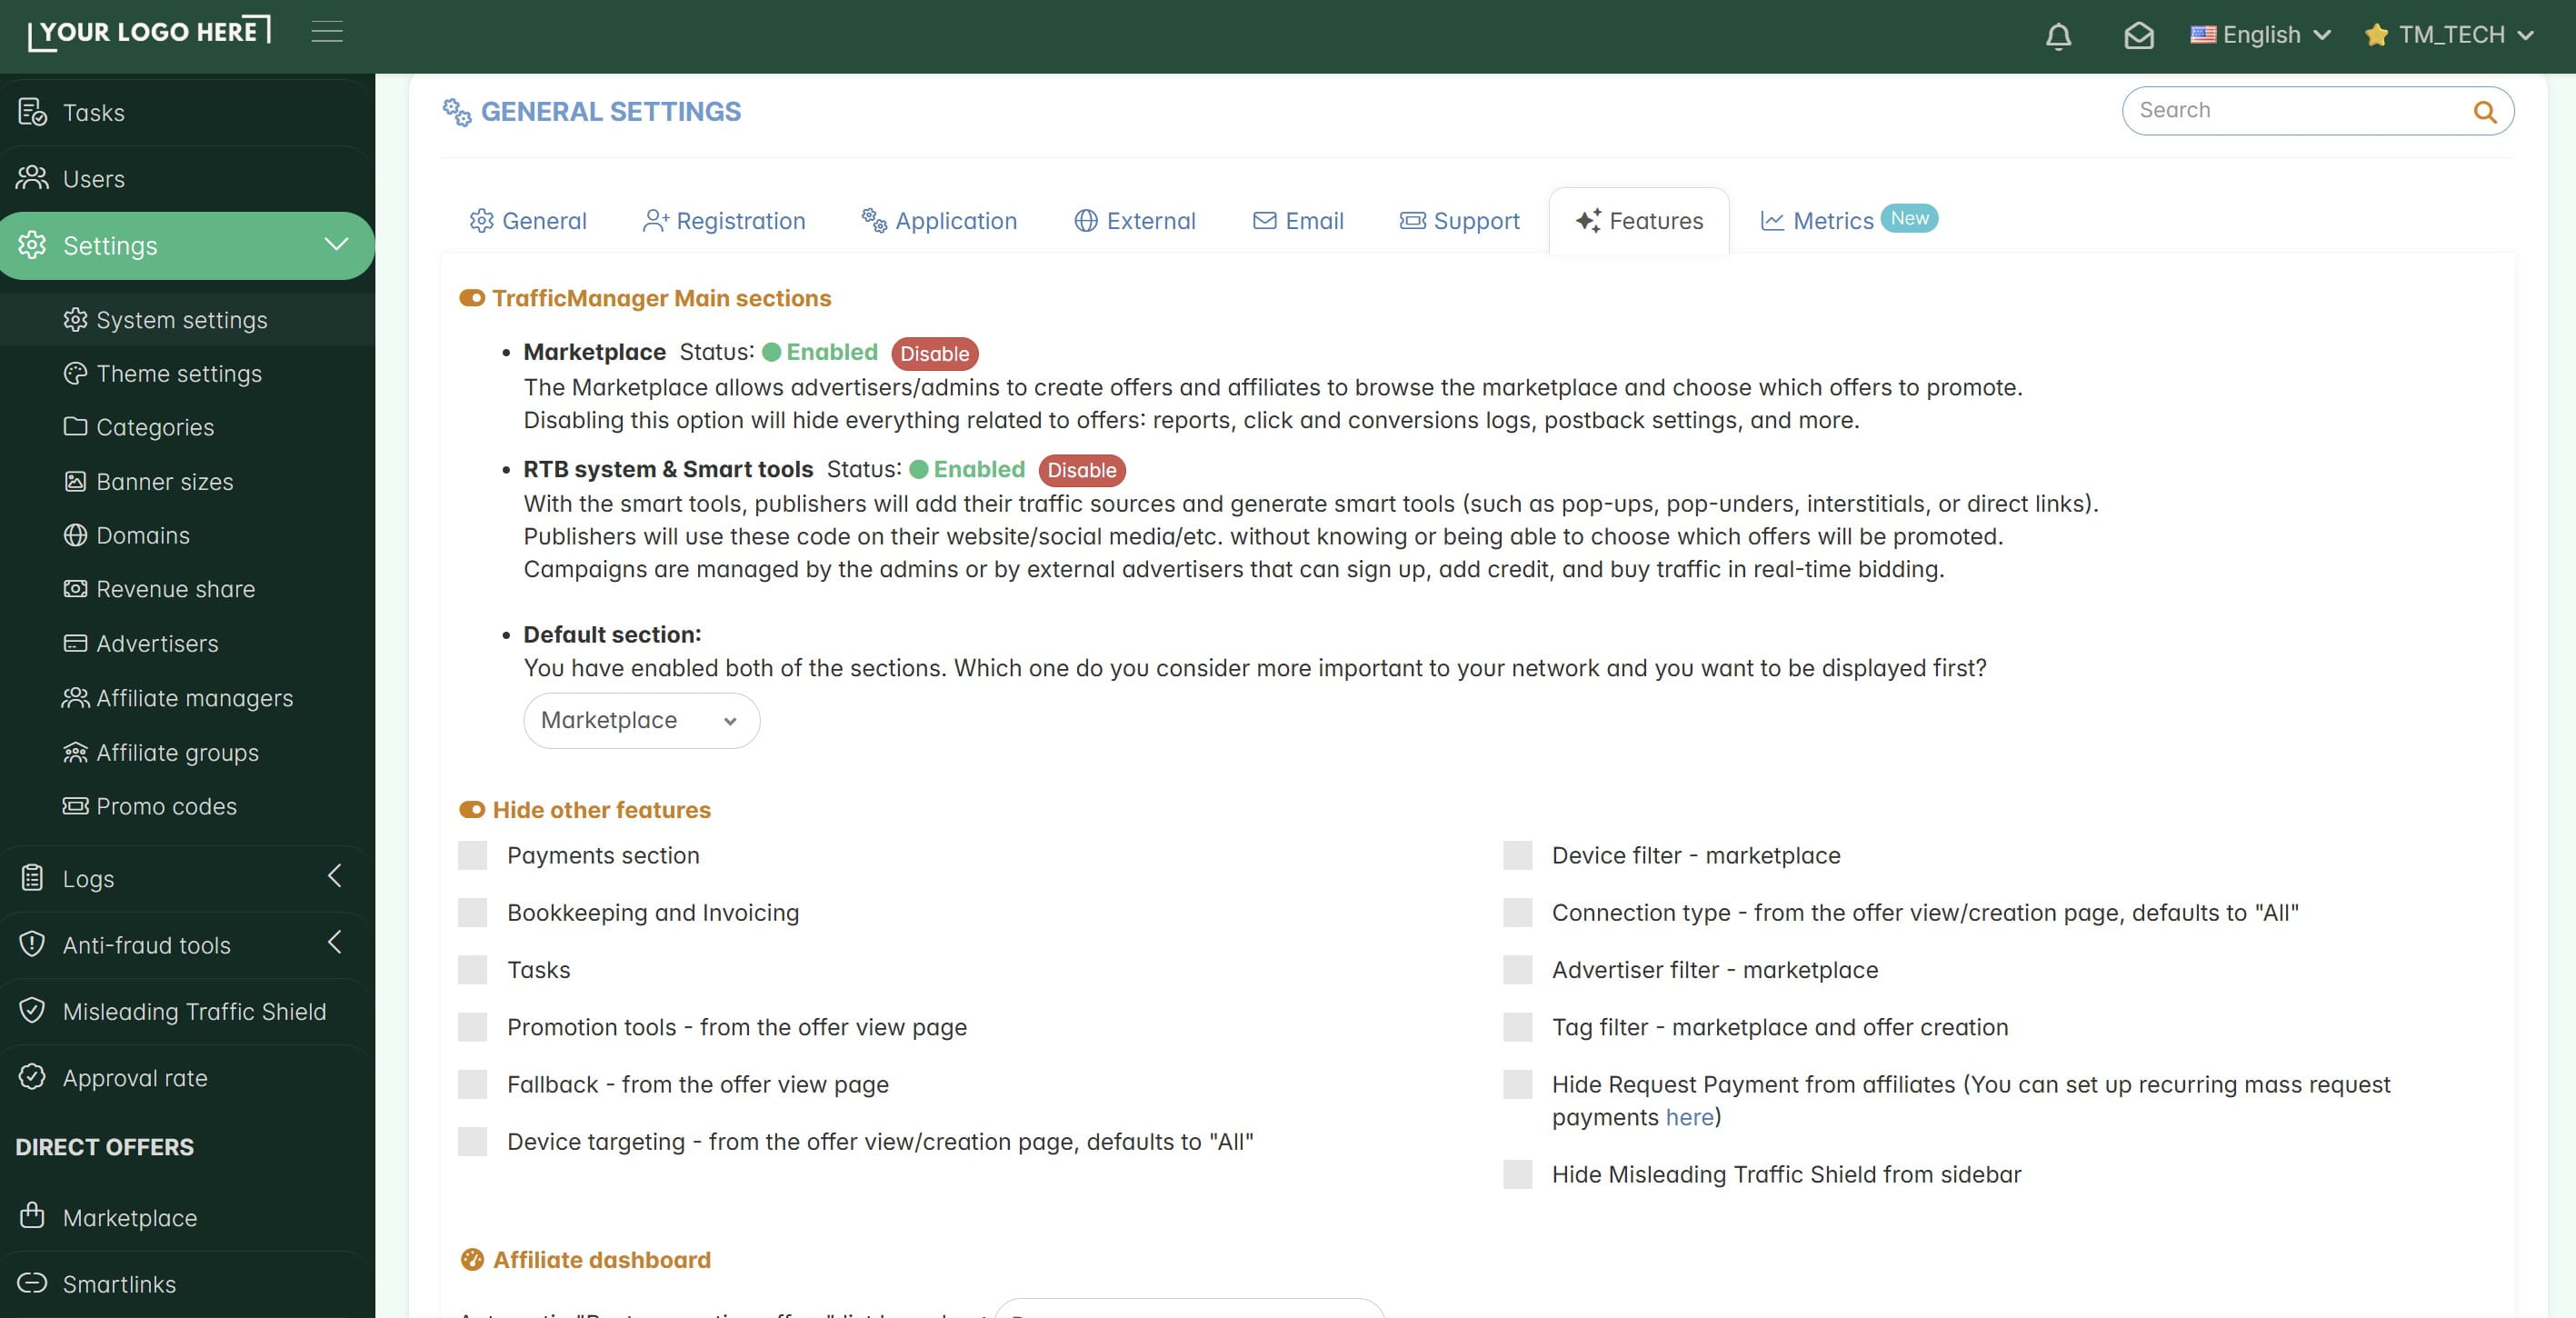
Hide Unused Features: If there are parts of the platform you don't use, you can hide them (like the "Tasks" feature, "Bookkeeping and Invoicing tool," or even hide the "Request Payment form" from the affiliates' dashboard). This makes the platform lighter and less confusing for you and your affiliates.
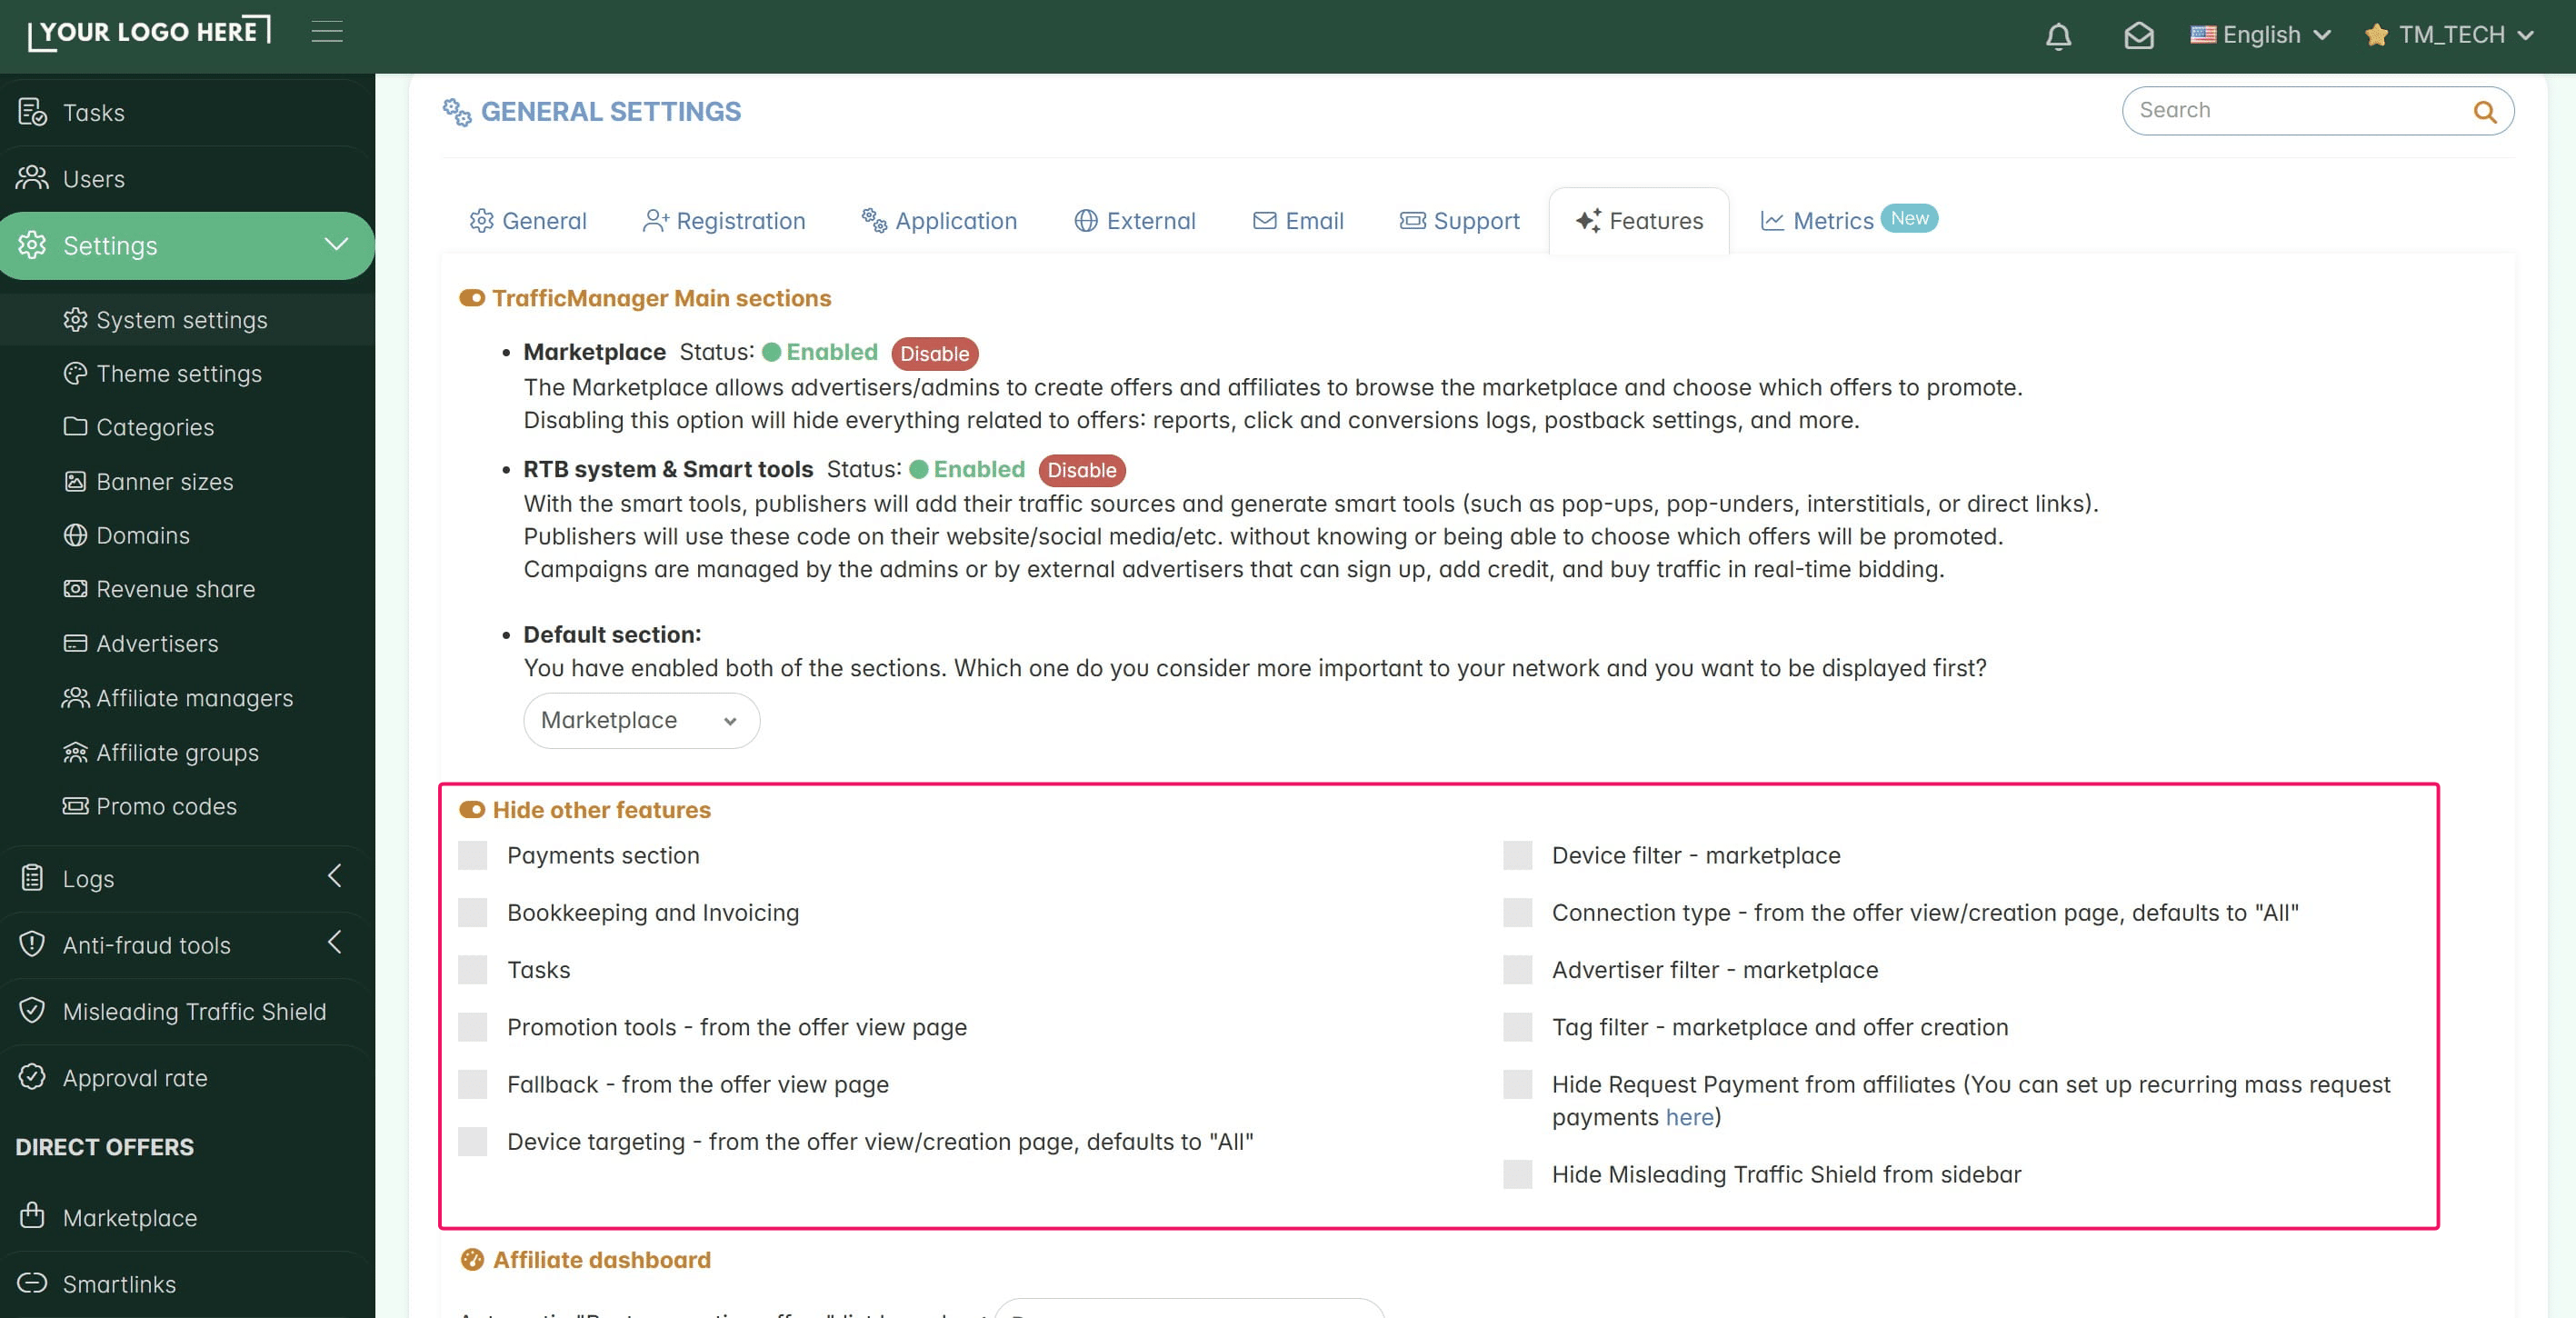
Order Form (Lead Collector): Activate this feature if you intend to create E-commerce offers with physical products (using Credit Card billing or Cash on Delivery) and/or "Lead Generation" offers (like CPL Finance, Sweepstakes, Auto Insurance, etc.). This will open the Physical Product Management section for E-commerce and the Lead Collector section for CPL offers. These tools allow you to collect lead data directly on the platform and set default rules for how that data or those products are managed. (You can find more details about this in our dedicated guide.)
Custom Smartlinks: Enable this to allow your affiliates to create their own Smartlinks (using the offers available in your Marketplace). These links automatically send traffic to the best-performing offers using a powerful machine learning algorithm for performance marketing.
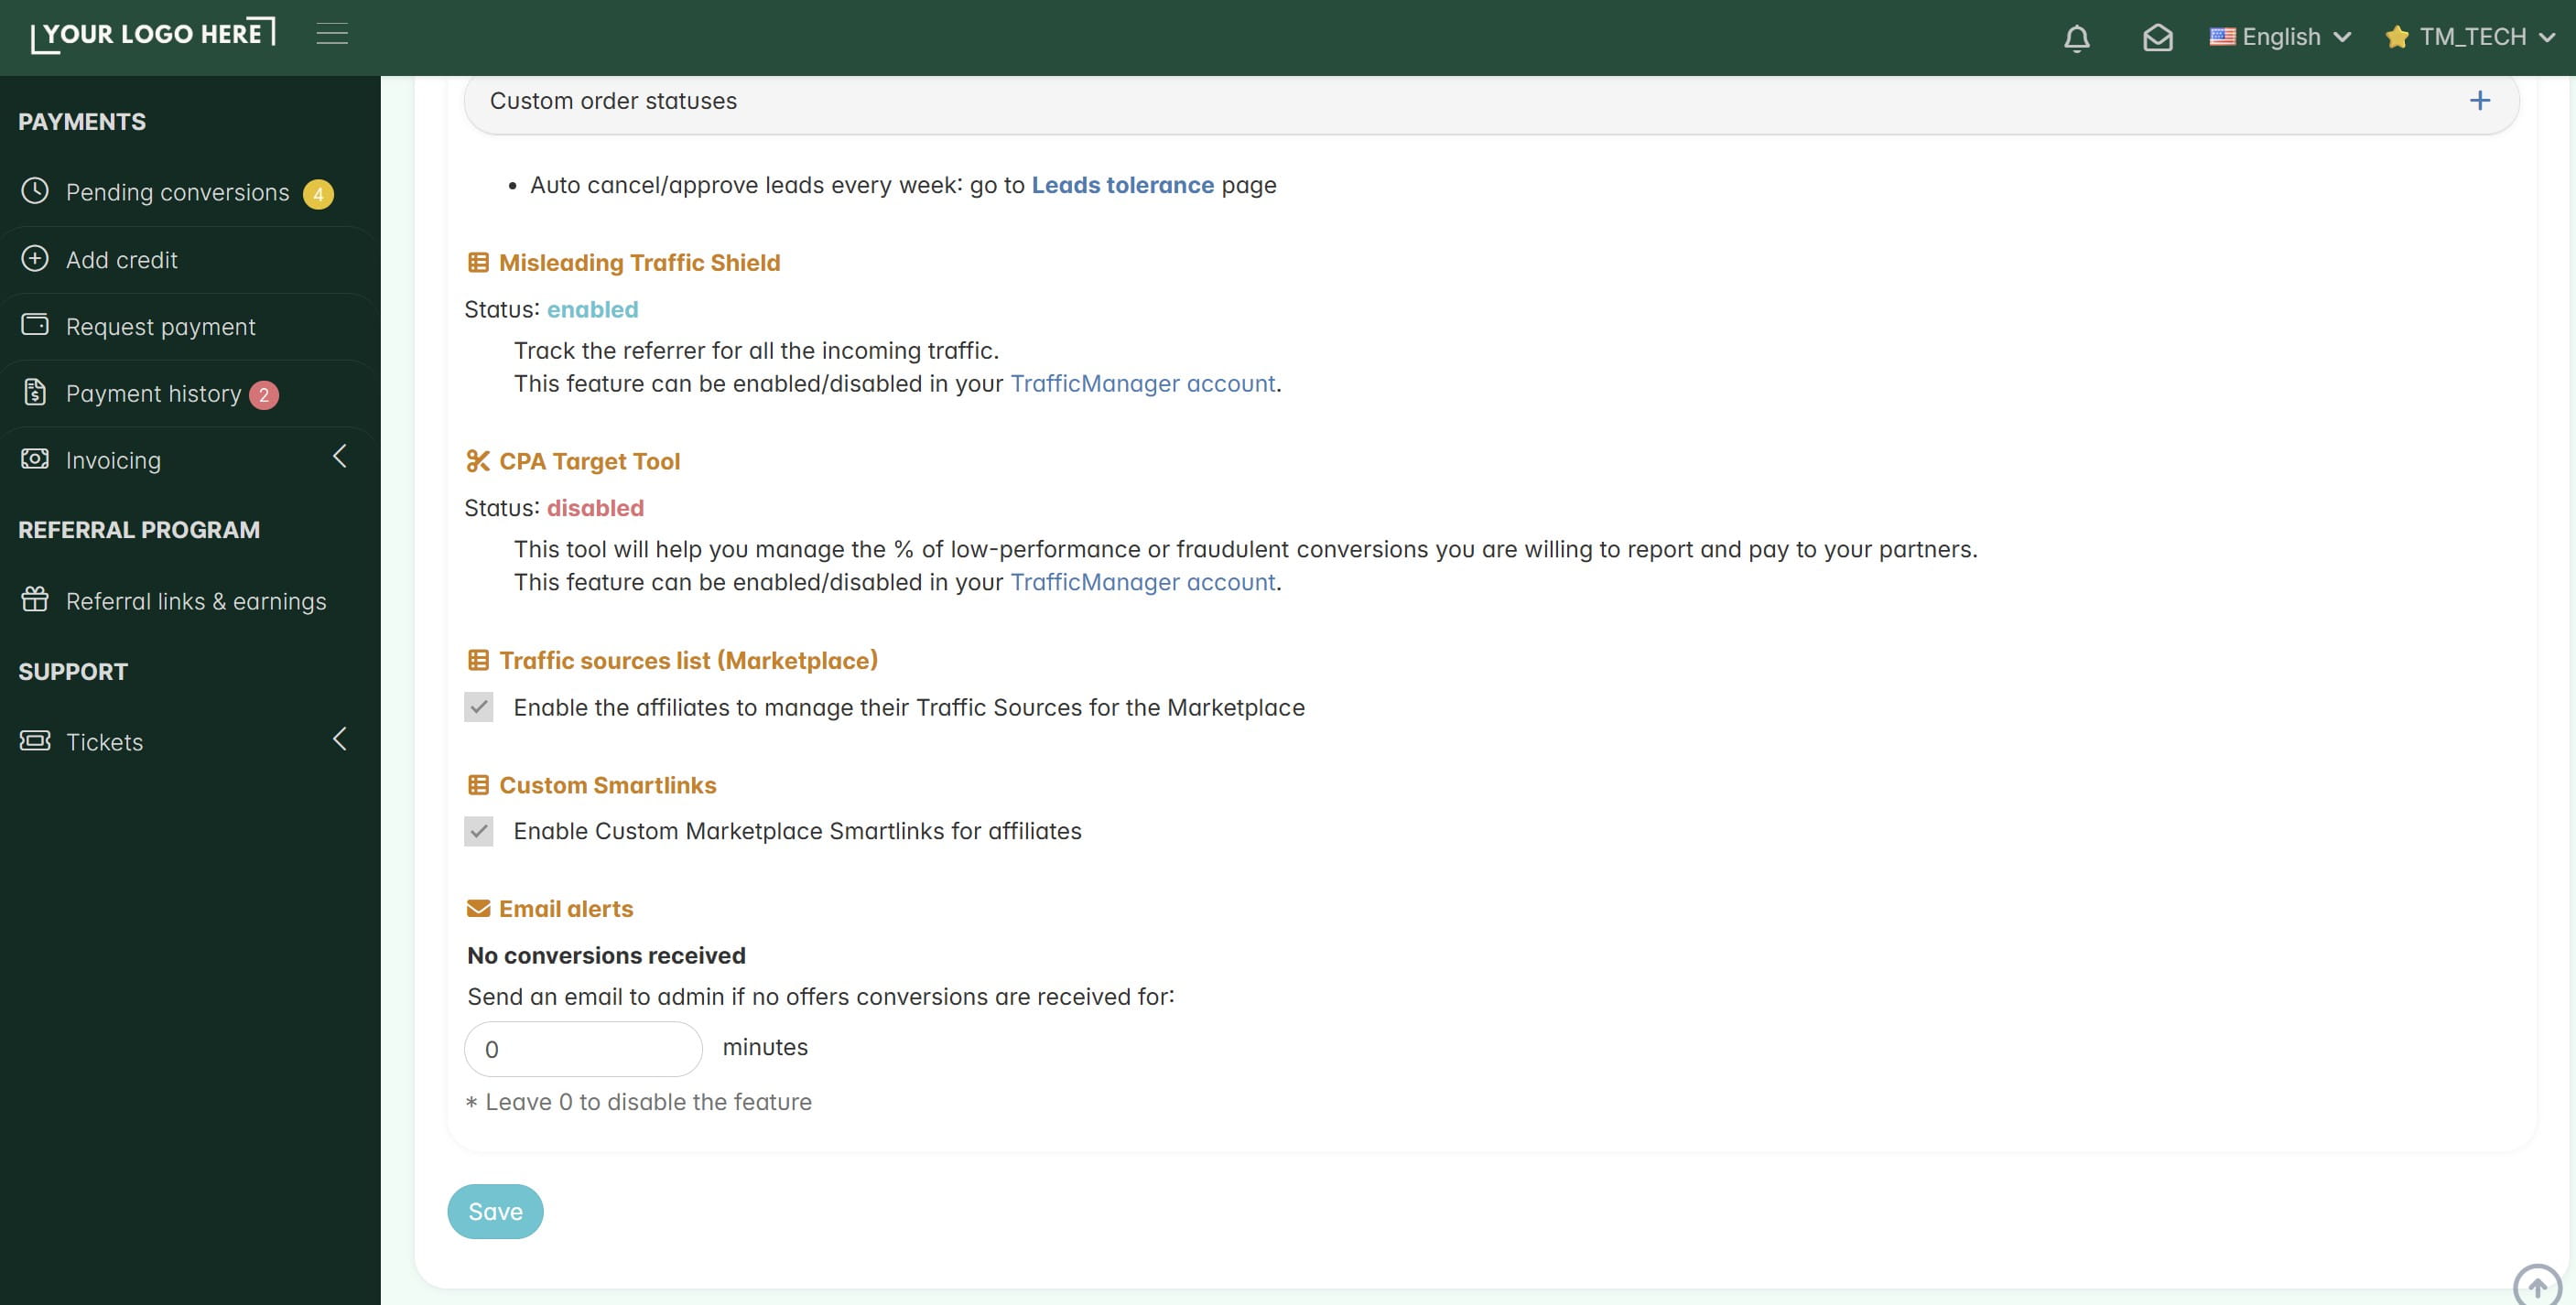
This is an incredible automated A/B testing tool that you can open for your affiliates. It will help them improve their EPC (Earnings Per Click) right away. Note: We suggest activating this feature only if you have multiple offers/products in your Marketplace, or a single offer with multiple landing pages to test.
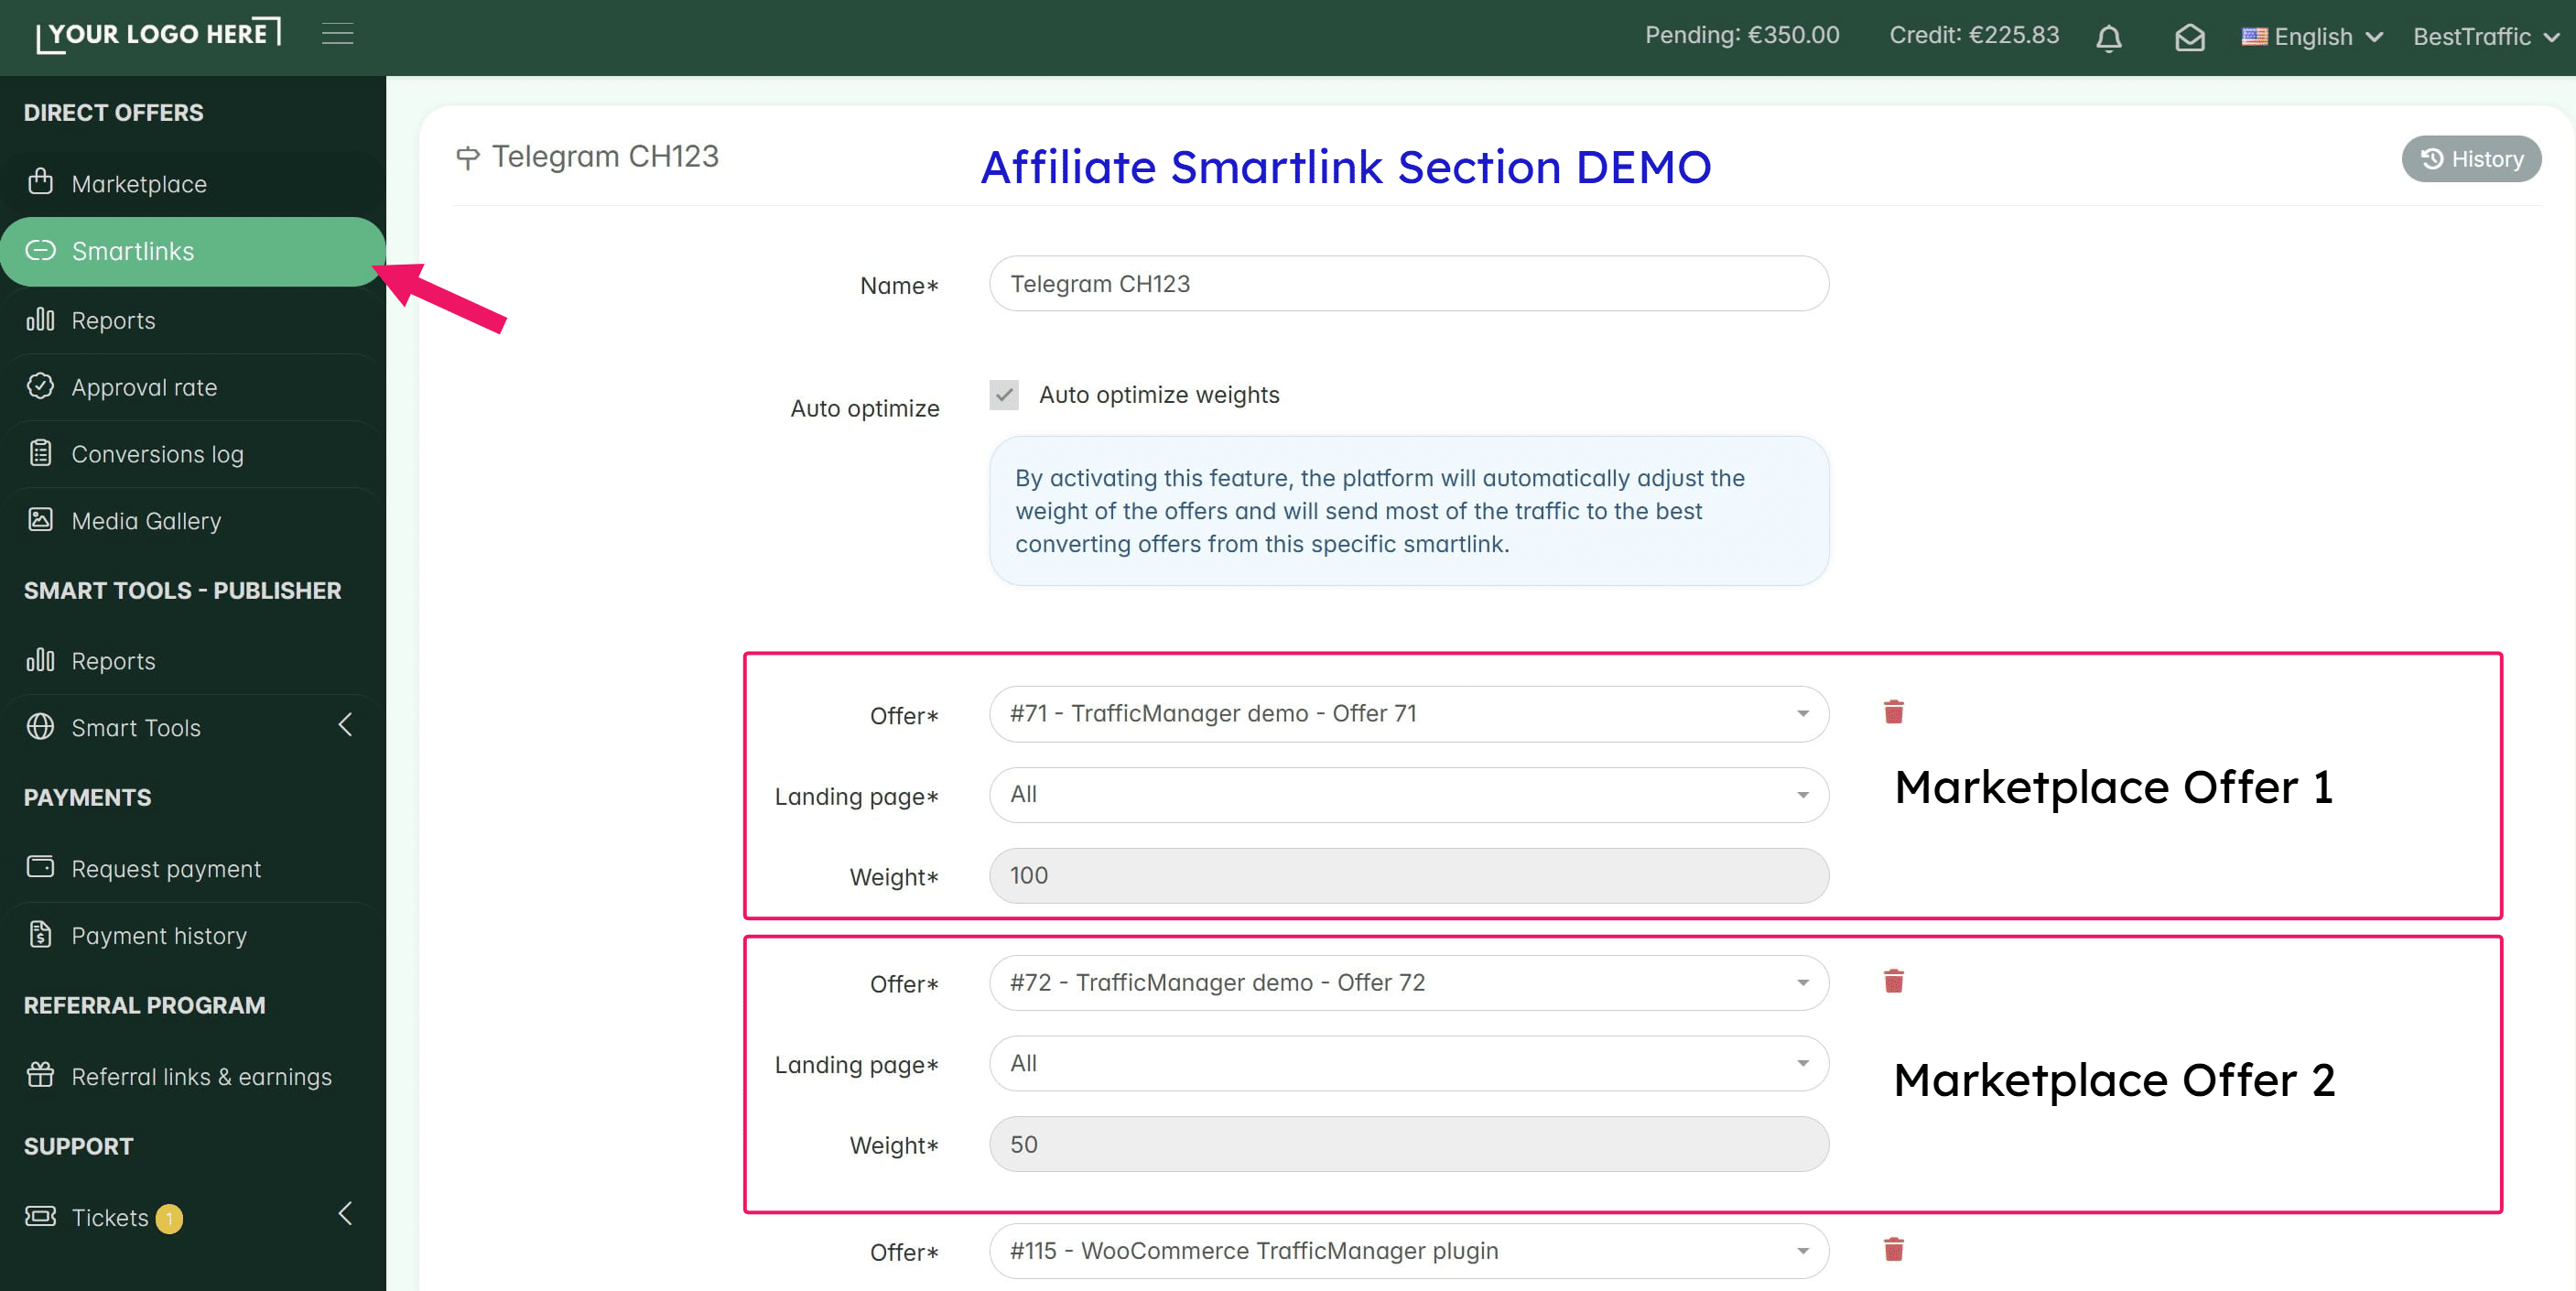
Don't forget to save your settings! Always remember to scroll to the bottom of the page and click the Save button after making any changes. If you leave the page without saving, your new configurations will not be applied.
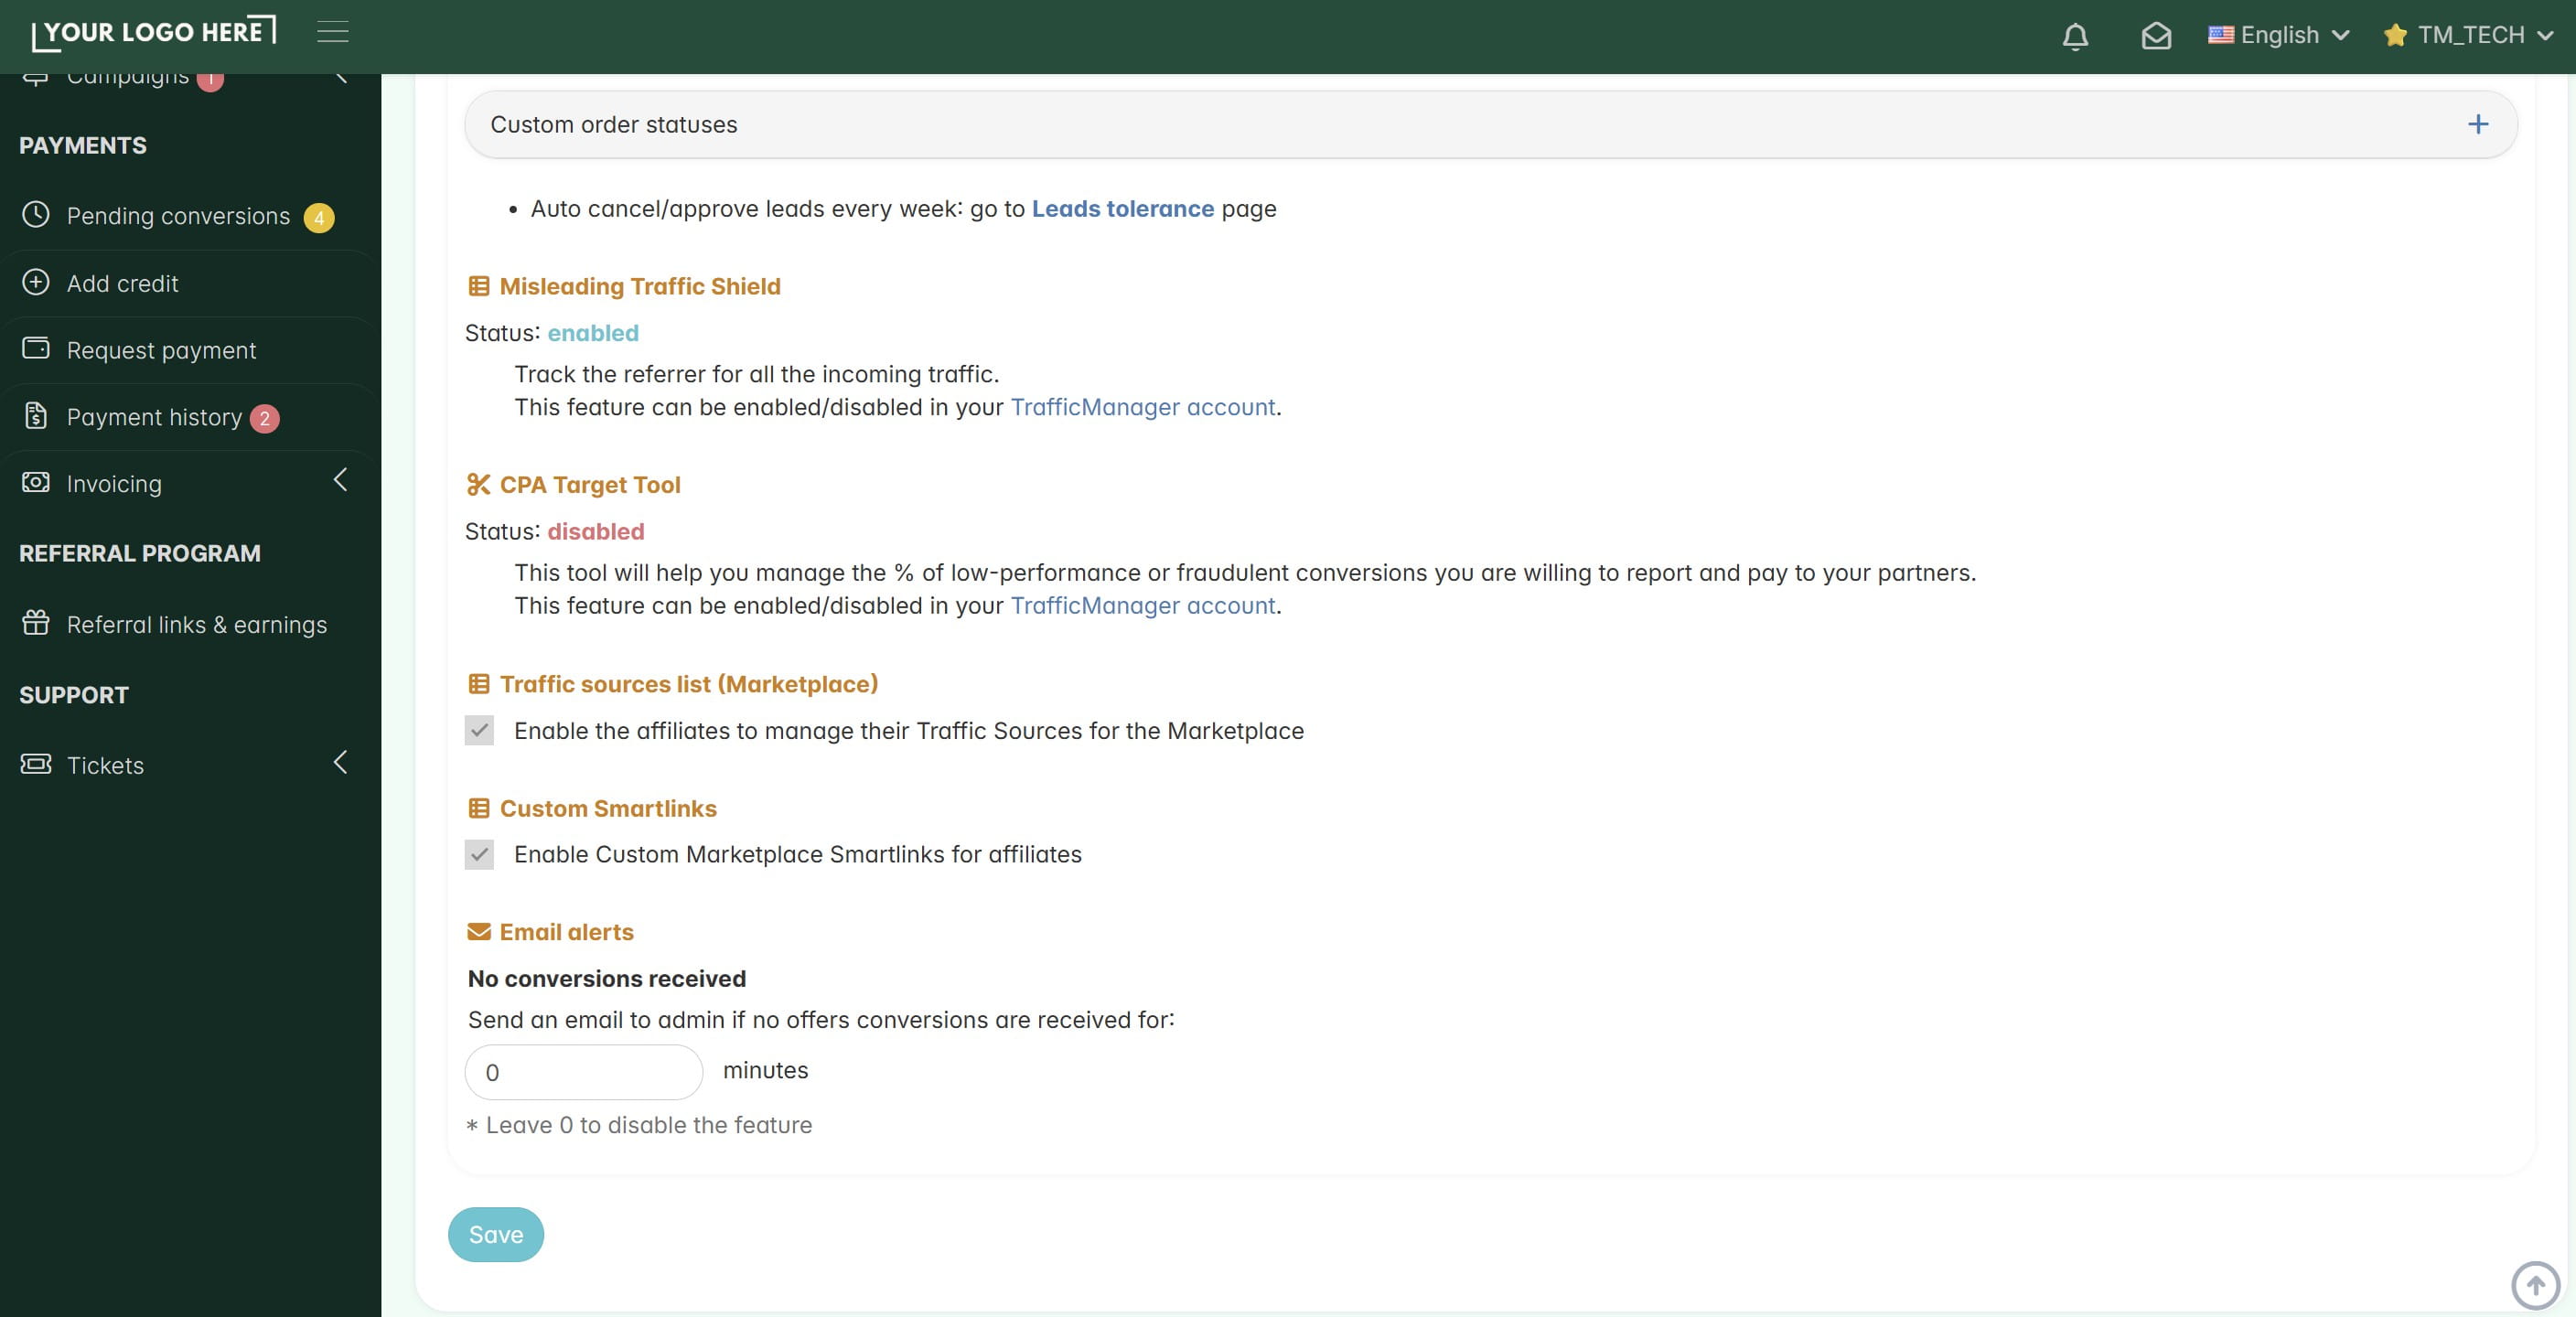
Quick Tip: Use the Search Bar If you are looking for a specific setting and don't know which tab it's in, you can use the Search function at the top right of the System Settings page.
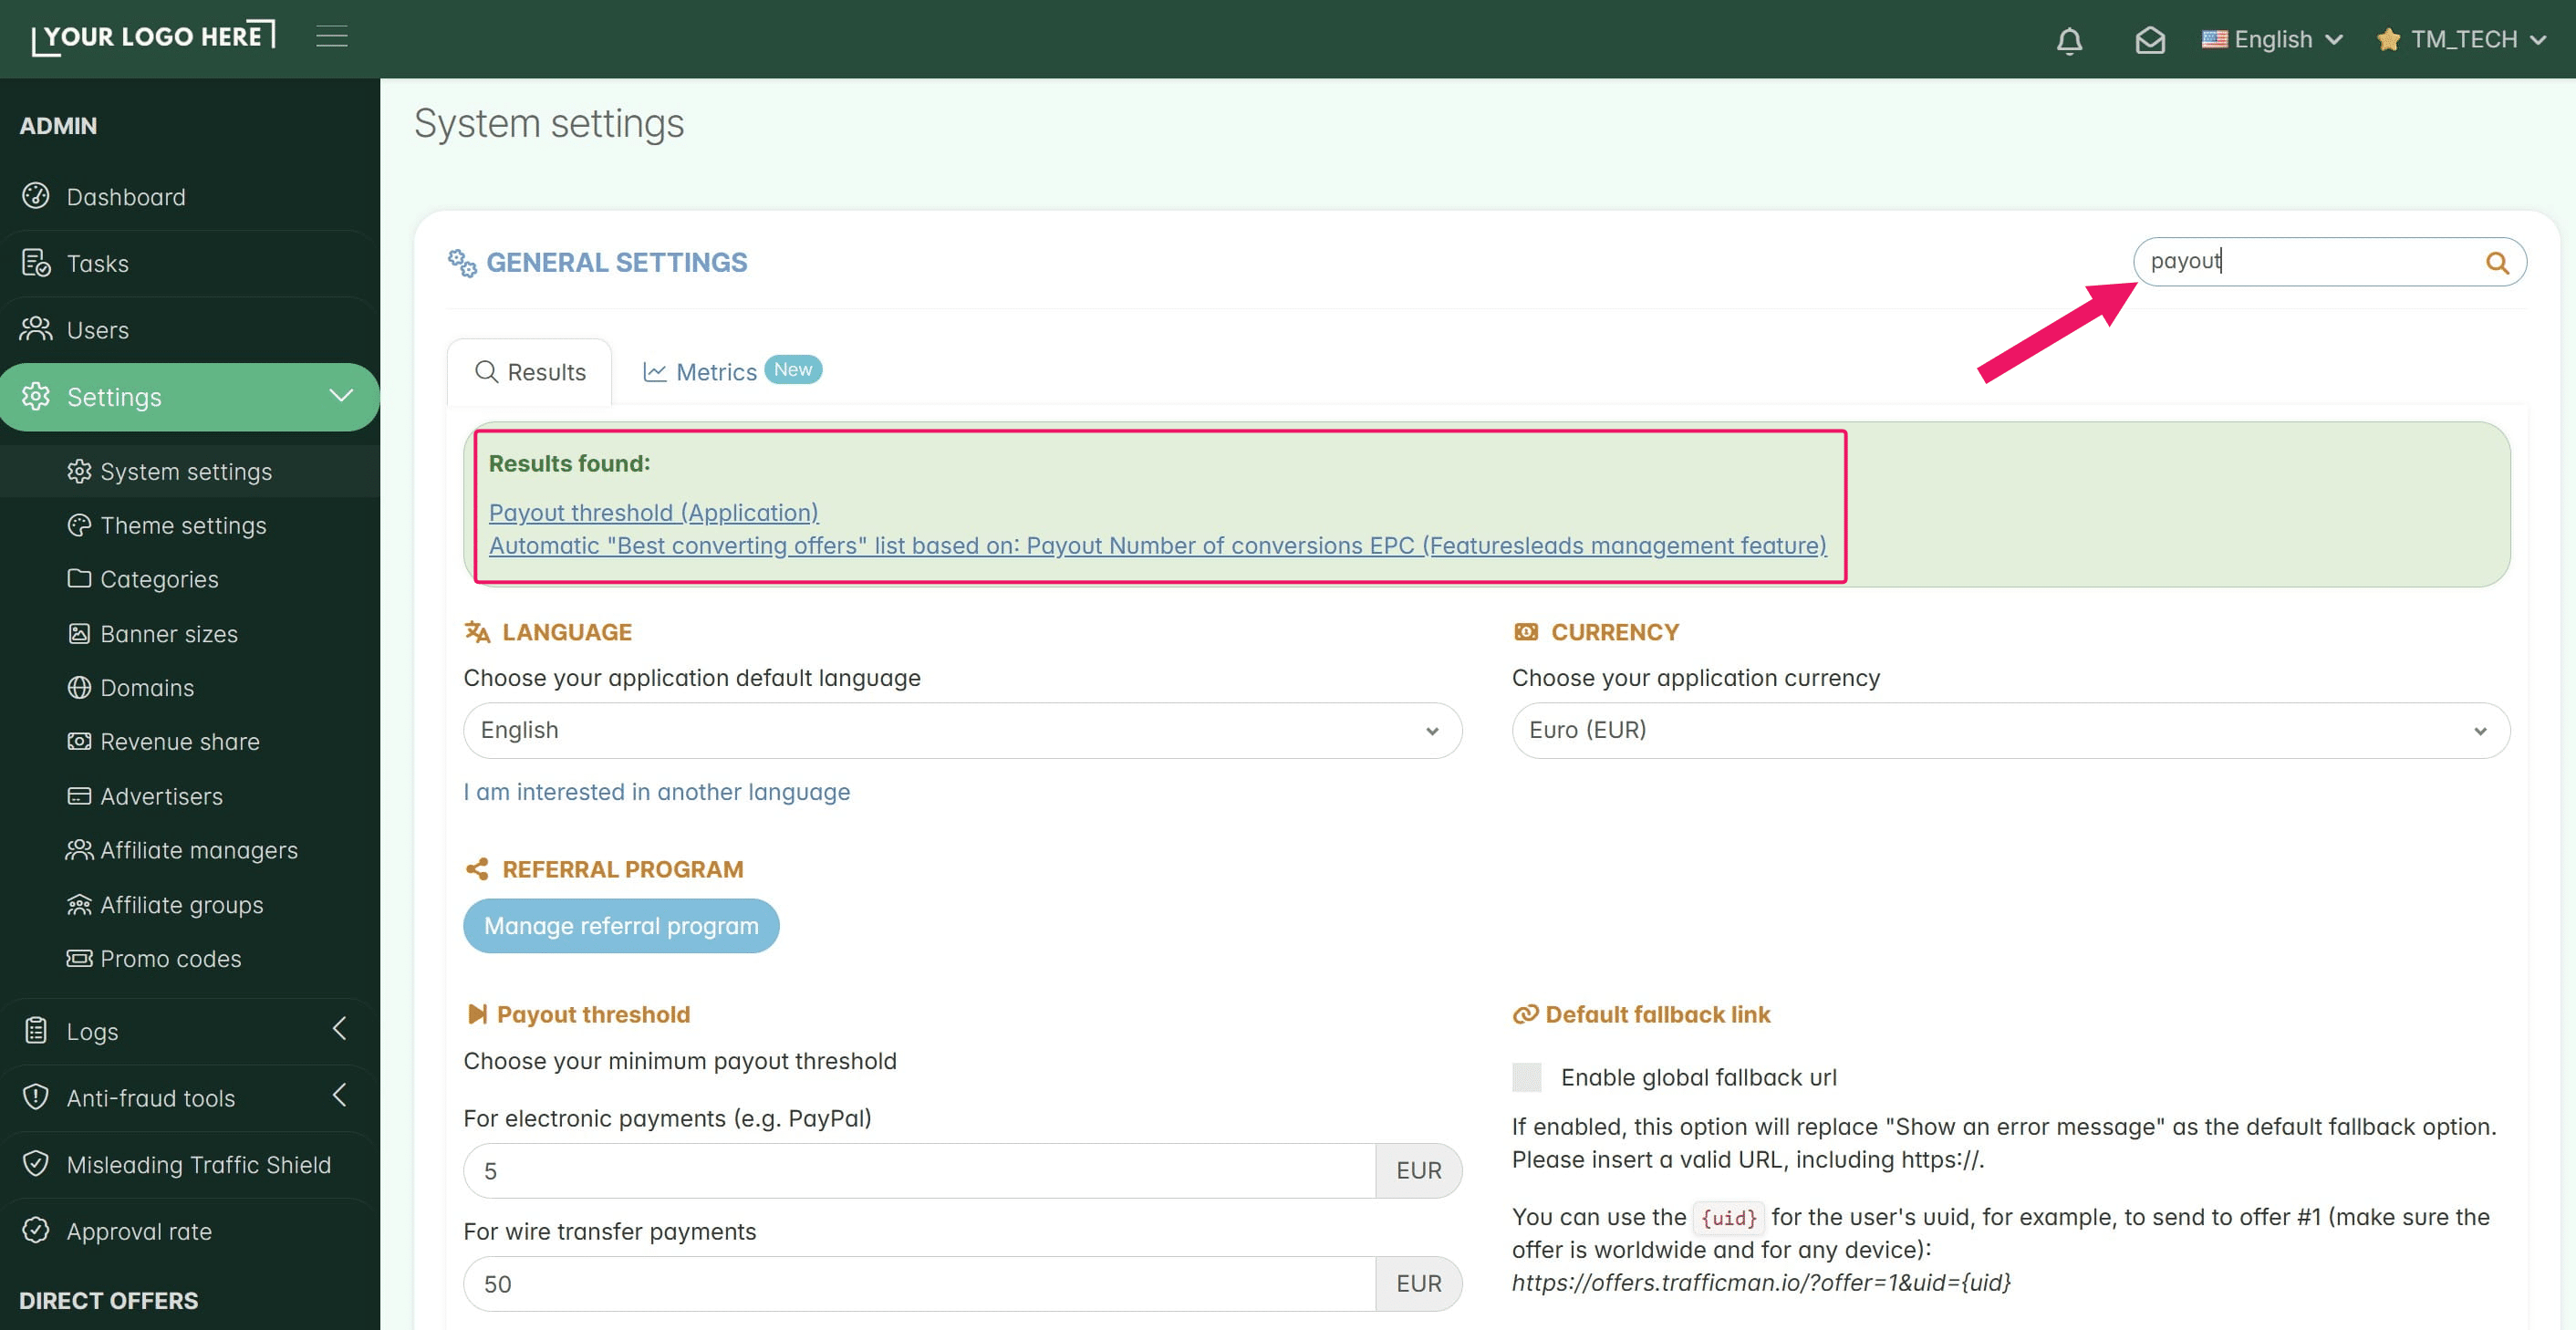
This is all you need for now to set up your TrafficManager and start onboarding affiliates. Your next step is to create offers and begin populating your Marketplace with opportunities for your partners. Check our guide for more details. PS: You will come across different features as you grow, so feel free to return to our guides page and check the documentation at any time.
Frequently asked questions
- Can I change the default language for my platform?
Yes. In the System settings -> Application tab, you can choose your application's default language (e.g., English, Italian, Spanish, etc.) so your affiliates feel more at home when they log in. Here you set up the "global" platform language which all affiliates will see at their first login. However, each affiliate can change the platform language from their own dashboard as well; in that case, the change will apply only to their specific dashboard.
- How do I change the currency shown on the platform?
You can set your platform’s currency in the System settings -> Application tab under "Currency." This is the currency used to track and display all affiliate earnings, such as USD or EUR. If you receive conversions (postbacks) in different currencies from your advertisers, make sure to also add the currency macro inside your postbacks ( ¤cy={currency} ) so that our platform can automatically convert the amount received into your platform currency (e.g., from USD to EUR). More info here: https://www.trafficmanager.com/blog/2018/12/multiple-currency-conversions/
- How do I show my company logo on the login page and inside the platform?
You can change the platform's default logo (the TrafficManager one) from the System settings -> General tab, in the "Logo" section. Please make sure to use the exact logo dimensions and format described on that page; otherwise, you will receive an error when you try to upload them.
- How do I connect my Telegram Bot?
In the System settings -> External tab, enter your Telegram Bot username and token. This allows the platform to send automatic alerts about new conversions and updates directly to your affiliates. To create a Telegram bot, open this link: https://t.me/BotFather.
- How does the Referral Program work?
If activated, your affiliates can invite their affiliate friends to join your program. They will earn a small bonus percentage based on the money their invited friends make (publishers' payouts). The feature offered in TrafficManager can assign and track affiliate commissions on a single layer or on multiple layers (Levels). Activate it from the System settings -> Application tab.
- Why do my affiliates see "Pending" and "Approved" balances?
This happens if you enable the "Pending Conversions" setting from the System settings -> General tab (scroll down to the end of the page). If active, all new conversions will require manual approval by an admin or an affiliate manager with designated access before the affiliate commissions are moved to the "Approved" balance for payout.
- What happens if I enable the "Global Fallback URL"?
If a visitor clicks an affiliate link that redirects to an offer that is not available in their country, or is closed, paused, or out of stock/capping, the system will send them to this URL instead of showing an error page. This ensures you never send your affiliate traffic to broken links and offers you the possibility to convert that user with another offer. This is a global function that can be modified at the offer level, where you are able to redirect users to specific offers from your marketplace instead of this global option, which should just be used as a "backup" fallback link.
- How do I provide live support via chat to my affiliates?
TrafficManager does not provide a dedicated chat application, but you can integrate the Tawk.to app from the System settings -> External tab. This adds a live chat bubble powered by Tawk.to ( https://tawk.to ) to the dashboard so you can chat with your partners in real-time. TrafficManager is not connected in any way with the Tawk.to team; we integrated their product for our clients because we believe it is a great tool. They have a mobile app available as well as a free version.
- Can I limit how often an affiliate can request payment?
Yes. In the System settings -> Features settings, you can choose to hide the "Request Payment from affiliates" option if you prefer to schedule recurring mass payments instead of allowing manual requests from the affiliates.
- Can I hide the specific advertiser's name from my affiliates in the Marketplace section?
Yes. In the System settings -> Features tab, check the box for "Advertiser filter - marketplace" and Save to hide these details. This is useful if you want to keep your direct sources private.
- Can I hide other features that I am not using?
Yes. In the System settings -> Features tab, you can check the boxes for tools you want to hide, like "Tasks," "Invoicing," or "Payments", and save to hide these features. This makes the dashboard cleaner and easier for your affiliates to use. Don't forget to save
- Error in saving your TrafficManager platform system settings changes?
If you made modifications in different tabs within the system settings area but you don't see them on the platform side, make sure you have saved the modifications made on each individual tab by pressing that tab's Save button first before switching to the next tab. Each tab (General, Registration, Application, External, etc.) acts as its own separate form. The platform does not "remember" unsaved changes if you navigate to a different section of the settings. If the problem persists, please open a support ticket with us from your client dashboard: https://clients.trafficmanager.com.